


60
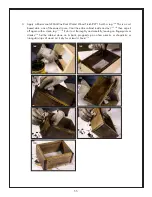
6. Now it is time to put on the grill cloth. Attaching grill cloth in a way that looks nice is not an easy
task. There are 2 goals to keep in mind when working with grill cloth: 1) Keep the lines straight;
nobody thinks crooked or wavy grill cloth looks good. 2) Make the grill cloth tight. Saggy grill cloth
is almost as unattractive as wavy lines. There are several different techniques for accomplishing
these two goals, but the process described here has worked well for us. If you aren’t confident
about doing this step, call your local upholstery shop and they might be able to help you out.
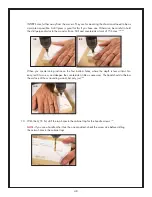
The first part of putting on grill cloth consists of folding the 4 sides while carefully following
straight lines.
a. Set the grill cloth face-down on the table. The face is the side with a distinct grid pattern and
broken black lines.
195
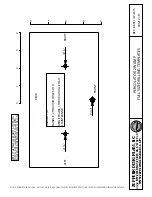
Place the frame black-side-down neatly centered on the grill cloth.
196
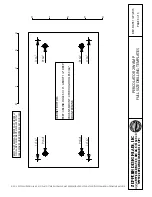
Align one of the long sides with one of the silver lines about an inch from the edge of the grill
cloth. Remove the frame and fold the cloth over on the silver line and crease it the entire length
of the grill cloth.
197
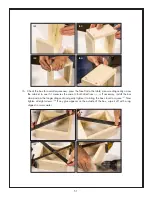
The bent edge should be at a 90 degree angle.
198
193
194
195
196
197
198