


46
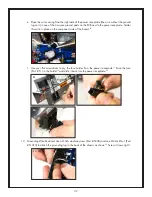
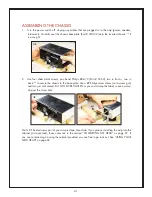
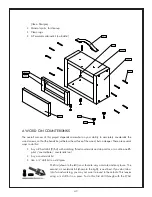
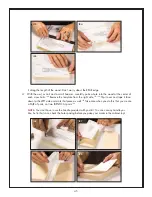
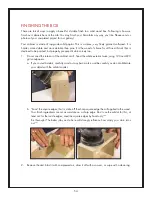
5. Stand up all four pieces of wood on their FRONT edges on your clean, smooth, flat work surface.
131
Dry-fit them together. Use the bar clamp to snug the pieces together as shown.
132
If your clamp
has no plastic pads, DO NOT OVER-TIGHTEN or you’ll mar the wood. It just needs to be snug.
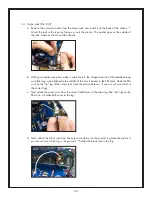
Pick one corner and line up the pieces of wood as carefully and accurately as you can.
133
Be
sure the faces (the sides touching the table) are flush to each other at the joint.
134
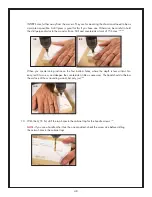
If the parts are
not precisely the same width (it happens), they will be a tiny bit uneven on the back face (that
is, the sides facing up). That’s okay; don’t worry about it – it’s the back. You can fix it later when
finishing the cabinet.
When you are satisfied with the alignment of one corner, tighten the clamp to secure the parts
for drilling.
Take your time with this step. The overall neatness of your cabinet depends on getting this step right.
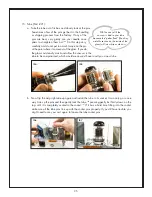
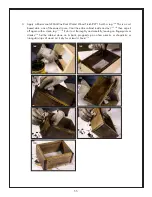
6. Fit your drill with the 1/16” bit, sticking out about 1-1/8”. These break easily; you may want to
pick up a spare. At the corner you lined up, drill two holes at your marks, through the side and
into the mated wood piece.
135
131
132
133
134
135
130