


25
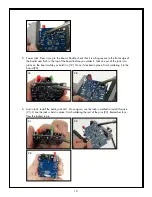
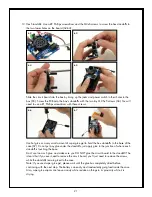
16. LDR Shield: You can install the LDR shields on the lid in the same way as the speaker grille. You’ll
notice that there is a little groove along the length of one side of the shield. We like to install the
shields so that this groove is in the 12:00 position on each one (77), but you can install them in
any orientation you’d like. Use the least amount of glue that you need, and don’t over-do it (78).
77
78
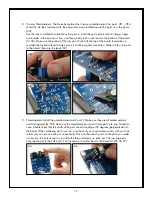
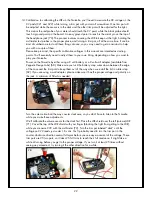
Note: If you used super glue gel, please do not attach the lid on your Noisette until the super
glue completely dries, otherwise the vapors from the glue will settle on and stain the circuit
board and case, leaving a very hard-to-remove white residue on the parts. In fact, it is a good
idea to leave the open Noisette case in an area with lots of air circulation (like in front of a fan)
to keep the glue vapors from settling on the black case and PCB. How quick the glue dries
depends on how much was used.
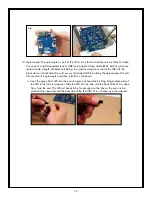
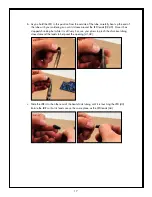
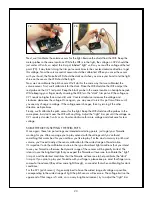
Once the glue has completely dried, place lid on box. To do this, line up the knobs and sensors
to their holes in the lid. Place the tabs on one side of the lid in their slots (80). Then very gently
press down the other side of the lid until it snaps into place (81). Be very careful to not force the
lid on, otherwise the tabs may break off of the lid.
79
80
81
82
That’s it!
You are now ready to enjoy the crazy sounds of your Noisette!