Preparations for use
S100 / OPMI pico
Version 7.0
Page 122
G-30-1781-en
Adjusting the carrier arm flat screen monitor
After mounting the carrier arm flat screen monitor, you can adjust the friction
of its joints as required. The factory setting of the joints is suitable for a me-
dium load capacity which meets the requirements of most users. If one joint
is set too stiffly or too freely, it is possible to adjust the friction.
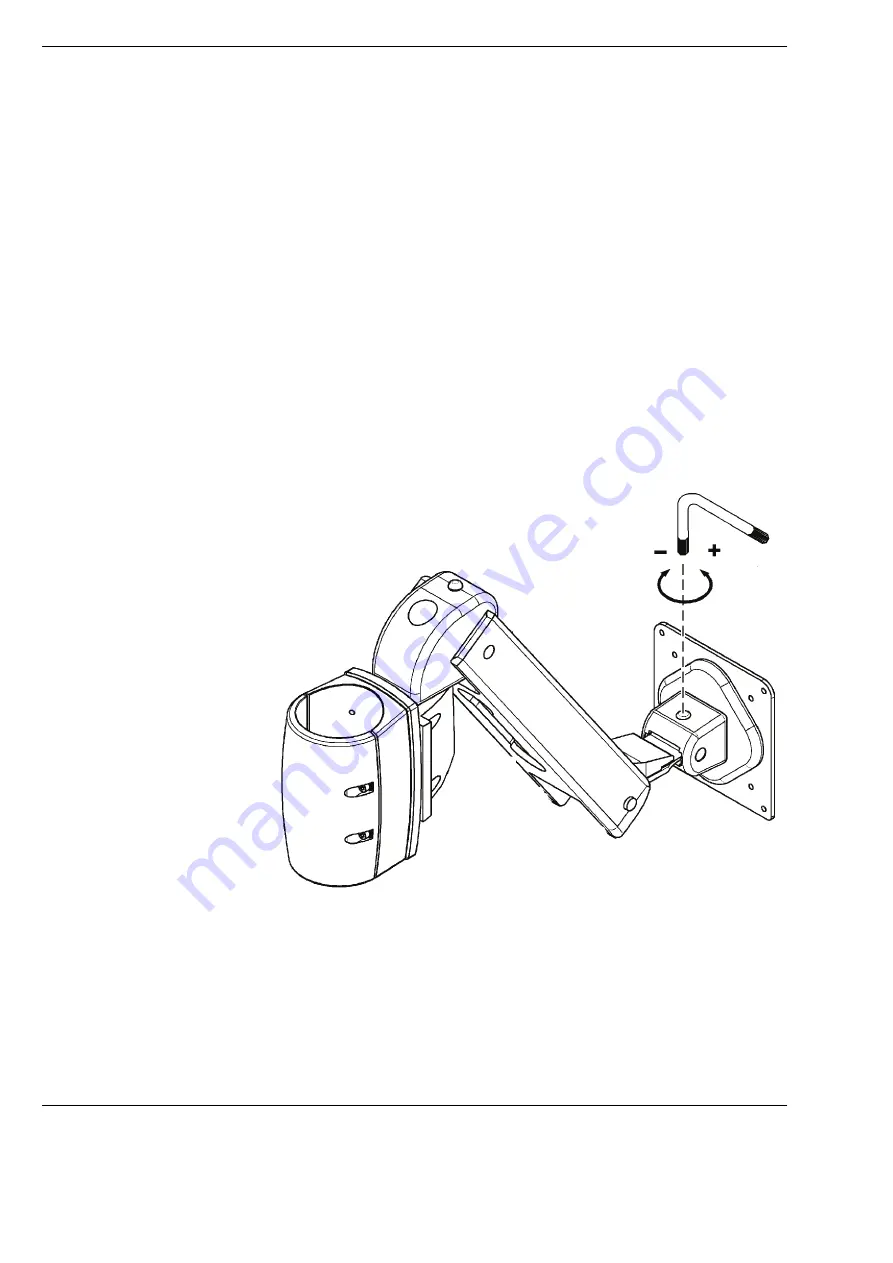
Adjusting the tilt function of the carrier arm flat screen monitor
• Check the tilt function of the monitor joint (upward/downward move-
ment).
• Use the tool supplied to increase or reduce the friction of the joint as re-
quired.
Fig. 66: Adjusting the tilt
function of the carrier arm flat
screen monitor
Содержание 000000-1080-349
Страница 1: ...ZEISS S100 OPMI pico Instructions for Use G 30 1781 en Version 7 0 2015 09 09...
Страница 4: ...S100 OPMI pico Version 7 0 Page 4 G 30 1781 en...
Страница 6: ...S100 OPMIpico Version 7 0 Page 6 G 30 1781 en...
Страница 49: ...Version 7 0 G 30 1781 en Page 49 S100 OPMI pico Safety Measures Fig 21 Video units 1 2 4 1 2 3...
Страница 50: ...Safety Measures S100 OPMI pico Version 7 0 Page 50 G 30 1781 en...
Страница 88: ...System Overview S100 OPMI pico Version 7 0 Page 88 G 30 1781 en...
Страница 111: ...Version 7 0 G 30 1781 en Page 111 S100 OPMI pico Preparations for use Fig 57 Connecting the HD video camera 4 2 1 3 5...
Страница 115: ...Version 7 0 G 30 1781 en Page 115 S100 OPMI pico Preparations for use...
Страница 126: ...Preparations for use S100 OPMI pico Version 7 0 Page 126 G 30 1781 en...
Страница 169: ...Version 7 0 G 30 1781 en Page 169 S100 OPMI pico Operation...
Страница 175: ...Version 7 0 G 30 1781 en Page 175 S100 OPMI pico Operation...
Страница 264: ...Indexes S100 OPMI pico Version 7 0 Page 264 G 30 1781 en...
Страница 276: ...S100 OPMI pico Version 7 0 Page 276 G 30 1781 en...
Страница 277: ...Version 7 0 G 30 1781 en Page 277 S100 OPMI pico Blank page for your notes...


