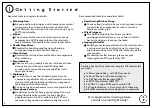
Double-check the box contents using the bill of materials
provided:
1 x Microphone Body - with XLR connector
1 x Shock Mount - with thread adapter
1 x K87 Capsule (Heiserman HK87)
1 x BV13 Transformer (AMI T13)
3 x PCBs - 2 x main PCBs and 1 x switch PCB
3 x Toggle Switches - 2 x two-way and 1 x three-way
All other semiconductors and passive components
Recommended tools for a smoother build:
Desoldering Wick or Pump:
You may find it useful to have a wick or pump in case
you misplaced a component or wish to rework a
mediocre solder joint.
Wire Strippers:
The wires included in this kit are provided
unstripped and therefore you may find it useful to
have wire strippers to expose the leads.
Isopropyl Alcohol:
Rubbing some isopropyl alcohol with a toothbrush or
a cotton swab can be an effective way to clean flux
and solder residue from PCBs after soldering all the
components.
For maximum effectiveness, please use pure
isopropyl above 91%, preferably 99%.
Required tools to complete this build:
Soldering Iron:
A good-quality soldering iron with temperature control
is necessary to get clean solder joints on this build.
For PCB work, a chisel tip with an iron that can go up to
350ºC is preferable.
Solder:
The choice of solder can be quite subjective but we
recommend a 63/37 leaded solder with a relatively
small diameter for durable solder joints in this build.
Needle Nose Pliers:
Essential for handling small parts and bending
component legs in neat beautiful shapes.
Wire Cutters:
Essential for cutting all excess leads from components
after soldering.
Screwdrivers:
Chances are you probably have a set of these at home
already but you will need a small Phillips head
screwdriver to fasten the capsule and PCBs to the
microphone body.
Multimeter:
You will need to use the voltmeter, ammeter and
ohmmeter capabilities of your multimeter for various
steps in this build including calibration, component
matching and troubleshooting.
You do not need an expensive one to complete this kit.
Microphone Preamp:
Hopefully you should have a good preamp if you are
attempting this build in order to send a healthy
phantom power of +48V to calibrate the JFET and
measure voltages when troubleshooting the circuit.
Getting Started
1
4
If a component is missing, please
send us an email right away!


