


8-2
IM WT18O1E-02EN
8.2 Setting Integration Conditions
This section explains the following settings for integration conditions:
• Integration mode
• Integration timer
• Scheduled times for real-time integration
• Turning integration auto calibration on and off
• Watt-hour integration method for each polarity
• Current mode for current integration
• Rated time of integrated D/A output (/DA option)
►
“Integration Conditions (Integ Set)” in the features guide
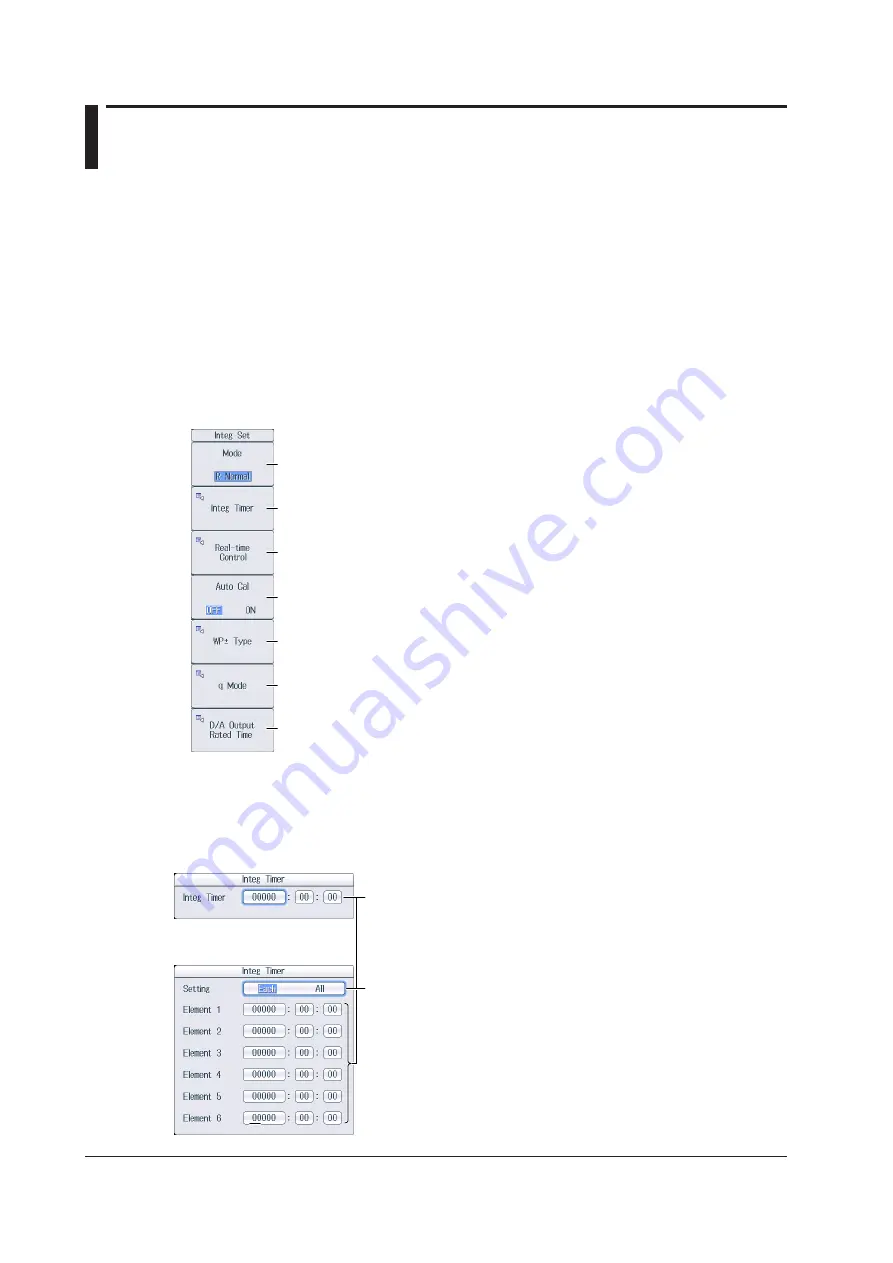
Integ Menu
Press
INTEG
and then the
Integ Set
soft key to display the following menu.
Set the integration timer.
Set the scheduled times for real-time integration.
This soft key is displayed when Mode is set to R-Normal or R-Continuous.
Turns integration auto calibration on and off
1
Set the watt-hour integration methods for each polarity.
1
Set the current modes for current integration.
Set the rated time of integrated D/A output (/DA option).
Set the integration mode (Normal, Continuous, R-Normal, R-Continuous).
1
1 You can set this when the data update interval is not Auto.
Setting the Integration Timer (Integ Timer)
Press the
Integ Timer
soft key to display the following screen.
Set the integration timer (00000 hours : 00 minutes : 00 seconds to
10000 hours : 00 minutes : 00 seconds).
*
When Independent
Integration Is Off
When Independent
Integration Is On
Select the integration timer’s setup method (Each, All).
When you select Each, you can set the integration timer for each input
element.
* When Mode is set to Normal and the integration timer is 00000 : 00 : 00,
this instrument is in manual integration mode.