Yealink
CP860
Before you start
Package with IP conference phone that you
have received from us, including: IP
conference phone, power adapter and
Ethernet cable. Turn IP teleconferencing
phone upside down and black Ethernet cable
to connect your phone to the port labeled
"LAN". Plug the other end into the modem,
router or switch into the socket designed for
IP phones. If the switch does not support
Power over Ethernet (PoE - Power over
Ethernet), connect the phone to a power
adapter and plug it into an outlet. After
connecting your phone and connect to the
network initialization process begins and
appears inscription "Welcome"
"Initializing
... Please wait" with a short welcome
melodies. In doing so, they will light up LEDs
on the top of the phone. Until a few minutes
later date and time displayed in the upper left
corner of the last three digits of your phone
number. After that you can start making calls.
Directly on the phone, we have prepared for
you phone list your company. To view
network directories, press the soft key "BSFT
Dir". Use arrow keys to move "down-up" and
"OK" button. In the newly displayed list all the
contacts of your company. Prepare now
transfer data collected during the service,
your
phone number and password. Use a password
to login to the portal portal-uc.gtsce.com.
Name your phone number. Here Virtual PBX
service can be adapted to your needs. Help
for each feature is available by clicking on the
"Help". Further instructions can be retrieved
by
clicks
the
"Downloads".
1. Making a call
Press the answer the call / call, enter the
phone number and then press the button
again to answer the call / call "Send" "OK" or
"Send" button. To end the call soft key
"Cancel" button or end the call.
2. Controls in general
The navigation buttons are used to navigate
the menu. OK button is used to confirm the
selection. The phone also includes context-
sensitive buttons. Context-sensitive buttons
change
their
function
automatically,
according to a state where the phone is
located, so that the control was most intuitive.
Menu navigation buttons to scroll through or
by means of direct elections, because every
choice is numbered. Furthermore, the manual
we talk about the so-called. Sequence, which
means the menu pops up context-dependent
"menu" key and press the direct election of 1-
9 confirmed by pressing the OK button. Ie .:
Menu-2-4-1 sequence represents a phased
press MENU, 2, OK, 4, OK, 1, OK. Return to
the default state, use the soft key Back-Back-
Exit. Soft key Call Hold
the caller hears music.
Soft key Call transfer - used to transfer the
call.
MENU button - is used to enter the
configuration menu of the phone.
Redial button - used to re-call to the last
number
dialed
-
Redial.
3. Telephone directory
Within the services of a virtual PBX uses the
telephone directory platform, which always
contains all active users. Add, edit or erase
items perform personal list through the portal
portal-uc.gtsce.com. Adding names: BSFT
soft key Dir - Local. Directory - Options, click
the Add button, you will see a menu for
entering a new directory entry. To enter the
name, use the selection buttons (1-9, *, #).
Use the second soft key to change from
numeric entry to the letter. If the bad
character entry, use the Delete button to
delete the last digit. After entering all the
data, press the Save soft key and the record
will be permanently stored.
4. Searching in tel. directory
Press MENU --> directory. Into the phone
loads the appropriate directory. To move the
list, use the up and down arrows, press the
"Dial" call the selected contact. For a quick
search (by name or surname of a person) to
enter the keypad numbers that correspond to
the letters for every letter press the button
only once. Combination of letters that
corresponds to the number you need to
press, refer to the phone or in the following
table:
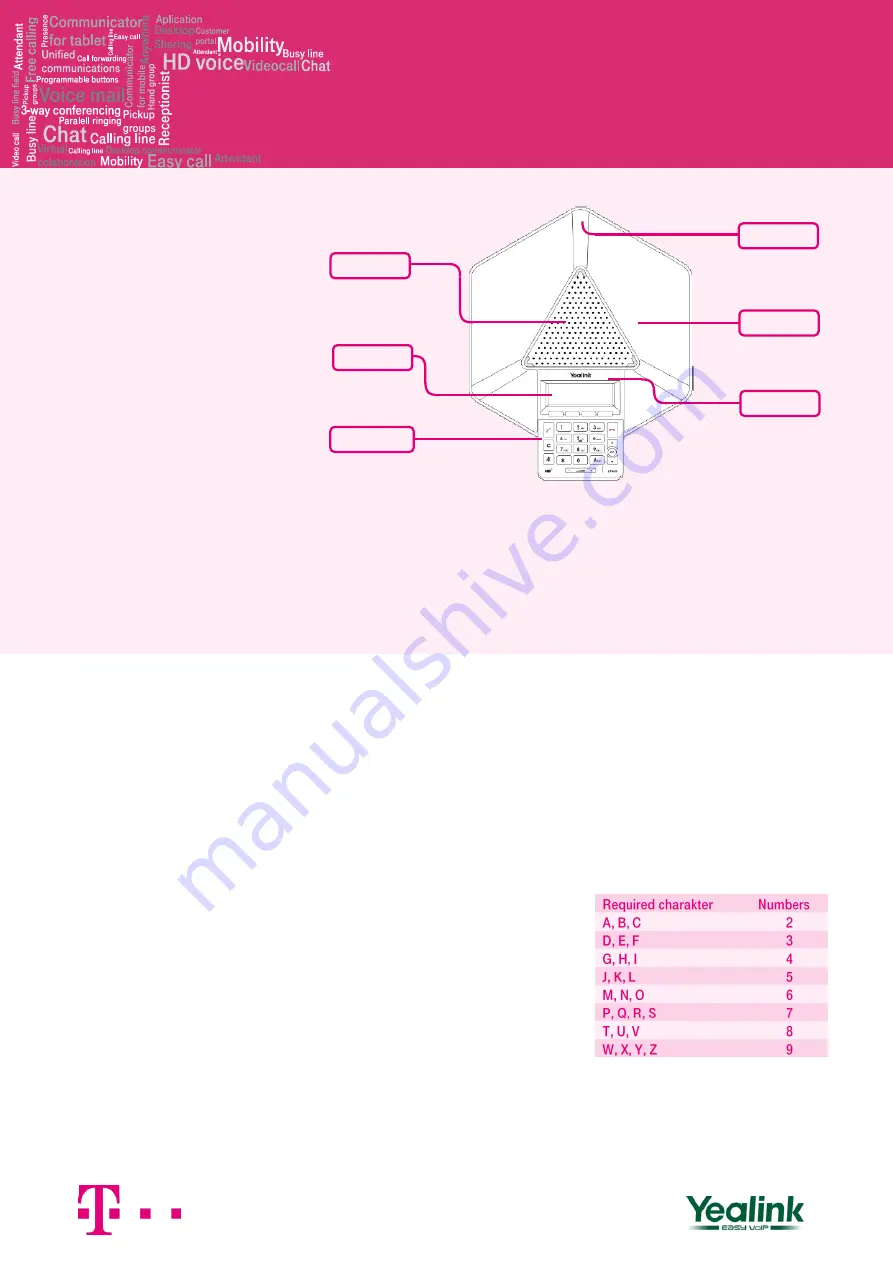
Loudspeaker
LCD display
LED indicator
Microphone
Hot keys
Keypad


