1. GENERAL CAUTIONS FOR
MAINTENANCE WORK
1-2
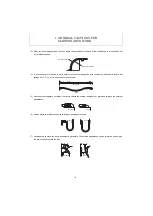
(6) Keep the parts apt to be damaged by water or oil apart from the oily or wet parts.
e.g.: Electrical parts, rubber parts, V-belts, etc.
(7) Use the jig for press-fitting the bearings, bushes and oil seals. When
using a hammer, use a pad block.
(8) Clean the joint surface of all parts and keep them free from dust.
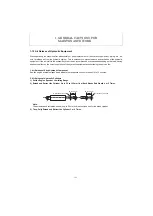
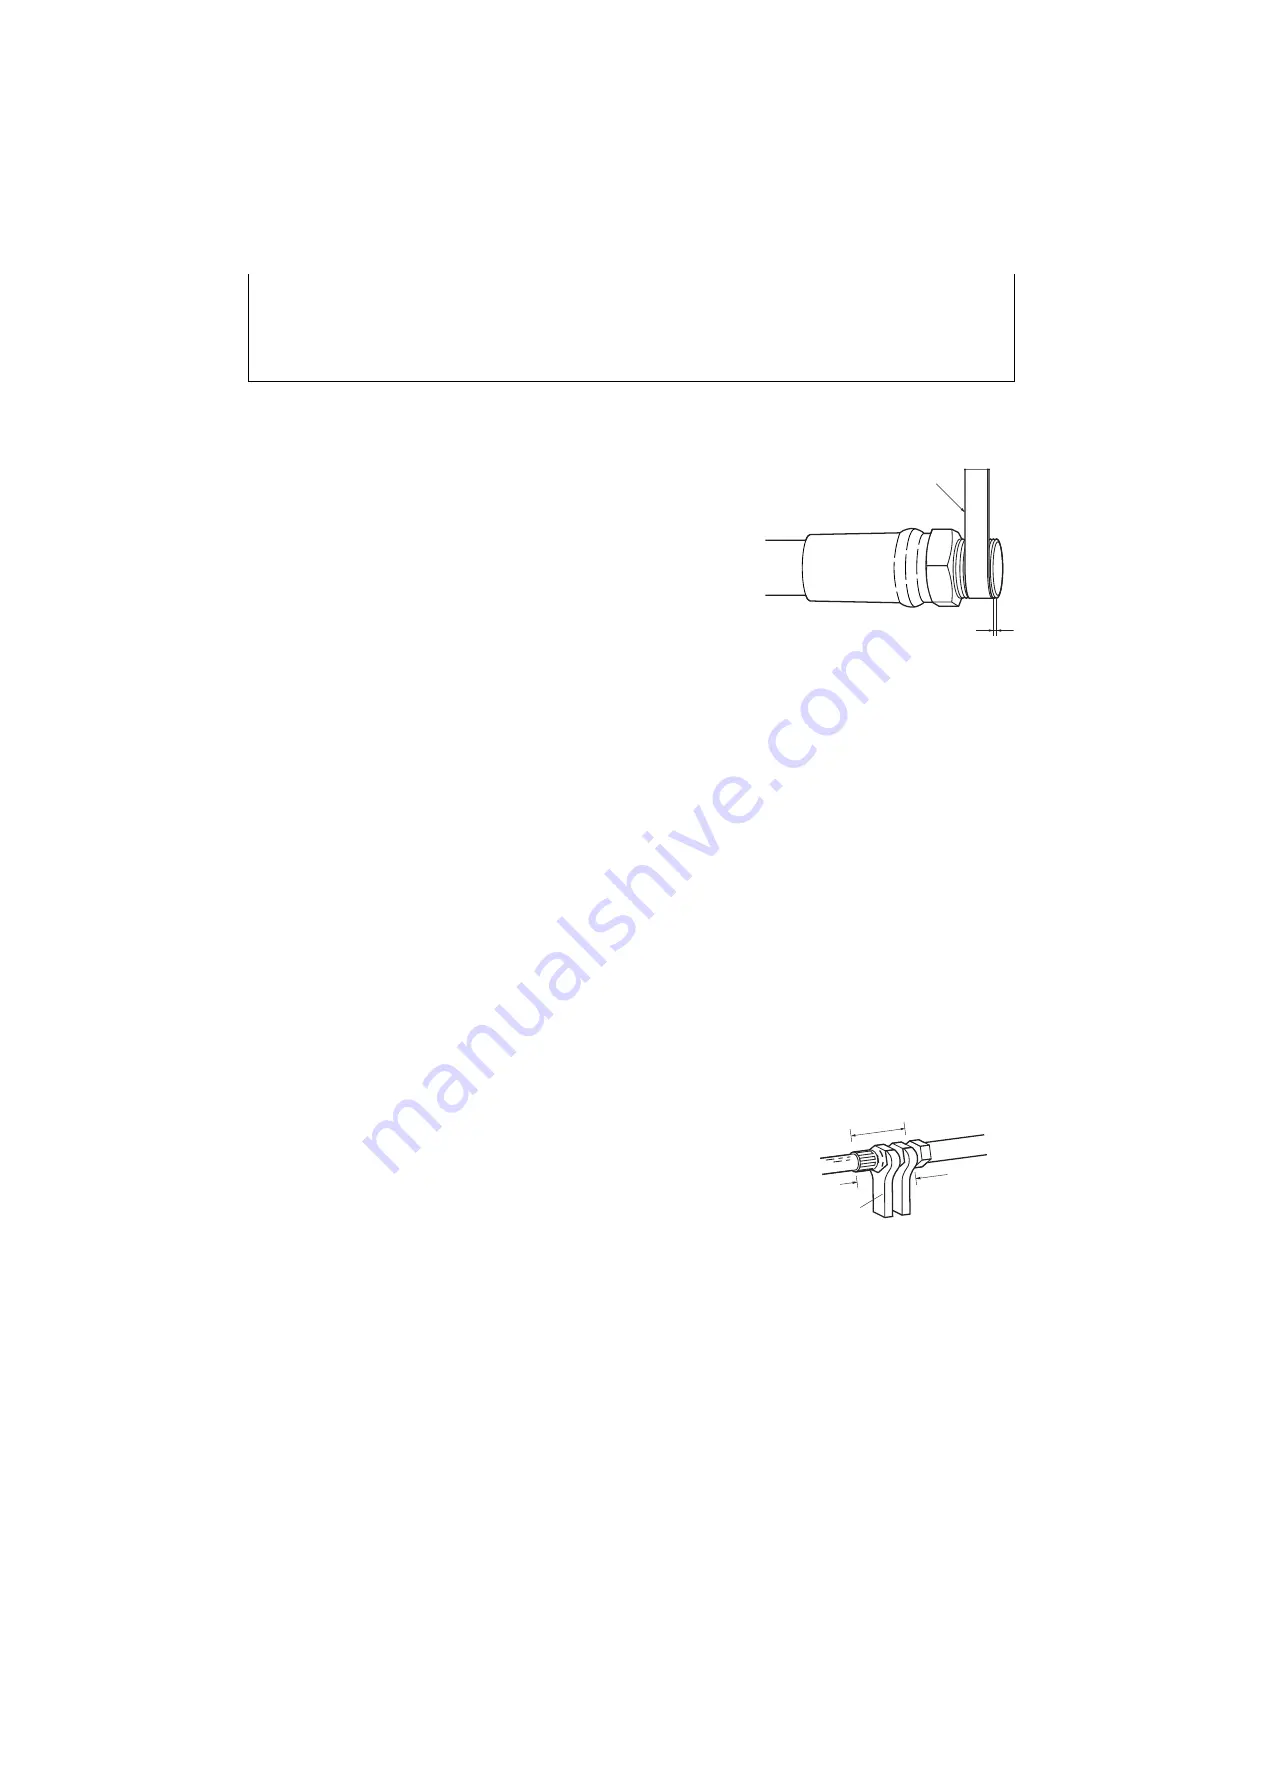
(9) Wind the sealing tape securely, leaving a space of one or two
threads from the tip of the male screw. The tape should have an
overlap of about 10 mm.
1-5 Cautions for Removal and Installation of Hydraulic Equipment
(1) Check that the hydraulic oil temperature is low enough.
(2) Release air from the hydraulic tank to prevent the hydraulic oil from flowing out.
(3) Be sure to plug open the ends of hydraulic components to prevent dust from entering.
(4) Be sure to wipe hydraulic oil from the hydraulic components so that it will not be mistaken for an oil leak.
(5) Take care not to damage the plating on the cylinder rod.
(6) Remove or install cylinders with rods fully retracted.
(7) Be sure to release air after installing the hydraulic cylinders.
• Run the engine at a low speed. Extend and retract the cylinders 4 to 5 times up to 50 to 100 mm from the end
of the stroke. Then, fully extend and retract.
(8) Be sure to pressurize the hydraulic tank after installing the hydraulic components (in the case of the sealed
hydraulic tank). Otherwise, hydraulic pumps might suffer cavitation and their life will be shortened.
• To pressurize the hydraulic tank, fully extend each cylinder and tighten the oil filter port plugs.
1-6 Cautions for Removal and Installation of Hydraulic Piping
(1) Installation of hydraulic hose
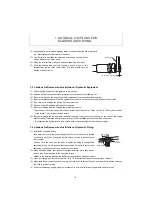
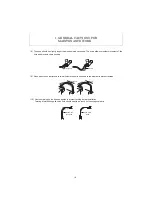
Take care not to twist the hoses. (Judge whether or not the hose is twisted
by the hose mark.) For hoses with a metal fitting, use two wrenches to pre-
vent twisting.
Use one to fix the hose, and the other to tighten the fitting to the specified
tightening torque. Carefully check that the hoses do not come in contact after
tightening. If any contact is found, correct it or use tubes.
(2) When installing hoses, first tighten to the specified torque and then loosen
them a little. Then retighten to the specified torque.
• Break in the installed parts before tightening (except those using seal tapes).
(3) When installing pipes, turn the nuts more 1/4 to 1/2 turn after they reach the sharp torque rise point.
(4) When installing or removing hoses, use two wrenches, one to fasten the hose and the other to tighten or loosen
the hose to prevent twisting.
(5) Check for oil leakage by applying max. pressure 5 to 6 times after attaching hydraulic hoses or pipes.
One and a half threads
Sealing tape
Metal fitting
Hose
Fixed side
Pipe or
connector
Содержание ViO12-2A
Страница 1: ...SERVICE MANUAL EXCAVATOR ViO12 2A...
Страница 2: ......
Страница 3: ......
Страница 9: ......
Страница 21: ......
Страница 23: ......
Страница 37: ......
Страница 55: ......
Страница 57: ......
Страница 99: ......
Страница 109: ...5 3 1 5 ELECTRIC SYSTEM 5 3 Wiring Diagram...
Страница 114: ......
Страница 117: ...6 HYDRAULIC SYSTEM 6 1 3...
Страница 118: ...6 HYDRAULIC SYSTEM 6 1 4...
Страница 119: ...6 HYDRAULIC SYSTEM 6 1 5 This Page Intentionally Left Blank...
Страница 121: ...6 HYDRAULIC SYSTEM 6 1 7...
Страница 122: ...6 HYDRAULIC SYSTEM 6 1 8...
Страница 123: ...6 HYDRAULIC SYSTEM 6 2 1 6 2 Hydraulic Circuit Schematic...
Страница 125: ...6 HYDRAULIC SYSTEM 6 3 2...
Страница 126: ...6 HYDRAULIC SYSTEM 6 3 3...
Страница 127: ...6 HYDRAULIC SYSTEM 6 3 4 This Page Intentionally Left Blank...
Страница 129: ...6 HYDRAULIC SYSTEM 6 3 6...
Страница 130: ...6 HYDRAULIC SYSTEM 6 3 7...
Страница 131: ...6 HYDRAULIC SYSTEM 6 3 8 This Page Intentionally Left Blank...
Страница 133: ...6 HYDRAULIC SYSTEM 6 3 10...
Страница 134: ...6 HYDRAULIC SYSTEM 6 3 11...
Страница 135: ...6 HYDRAULIC SYSTEM 6 3 12 This Page Intentionally Left Blank...
Страница 137: ...6 HYDRAULIC SYSTEM 6 3 14...
Страница 138: ...6 HYDRAULIC SYSTEM 6 3 15...
Страница 139: ...6 HYDRAULIC SYSTEM 6 3 16 This Page Intentionally Left Blank...
Страница 141: ...6 HYDRAULIC SYSTEM 6 3 18...
Страница 143: ...6 HYDRAULIC SYSTEM 6 3 20 This Page Intentionally Left Blank...
Страница 145: ...6 HYDRAULIC SYSTEM 6 3 22...
Страница 147: ...6 HYDRAULIC SYSTEM 6 3 24 This Page Intentionally Left Blank...
Страница 149: ...6 HYDRAULIC SYSTEM 6 3 26...
Страница 150: ...6 HYDRAULIC SYSTEM 6 3 27...
Страница 151: ...6 HYDRAULIC SYSTEM 6 3 28 This Page Intentionally Left Blank...
Страница 153: ...6 HYDRAULIC SYSTEM 6 3 30...
Страница 155: ...6 HYDRAULIC SYSTEM 6 3 32 This Page Intentionally Left Blank...
Страница 157: ...6 HYDRAULIC SYSTEM 6 3 34...
Страница 159: ...6 HYDRAULIC SYSTEM 6 3 36 This Page Intentionally Left Blank...
Страница 161: ...6 HYDRAULIC SYSTEM 6 3 38...
Страница 162: ...6 HYDRAULIC SYSTEM 6 3 39...
Страница 163: ...6 HYDRAULIC SYSTEM 6 3 40 This Page Intentionally Left Blank...
Страница 165: ...6 HYDRAULIC SYSTEM 6 3 42...
Страница 166: ...6 HYDRAULIC SYSTEM 6 3 43...
Страница 168: ...6 HYDRAULIC SYSTEM 6 3 45...
Страница 169: ...6 HYDRAULIC SYSTEM 6 3 46...
Страница 180: ...6 HYDRAULIC SYSTEM 6 5 7 4 Special tools Unit mm Oil seal installation jig 063145 00EN00 115 10 19 8 31 7...
Страница 219: ...6 HYDRAULIC SYSTEM 6 7 8 1 4 3 8 7 12 10 10 15 a b c Loctite 262 0 30Nm 0 45Nm...
Страница 345: ...7 ADJUSTMENT AND REPAIR 7 5 28 3 Upperstructure Control valve Swivel joint Control valve Boom swing cylinder...
Страница 348: ...7 ADJUSTMENT AND REPAIR 7 5 31 6 Control Levers Pilot valves Control valve...
Страница 349: ...7 ADJUSTMENT AND REPAIR 7 5 32 7 Upperstructure Implement Bucket cylinder Arm cylinder...
Страница 351: ...7 ADJUSTMENT AND REPAIR 7 5 34 9 Undercarriage High speed travel solenoid valve...
Страница 359: ......
Страница 360: ...CHAPTER 8 PERIODIC INSPECTION AND SERVICING 8 1 List of Periodic Inspection and Servicing 8 1...
Страница 361: ......
Страница 364: ...CHAPTER 9 FUEL LUBE OIL AND GREASE RECOMMENDED 9 Fuel Lube Oil and Grease Recommended 9 1...
Страница 365: ......
Страница 367: ......
Страница 369: ......
Страница 406: ...CHAPTER 11 REFERENCE DATA 11 1 Specifications for Attachment 11 1...
Страница 407: ......


