background image

Perio

d

ic maintenance an

d

 a

d

justment

9-25

9

EAU23098

Checkin

g

 an

d

 lu

b

ricatin

g

 the 

ca

b

les

The operation of all control cables and
the condition of the cables should be
checked before each ride, and the ca-
bles and cable ends should be lubri-
cated if necessary. If a cable is
damaged or does not move smoothly,
have a Yamaha dealer check or re-
place it. 

WARNING! Dama

g

e to the

outer housin

g

 of ca

b

les may result

in internal rustin

g

 an

d

 cause inter-

ference with ca

b

le movement. Re-

place 

d

ama

g

e

d

 ca

b

les as soon as

possi

b

le to prevent unsafe con

d

i-

tions.

 [EWA10712]

EAU49921

Checkin

g

 an

d

 lu

b

ricatin

g

 the 

throttle 

g

rip an

d

 ca

b

le

The operation of the throttle grip
should be checked before each ride. In
addition, the cable should be lubricat-
ed by a Yamaha dealer at the intervals
specified in the periodic maintenance
chart.

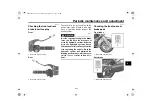
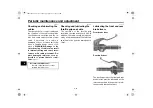
EAU23173

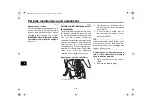
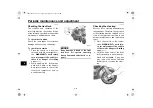
Lu

b

ricatin

g

 the front an

d

 rear 

b

rake levers

Front 

b

rake lever

Rear 

b

rake lever

The pivoting points of the front and rear
brake levers must be lubricated at the
intervals specified in the periodic main-
tenance and lubrication chart.

Recommen

d

e

d

 lu

b

ricant:

Yamaha cable lubricant or other 
suitable cable lubricant

UBKA10E0.book  Page 25  Thursday, September 22, 2022  1:40 PM

Содержание X MAX CZD300P 2022

Страница 1: ...R S MANUAL Specifications 13 Index Consumer information Scooter care and storage Periodic maintenance and adjustment For your safety pre operation checks Instrument and control functions Smartphone Co...

Страница 2: ...eproductive harm To minimize exposure avoid breathing exhaust do not idle the engine except as necessary service your vehicle in a well ventilated area and wear gloves or wash your hands frequently wh...

Страница 3: ...y Bluetooth SIG Inc iOS is a registered trademark or trademark of Cisco Systems Inc and or its affiliates in the United States and certain other countries Android is a trademark of Google LLC Garmin S...

Страница 4: ...UBKA10E0 book Page 3 Thursday September 22 2022 1 40 PM...

Страница 5: ...n these high standards it is important that you and your Yamaha dealer pay close attention to the recommended maintenance schedules and operating instructions contained within this manual Yamaha conti...

Страница 6: ...al personal injury hazards Obey all safety messages that follow this symbol to avoid possible injury or death A WARNING indicates a hazardous situation which if not avoided could result in death or se...

Страница 7: ...orporation U S A 1st edition November 2022 All rights reserved Any reprinting or unauthorized use without the written permission of Yamaha Motor Corporation U S A is expressly prohibited Printed in In...

Страница 8: ...6 Fuel 6 27 Fuel tank overflow hose 6 28 Catalytic converter 6 28 Storage compartments 6 29 Windscreen 6 31 Handlebar position 6 32 Adjusting the shock absorber assemblies 6 33 Power outlet 6 33 DC co...

Страница 9: ...cking the wheel bearings 9 28 Battery 9 28 Replacing the fuses 9 29 Vehicle lights 9 31 Replacing the license plate light bulb 9 31 Troubleshooting 9 32 Troubleshooting chart 9 33 Emergency mode 9 35...

Страница 10: ...y contain important information for safe and proper operation of your vehicle Never remove any labels from your vehicle If a label becomes difficult to read or comes off a replacement label is availab...

Страница 11: ...This unit contains high pressure nitrogen gas Mishandling can cause explosion Read owner s manual for instructions Do not incinerate puncture or open B74 F2259 10 FUEL TANK THROTTLE BODY ATMOSPHERE C...

Страница 12: ...90 kg 198 lbs load FRONT REAR 200 kPa 2 00 kgf cm 29 psi 225 kPa 2 25 kgf cm 33 psi 90kg 198 lbs maximum load FRONT REAR 200 kPa 2 00 kgf cm 29 psi 225 kPa 2 25 kgf cm 33 psi NOTICE Cleaning with alka...

Страница 13: ...you Safe Riding Perform the pre operation checks each time you use the vehicle to make sure it is in safe operating condition Failure to inspect or maintain the vehi cle properly increases the possibi...

Страница 14: ...in tain control of the scooter The passenger should always hold onto the operator the seat strap or grab bar if equipped with both hands and keep both feet on the passenger footrests Never carry a pas...

Страница 15: ...y of an accident use extreme caution when adding cargo or acces sories to your scooter Use extra care when riding a scooter that has added cargo or accessories Here along with the information about ac...

Страница 16: ...nes in mind as well as those provided under Load ing when mounting accessories Never install accessories or carry cargo that would impair the per formance of your scooter Careful ly inspect the access...

Страница 17: ...Choose the lo cation for the straps carefully so the straps will not rub against painted surfaces during transport The suspension should be com pressed somewhat by the tie downs if possible so that th...

Страница 18: ...colored jacket Do not carry too much luggage on the scooter An overloaded scoot er is unstable Use a strong cord to secure any luggage to the carri er if equipped A loose load will affect the stabilit...

Страница 19: ...assembly spring preload adjusting ring page 6 33 6 Final transmission oil filler cap page 9 12 7 Final transmission oil drain bolt page 9 12 8 V belt case air filter element page 9 15 9 Engine oil dra...

Страница 20: ...tank cap page 6 26 5 Storage compartment B page 6 29 6 Windscreen page 6 31 7 Front turn signal light 8 Battery page 9 28 9 Fuses page 9 29 10 Headlight page 9 31 11 Auxiliary light page 9 31 12 Cent...

Страница 21: ...20 3 Rear brake fluid reservoir page 9 23 4 Infotainment display page 6 5 5 Main display page 6 3 6 Front brake fluid reservoir page 9 23 7 Right handlebar switches page 6 20 8 Front brake lever page...

Страница 22: ...opera tion of such devices when close by If you have an electric medical device consult a doctor or the device manufacturer before us ing this vehicle NOTICE ECA24080 The smart key system uses weak r...

Страница 23: ...switch knob to turn the smart key system back on EAU66881 Part 15 of FCC Rules This device complies with Part 15 of FCC Rules Operation is subject to the following two conditions 1 this device may no...

Страница 24: ...perate the vehi cle Included with the vehicle is one smart key two mechanical keys and one identification number card If the vehicle battery is discharged the mechanical key can be used to open the se...

Страница 25: ...ls polishing agents fuel or any strong chemicals to come in contact with the smart key The smart key body may become discol ored or cracked TIP The smart key battery life is ap proximately two years b...

Страница 26: ...ight Comes on quickly for 0 1 sec onds The smart key is turned on Comes on slowly for 0 5 seconds The smart key is turned off Remote answer back function Push the smart key button to operate the answe...

Страница 27: ...n the vehi cle is first turned on the smart key bat tery is low and should be replaced Also if the answer back function does not work or its operating range is very short replace the battery soon WARN...

Страница 28: ...rom being damaged or contaminated by dirt Do not touch the internal cir cuits and terminals This may cause malfunctions Do not apply excessive force to the smart key when replacing the battery Make su...

Страница 29: ...e main switch again The main switch positions are de scribed below EAU76502 ON All electrical circuits are supplied with power and the engine can be started To turn the vehicle power on 1 Turn the sma...

Страница 30: ...urn off automatically To turn the vehicle power off im mediately push the main switch knob four times within 2 seconds EAU79042 OPEN open Power is supplied to the main switch The seat and storage comp...

Страница 31: ...he OPEN position If the beeper sounds after 3 minutes turn the main switch to OFF or If the beeper sounds because the smart key was turned off or moved out of range turn the smart key on and walk back...

Страница 32: ...o the desired posi tion EAU79000 fuel tank cap lid To open the fuel tank cap lid 1 With the smart key turned on and within operating range push the main switch knob 2 While the smart key system indi c...

Страница 33: ...ge 5 7 Audio player page 6 11 Smartphone notifications Weather information page 6 15 Clock automatic update page 6 17 Language settings page 5 2 TIP Some features may not be avail able depending on yo...

Страница 34: ...h is needed to complete the connection between the CCU and your smartphone The app can be searched by name and downloaded from your smartphone application store TIP Use of Yamaha Motorcycle Con nect i...

Страница 35: ...which the receiver is con nected Consult the dealer or an experi enced radio TV technician for help FCC CAUTION Any changes or modifications not ex pressly approved by the grantee of this device coul...

Страница 36: ...aviga tion system route guidance pair connect a Bluetooth headset to your smartphone See page 5 7 Yamaha Motorcycle Connect pair ing NOTICE ECAN0150 The Bluetooth connection may not work in the follow...

Страница 37: ...ear on the top of the infotainment display and also next to the connected smart phone device name in the Paired devices list See page 6 16 TIP A request will appear on your smartphone to share contact...

Страница 38: ...igation system TIP Use of the Garmin StreetCross app is subject to your agreement to the Garmin StreetCross terms of use Yamaha shall not be liable for any damages resulting from the use of the Garmin...

Страница 39: ...uctions to pair connect to your smartphone When the headset con nection is detected by the Yamaha Motorcycle Connect app the Headset indicator icon will appear on the top of the infotainment display T...

Страница 40: ...es rejecting a call with the switch will not function correctly The end call icon may be grayed out or using the end call icon will accept the call instead In this case operate the smartphone directly...

Страница 41: ...ls and check the connec tion as instructed on the screen If the error persists try the following 1 Turn OFF the vehicle power After 20 seconds turn ON the vehicle power again 2 Turn OFF the smartphone...

Страница 42: ...g EAU89430 Engine trouble warning light This warning light comes on if a prob lem is detected in the engine or other vehicle control system If this occurs have a Yamaha dealer check the on board diagn...

Страница 43: ...EAUN2772 Smart key system indicator light This indicator light communicates the status of the smart key system When the smart key system is operating nor mally this indicator light will be off If the...

Страница 44: ...ts of the fuel meter disappear from F full towards E empty as the fuel level decreases When the fuel de creases to the reserve level then the last segment of the fuel meter will start flashing refuel...

Страница 45: ...ment display menu sys tem See page 6 12 TIP The tripmeters can be reset using the Settings Information Reset Trip mileage reset function of the in fotainment display menu system See page 6 19 Odometer...

Страница 46: ...isplay becomes too hot the screen brightness levels will auto matically reduce to avoid damage to the components The display units can be switched between kilometers miles and Celsius Fahrenheit See p...

Страница 47: ...zer The speed limit on the road currently being traveled on is indicated with text and by the outer circle The inner circle expands contracts to indicate the cur rent vehicle speed When the speed limi...

Страница 48: ...with a loading animation When the connection improves the navigation screen will return to the former setting For some smartphones using the phone function while navigation is in progress may display...

Страница 49: ...lometers the instanta neous fuel consumption display can be set to km L or L 100km page 6 18 When using miles the instanta neous fuel consumption is displayed in MPG Trip timer TRIP TIME Displays the...

Страница 50: ...eives an SNS E mail or other notification After that the icon stays on until you turn the ve hicle off or check the notifications by navigating to Notification in the menu system TIP This function wor...

Страница 51: ...er and the CCU this icon will flash yellow Headset indicator icon This icon comes on if a Bluetooth headset is connected to the smart phone TIP For some smartphones this icon may go off during phone c...

Страница 52: ...just the volume Long press the switches to skip to the next previous track Short press the switch to play pause the track TIP All audio track information is im ported from the music player ap plicatio...

Страница 53: ...eset With ODO TRIP highlighted in the top menu long press the switch to reset all tripme ters at once Meter display This module allows selection of which visualizer is displayed on the visualizer home...

Страница 54: ...matically Navigation Stop navigation Cancels the current route guidance and opens the navigation home screen Navigation Skip next stop Skips the next stop in your planned route and opens the navigatio...

Страница 55: ...fications since con nection to CCU and missed calls from the connected smartphone Select an item to read the notification message on the infotainment display When all notifications and missed calls ha...

Страница 56: ...6 24 for more information about the traction control system TIP The checkmark beside this setting will reappear after each time the vehicle power is turned ON Traction Con trol Activate Deactivate tra...

Страница 57: ...in dicates that Garmin StreetCross is cur rently connected to the CCU TIP There is a maximum of 8 paired devic es Select a device name for more options Delete pairing Deletes the selected paired devi...

Страница 58: ...the switches to ad just the highlighted item up down Short press the switch to set the item and continue to the next item in line After the last item is set select OK and the display will return to th...

Страница 59: ...Temperature C or F TIP When mile is selected for the Mile age unit the Fuel unit is automati cally changed to MPG At this time the Fuel item is grayed out and can not be selected Settings System info...

Страница 60: ...itches to highlight an item Long press the switch to re set the item Confirm by selecting OK TIP TRIP F can only be selected when the fuel is low Otherwise the item is grayed out Maintenance reset Thi...

Страница 61: ...ttings TRIP TIME infotainment display home screen selection navigation view setting notification list weather info Bluetooth settings clock language settings Confirm by selecting OK TIP If Reset Other...

Страница 62: ...ing the engine Set this switch to to stop the en gine in case of an emergency such as when the vehicle overturns or when the throttle cable is stuck EAUN3950 Hazard switch Use this switch to turn on t...

Страница 63: ...execute a selec tion in the menu system Short press the button to cy cle between the 3 home screens or return to the previous screen in the menu system Long press the button to exit the menu system an...

Страница 64: ...uch as rough or gravel roads the brak ing distance may be longer with the ABS than without The ABS is monitored by an ECU which will revert the system to conven tional braking if a malfunction occurs...

Страница 65: ...Traction control cannot prevent loss of traction due to excessive speed when entering turns when accelerating hard at a sharp lean angle or while braking and cannot prevent front wheel slip ping As wi...

Страница 66: ...the centerstand do not rev the engine for an extended period of time Otherwise the traction control system will automatically dis able and need to be reset If the traction control system automat icall...

Страница 67: ...ase mark aligns with and then pull the cap off To install the fuel tank cap 1 Insert the fuel tank cap onto the tank opening and turn it clockwise until the install mark aligns with 2 Close the fuel t...

Страница 68: ...072 4 Be sure to securely close the fuel tank cap WARNING EWA15152 Gasoline is poisonous and can cause injury or death Handle gaso line with care Never siphon gasoline by mouth If you should swallow s...

Страница 69: ...e sure that the fuel tank over flow hose is not blocked and clean it if necessary EAU13435 Catalytic converter The exhaust system contains catalytic converter s to reduce harmful exhaust emissions WAR...

Страница 70: ...to OPEN and then push the LID but ton To close storage compartment A push the storage compartment lid until it is closed Storage compartment B To open storage compartment B push the storage compartmen...

Страница 71: ...de it To avoid humidity from spread ing through the storage com partment wrap wet articles in a plastic bag before storing them in the compartment Since the storage compartment may get wet while the v...

Страница 72: ...he bolts 3 Install the windscreen to the high position by installing the bolts and then tighten the bolts to the spec ified torque WARNING A loose windscreen could cause an ac cident Be sure to tighte...

Страница 73: ...d torque WARNING A loose windscreen could cause an ac cident Be sure to tighten the screws to the specified torque EWAN0080 4 Place the bolt access covers and then install the quick fasteners EAU46833...

Страница 74: ...cluded in the kit to make this adjustment EAUN3820 Power outlet WARNING EWAN0050 To prevent electrical shock or short circuiting install the cap when the power outlet is not in use NOTICE ECAN0210 The...

Страница 75: ...he sidestand or lower it with your foot while holding the vehicle upright TIP The built in sidestand switch is part of the ignition circuit cut off system which cuts the ignition in certain situa tion...

Страница 76: ...ularly and have a Yamaha dealer repair it if it does not function properly EAUT1098 Ignition circuit cut off system Check the operation of the sidestand switch according to the following pro cedure UB...

Страница 77: ...brake levers The engine will start Put the sidestand down If the engine stalls The sidestand switch is OK Place vehicle on centerstand WARNING The vehicle must be placed on the centerstand during this...

Страница 78: ...l Check fuel level in fuel tank Refuel if necessary Check fuel line for leakage Check fuel tank overflow hose for obstructions cracks or damage and check hose connection 6 27 6 28 Engine oil Check oil...

Страница 79: ...n is smooth Lubricate if necessary 9 25 Wheels and tires Check for damage Check tire condition and tread depth Check air pressure Correct if necessary 9 20 9 21 Brake levers Make sure that operation i...

Страница 80: ...0 km 1000 mi The various parts in the engine wear and polish themselves to the correct operating clearances During this period prolonged full throt tle operation or any condition that might result in...

Страница 81: ...does not work as described above have a Yamaha dealer check the vehicle 2 Close the throttle 3 While applying the front or rear brake push the side of the stop run start switch Release it when the en...

Страница 82: ...grip in di rection a To reduce the speed turn the throttle grip in direction b EAU60650 Braking WARNING EWA17790 Avoid braking hard or suddenly especially when leaning over to one side otherwise the v...

Страница 83: ...e engine and operate the vehicle Please turn the smart key off when leaving the ve hicle See page 4 5 If the sidestand is lowered when the engine is running the engine will stop and the beeper will so...

Страница 84: ...forming maintenance unless otherwise specified A running engine has moving parts that can catch on body parts or clothing and electrical parts that can cause shocks or fires Running the engine while s...

Страница 85: ...e intended to assist you in the perfor mance of preventive maintenance and minor repairs However a torque wrench and other tools are necessary to perform certain maintenance work correctly TIP If you...

Страница 86: ...6 months 8000 mi 13000 km or 12 months 12000 mi 19000 km or 18 months 16000 mi 25000 km or 24 months 20000 mi 31000 km or 30 months 1 Fuel line Check fuel hoses for cracks or damage Replace if necessa...

Страница 87: ...ery 12000 mi 19000 km 3 Pre air filter element Clean Every 12000 mi 19000 km 4 Sub air filter ele ment Replace Every 12000 mi 19000 km 5 Air filter check hose Clean 6 V belt case air filter element Cl...

Страница 88: ...itting and fas teners Correct if necessary 16 Front brake lever pivot shaft Apply silicone grease lightly 17 Rear brake lever pivot shaft Apply silicone grease lightly 18 Centerstand and sidestand piv...

Страница 89: ...coolant Every 3 years 25 Final transmission oil Check vehicle for oil leakage Change Every 12000 mi 19000 km 26 V belt Replace When the V belt replacement indicator flashes 27 Front and rear brake swi...

Страница 90: ...luid levels and replenish the reservoirs as needed Replace the internal components of the brake master cylinders and calipers and change the brake fluid every two years Replace the brake hoses every f...

Страница 91: ...eat and deposits will cause any spark plug to slowly erode it should be removed and checked in accordance with the periodic mainte nance and lubrication chart In addi tion the condition of the spark p...

Страница 92: ...ever the spark plug should be tightened to the specified torque as soon as possible EAU36113 Canister This model is equipped with a canister to prevent the discharging of fuel vapor into the atmospher...

Страница 93: ...eck window locat ed at the bottom right side of the crankcase TIP The engine oil should be between the minimum and maximum level marks 4 If the engine oil is below the mini mum level mark add sufficie...

Страница 94: ...ount of the recommended engine oil TIP Be sure to wipe off spilled oil on any parts after the engine and exhaust sys tem have cooled down NOTICE ECA24060 Make sure that no foreign material enters the...

Страница 95: ...e final oil clears our performance standards Thus Yamalube mineral semisynthetic and synthetic oils have their own distinct characters and value Yamaha s expe rience gained over many years of re searc...

Страница 96: ...ould be checked before each ride In addition the cool ant must be changed at the intervals specified in the periodic maintenance and lubrication chart EAU78580 To check the coolant level 1 Place the v...

Страница 97: ...as been used instead of coolant replace it with cool ant as soon as possible other wise the cooling system will not be protected against frost and corrosion If water has been added to the coolant have...

Страница 98: ...chart Service the air filter elements more frequently if you are riding in un usually wet or dusty areas The air filter check hose must be frequently checked and cleaned if necessary Cleaning the air...

Страница 99: ...is properly seated in the air filter case The engine should never be operated without the air filter element installed otherwise the piston s and or cylinder s may become excessively worn ECA10482 7 P...

Страница 100: ...lled as shown 11 Install the rubber plugs Cleaning the V belt case air filter el ement 1 Place the vehicle on the center stand 2 Remove the air filter case cover See the previous section 3 Remove the...

Страница 101: ...air filter cov er by installing the bolts 11 Install the rear wheel sensor lead into the holders so that the white tape on the lead matches the holders as shown 12 Install the air filter case bolts a...

Страница 102: ...lves are an important engine component and since valve clearance changes with use they must be checked and adjusted at the intervals specified in the periodic maintenance chart Unadjusted valves can r...

Страница 103: ...ing speed and with the total weight of rider passenger car go and accessories approved for this model WARNING EWA10512 Never overload your vehicle Opera tion of an overloaded vehicle could cause an ac...

Страница 104: ...s should be of the same make and design other wise the handling characteristics of the vehicle may be different which could lead to an accident After extensive tests only the tires list ed below have...

Страница 105: ...presence of air in the hydraulic system If there is air in the hydraulic system have a Yamaha dealer bleed the system be fore operating the vehicle Air in the hydraulic system will diminish the brakin...

Страница 106: ...above the minimum level mark TIP Make sure the reservoir is level with the ground when checking the fluid level NOTICE ECA17641 Brake fluid may damage painted surfaces or plastic parts Always clean u...

Страница 107: ...r the brake fluid reservoir when refilling Water will signifi cantly lower the boiling point of the fluid and may result in vapor lock EAU22734 Changing the brake fluid Have a Yamaha dealer change the...

Страница 108: ...as soon as possible to prevent unsafe condi tions EWA10712 EAU49921 Checking and lubricating the throttle grip and cable The operation of the throttle grip should be checked before each ride In addit...

Страница 109: ...ces should be lubri cated if necessary WARNING EWA10742 If the centerstand or sidestand does not move up and down smoothly have a Yamaha dealer check or re pair it Otherwise the centerstand or sidesta...

Страница 110: ...eral times to check if the front fork compresses and re bounds smoothly NOTICE ECA10591 If any damage is found or the front fork does not operate smoothly have a Yamaha dealer check or re pair it EAU4...

Страница 111: ...ctions need to be checked and if necessary tight ened WARNING EWA10761 Electrolyte is poisonous and dangerous since it contains sul furic acid which causes severe burns Avoid any contact with skin eye...

Страница 112: ...connect the negative lead before discon necting the positive lead ECA16304 2 If the battery will be stored for more than two months check it at least once a month and fully charge it if necessary 3 Fu...

Страница 113: ...amaha dealer check the electrical system NOTICE ECA27210 Do not drive while the fuse box cov er is removed 1 ABS motor fuse 2 ABS solenoid fuse 3 Signaling system fuse 2 4 Terminal fuse 5 Ignition fus...

Страница 114: ...e plate light unit by removing the bolts and plate and then remove the license plate light bulb socket together with the bulb by pulling it out 2 Remove the burnt out bulb by pulling it out 3 Insert a...

Страница 115: ...open flames or sparks in the ar ea including pilot lights from water heaters or furnaces Gasoline or gasoline vapors can ignite or ex plode causing severe injury or prop erty damage EAU76551 Smart key...

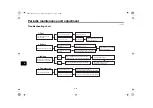
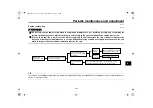
Страница 116: ...Yamaha dealer check the vehicle Remove the spark plug and check the electrodes 3 Ignition Wipe off with a dry cloth and correct the spark plug gap or replace the spark plug s Have a Yamaha dealer che...

Страница 117: ...ped press down on the cap while turning it counterclockwise and then remove the cap TIP If coolant is not available tap water can be temporarily used instead provided that it is changed to the recomme...

Страница 118: ...ight will come on for three seconds to indicate the transition to emergency mode 3 After the smart key system indica tor light goes off input the identifi cation number as follows 4 Inputting the iden...

Страница 119: ...l flash quickly for 3 seconds In this case start over again from step 2 When there are no knob opera tions for 10 seconds during the identification number input pro cess When the smart key system indi...

Страница 120: ...In cold weather when roads may be salted as a de icing method it s im portant to clean the vehicle thor oughly to remove road salt and avoid corrosion Wheel spokes bolts nuts and other unpainted met...

Страница 121: ...f any degreaser and spray down the vehicle with a garden hose Use only enough pressure to do the job Avoid spraying wa ter directly into the muffler instru ment panel air inlet or other inner areas su...

Страница 122: ...e a detail spray for motorcycles 8 When finished cleaning start the engine and let it idle for several minutes to help dry any remaining moisture 9 If the headlight lens has fogged up start the engine...

Страница 123: ...fuel cock lever to the off position 5 For vehicles with a carburetor To prevent fuel deposits from build ing up drain the fuel in the carbu retor float chamber into a clean container Retighten the dr...

Страница 124: ...isture from entering it 10 Remove the battery and fully charge it or attach a maintenance charger to keep the battery opti mally charged NOTICE Confirm that the battery and its charger are compatible...

Страница 125: ...th oil filter removal 1 60 L 1 69 US qt 1 41 Imp qt Final transmission oil Type Motor oil SAE 10W 40 type SG or higher Quantity 0 20 L 0 21 US qt 0 18 Imp qt Coolant quantity Coolant reservoir up to t...

Страница 126: ...cal system System voltage 12 V Battery Model GTZ8V Voltage capacity 12 V 7 0 Ah 10 HR Bulb wattage Headlight LED Brake tail light LED Front turn signal position light LED Rear turn signal light LED Au...

Страница 127: ...IDENTIFICATION NUMBER ENGINE SERIAL NUMBER MODEL LABEL INFORMATION EAU26411 Vehicle identification number The vehicle identification number is stamped into the frame TIP The vehicle identification num...

Страница 128: ...EAU90250 Vehicle data recording This model s ECU stores certain vehi cle data to assist in the diagnosis of malfunctions and for research statisti cal analysis and development purpos es Although the...

Страница 129: ...related to the han dling of vehicle data Even in this case Yamaha will require the contractor to properly handle the vehicle data we provided and Yamaha will appropriate ly manage the data With the c...

Страница 130: ...inds that a safety defect exists in a group of vehicles it may order a recall and remedy campaign However NHTSA cannot become involved in individual problems between you your dealer or Yamaha Motor Co...

Страница 131: ...for the purpose of noise control prior to its sale or delivery to the ultimate purchaser or while it is in use or 2 the use of the vehicle after such device or element of design has been removed or re...

Страница 132: ...r that maintenance work is required It is not acceptable proof of maintenance work Maintenance interval Date of service Mileage Servicing dealer name and address Remarks 600 mi 1000 km or 1 month 4000...

Страница 133: ...ion 12 7 12 36000 mi 55000 km or 54 months 40000 mi 61000 km or 60 months Maintenance interval Date of service Mileage Servicing dealer name and address Remarks UBKA10E0 book Page 7 Thursday September...

Страница 134: ...machine be inspected and registered for warranty by an authorized Yamaha scooter dealer In order for this warranty to remain in effect this inspection and registration must take place within ten 10 da...

Страница 135: ...Consumer information 12 9 12 UBKA10E0 book Page 9 Thursday September 22 2022 1 40 PM...

Страница 136: ...red repairs There s no deductible to pay and repairs aren t pro rated You don t have any out of pocket expenses for covered repairs In addition Travel and Recreation Interruption Protection TRIP is in...

Страница 137: ...rotection even after your Yamaha Limited Warranty expires A special note If visiting your dealer isn t convenient contact Yamaha with your VIN number and we ll be happy to help you get the Y E S cover...

Страница 138: ...s for reducing 8 4 Fuel tank cap 6 26 Fuel tank overflow hose 6 28 Fuses replacing 9 29 H Handlebar position adjusting 6 32 Handlebar switches 6 20 Hazard switch 6 21 High beam indicator light 6 1 Hor...

Страница 139: ...y checking 9 19 Tires 9 20 Tool kit 9 2 Traction control system 6 24 Traction control system indicator light 6 2 Troubleshooting 9 32 Troubleshooting chart 9 33 Turn signal indicator lights 6 1 Turn s...

Страница 140: ...UBKA10E0 book Page 3 Thursday September 22 2022 1 40 PM...

Страница 141: ...ght right out of the box Yamalube Take care of your Yamaha with legendary Yamalube oils lubricants and care products They re formulated and approved by the toughest judges we know the Yamaha engineeri...

Страница 142: ...DIC183 This Owner s manual is also available online at the Yamaha Owner s Manual Library https www yamahamotorsports com yamaha manuals PRINTED IN INDONESIA 2022 11...

Отзывы: