62
Basics Section
Quick Guide
Refer
ence
Appendix
Voice Edit
3
Set the Common
Parameters
Each Voice consists of up to four Elements. Here, the
parameters common to all Elements are explained.
●
GENERAL [F1]
For setting general parameters in Common Edit, such
as the Voice Name.
●
OUTPUT [F2]
For setting the Voice output parameters such as the
output level (volume) and pan position.
●
ARP [F3]
By setting these parameters, you can control how the
Voice is arpeggiated (page 45).
●
CTL SET [F4]
For assigning various functions to the controllers on
the front/rear panel. For example, you can assign
parameters to the Pitch Bend Wheel and a Foot
Controller so that you can change the tone of the Voice
in real time (page 55).
●
LFO [F5]
For setting the LFO parameters. The LFO uses a low
frequency waveform to vary the pitch/filter/amplitude
characteristics, and can be used to create vibrato, wah,
tremolo and other effect.
●
EFFECT [F6]
For setting the Effects parameters for the Voice. There
are two Insertion Effects plus two System Effects
(Reverb and Chorus).
4
Set the Element Parameters
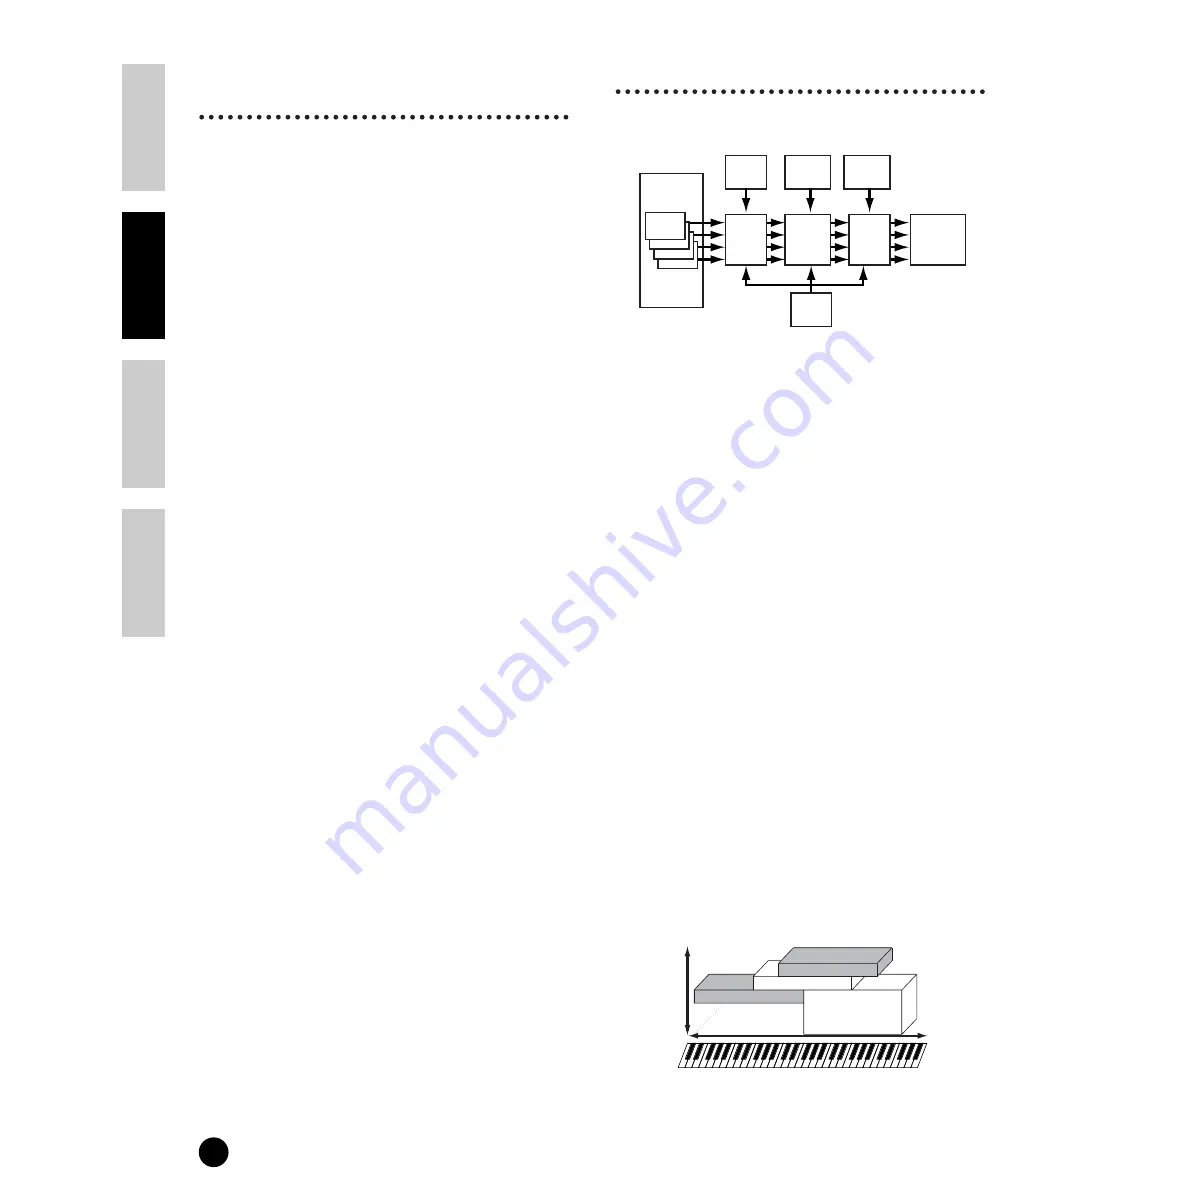
Element Edit Process
●
OSC (Oscillator) [F1]
You can set the various parameters controlling the
waveforms on which the Voice is based. You can select
the Wave used for the Element, the volume and note
range of each Element and so on.
ElementSw (Element Switch)
Determines whether each Element sounds or not.
WaveNo. (Wave Number)
Select the Wave for each Element.
NoteLimit (Note Limit Low/High)
VelocityLimit (Velocity Limit Low/High)
Set the note range for each Element (the range of notes
on the keyboard over which the Element will sound)
and also the velocity response (the range of note
velocities within which the Element will sound). You
can assign different settings for each Element. With
these parameters, you can layer Elements and control
their output.
For example, you could set one Element to sound in an
upper range of the keyboard, and another Element to
sound in a lower range. Thus, even within the same
Voice, you can have two different sounds for different
areas of the keyboard or you can make the two Element
ranges overlap so that their sounds are layered over a
set range.
Furthermore, you can set each Element to respond to
different velocity ranges so that one Element sounds
for lower note velocities, whereas another Element
sounds for higher note velocities.
n
In the Performance mode, similar settings can be
assigned for each Part (Ref. #42, 43).
AMP
FILTER
PITCH
OSC
PEG
FEG
AEG
LFO
Element
1-4
Effect
Velocity
C-2
G8
Element 4
Element 3
Element 2
Element 1
Содержание S90
Страница 136: ...136 MEMO ...


