Specify the console port to connect
From the PC connected to the console port, log in the
product using a terminal software program, and send console
commands to configure settings. The following explains an
example using Windows XP and Hyper Terminal.
Note
You should fully understand the behavior of a console command
before using it. After configuring a setting in “Basic configuration
page”, if you change the setting with a console command, an
unintended operation may be resulted. Be sure to check whether
the command behaves as you intended after changing the setting.
Tip
Please refer to “Command reference” (included in the attached
CD-ROM) for more details on console commands.
1
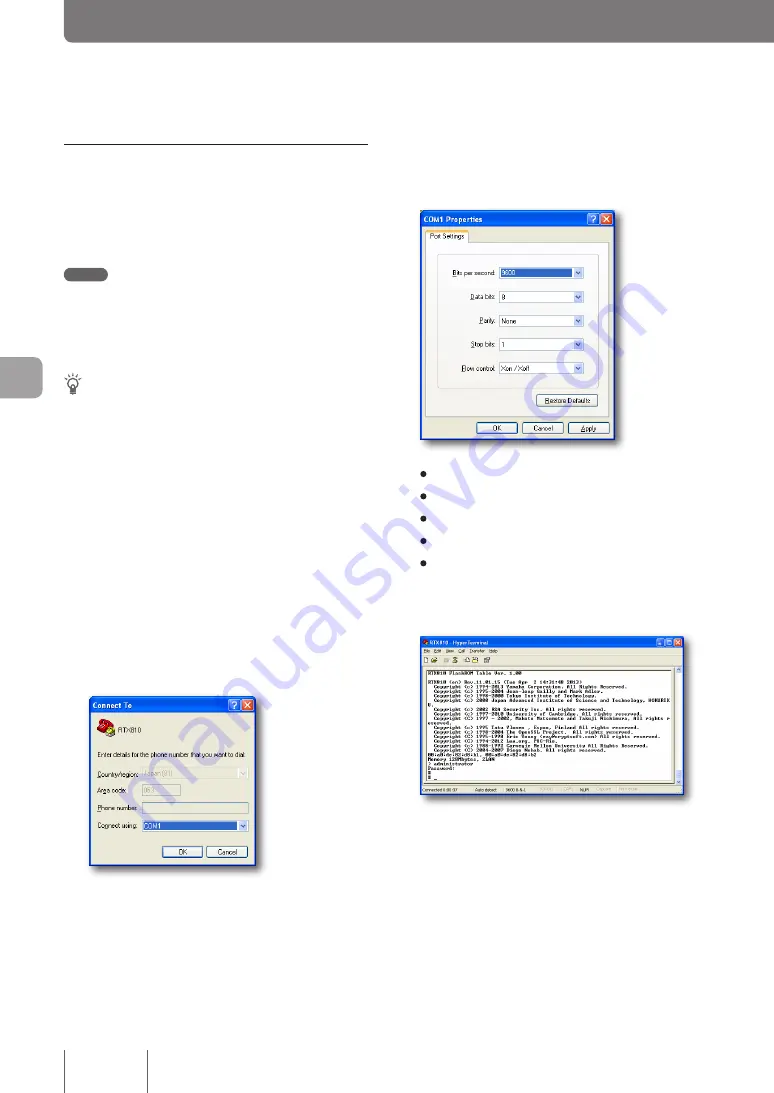
From the “Start” menu, click “All Programs”
- “Accessories” - “Communications” - “Hyper
Terminal”.
The “Connect To” screen appears.
2
Type a connection name into the “Name” field,
and click “OK”.
You can specify a desired connection name.
3
After selecting the serial port number confirmed
in the previous page, click “OK”.
The “COMx properties” screen appears.
4
Change the communication settings to the
following values:
• Bits per second: 9600
• Data bits: 8
• Parity: None
• Stop bits: 1
• Flow control: Xon/Xoff
5
Click “OK”.
The Hyper Terminal screen appears.
The subsequent procedure is the same as step 3 of
“Connect with TELNET” (page 118).
122
O
pe
ra
tin
g a
nd
m
an
ag
in
g t
he
p
ro
du
ct
7
Changing the product settings
(Continued from the previous page)


