background image

14

PSR-E443  Owner’s Manual

Setting Up

Set

tin

g

 Up

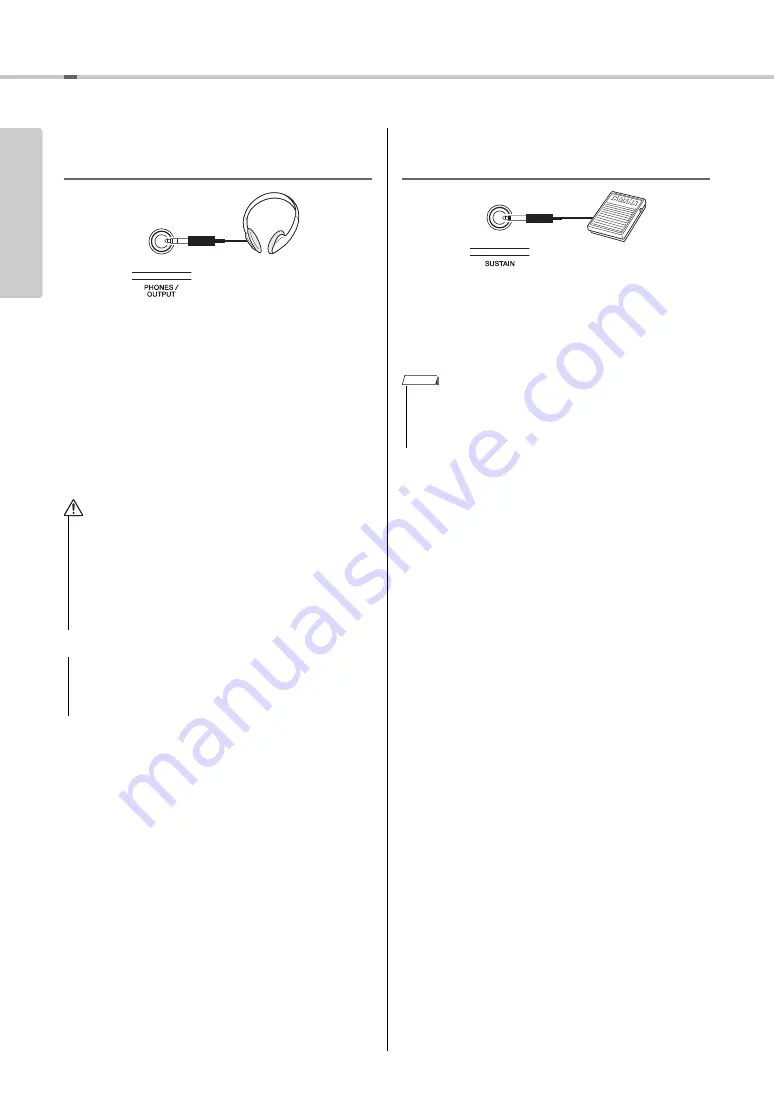
Connecting Headphones or 
External Audio Equipment

Any pair of stereo headphones with a 1/4” stereo 
phone plug can be plugged in here for convenient 
monitoring. The speakers are automatically shut off 
when a plug is inserted into this jack.
The [PHONES/OUTPUT] jack also functions as an 
external output. You can connect the [PHONES/OUT-
PUT] jack to a computer, keyboard amplifier, stereo 
system, mixer, tape recorder, or other line-level audio 
device to send the instrument’s output signal to that 
device.

Connecting a Footswitch to the 
[SUSTAIN] jack

You can produce a natural sustain as you play by 
pressing an optional Footswitch plugged into the 
[SUSTAIN] jack. Make sure that the footswitch plug 
is properly connected to the [SUSTAIN] jack before 
turning on the power.

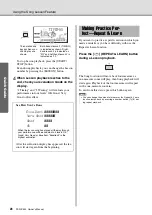
• Do not use the instrument/device or headphones for a long 

period of time at a high or uncomfortable volume level, 
since this can cause permanent hearing loss. If you experi-
ence any hearing loss or ringing in the ears, consult a phy-
sician.

• Before connecting the instrument to other electronic com-

ponents, set all volume levels to the minimum, then turn 
off the power for all components.

• When the instrument’s sound is output to an external 

device, first turn on the power to the instrument, then to 
the external device. Reverse this order when you turn the 
power off.

CAUTION

NOTICE

• The sustain function does not affect split voices (page 18).

• Do not press the footswitch while turning the power on. Doing 

this changes the recognized polarity of the footswitch, result-
ing in reversed footswitch operation.

NOTE

Содержание PSR-E443

Страница 1: ...DIGITAL KEYBOARD Setting Up Reference Appendix Quick Guide Owner s Manual EN ...

Страница 2: ... types of batteries Batteries MUST be installed cor rectly Mismatches or incorrect installation may result in overheating and battery case rupture Warning Do not attempt to disassemble or incinerate any battery Keep all bat teries away from children Dispose of used batteries promptly and as regulated by the laws in your area Note Check with any retailer of household type batteries in your area for...

Страница 3: ...re you purchased the items For business users in the European Union If you wish to discard electrical and electronic equipment please contact your dealer or supplier for further information Information on Disposal in other Countries outside the European Union These symbols are only valid in the European Union If you wish to discard these items please contact your local authorities or dealer and as...

Страница 4: ...ified battery type page 13 only Use new batteries all of which are the same type same model and made by the same manufacturer Always make sure all batteries are inserted in conformity with the polarity markings When the batteries run out or if the instrument is not to be used for a long time remove the batteries from the instrument When using Ni MH batteries follow the instructions that came with ...

Страница 5: ...ment along with an application on your iPad iPhone or iPod touch we recommend that you set Airplane Mode to ON on that device in order to avoid noise caused by communication Do not expose the instrument to excessive dust or vibrations or extreme cold or heat such as in direct sunlight near a heater or in a car during the day to prevent the possibility of panel disfiguration damage to the internal ...

Страница 6: ...g Lesson Feature 27 Three Types of Song Lesson 27 Practicing with Song Lesson 27 Making Practice Perfect Repeat Learn 28 Playing an External Audio Device with the Built in Speakers 29 Using the Melody Suppressor 29 Recording Your Performance 30 Track Structure of a Song 30 Quick Recording 30 Recording to a Specified Track 31 Clearing a User Song 32 Clearing a Specified Track from a User Song 32 Me...

Страница 7: ...rds Using the Chord Dictionary 49 Song Settings 50 BGM Background Music Playback 50 Random Song Playback 50 Tempo Setting of the Song 51 Tap Start 51 Song Volume 51 Melody Voice Setting of the Preset Song 51 The Functions 52 Basic Procedure in the Function Display 52 USB Flash Memory Operations 56 Connecting a USB Flash Memory 57 Formatting a USB Flash Memory 58 Saving User Data to a USB Flash Mem...

Страница 8: ...t Naturally you can play back any XG song data using an XGlite tone generator However keep in mind that some songs may play back differently compared to the original data due to the reduced set of control parameters and effects USB USB is an abbreviation for Universal Serial Bus It is a serial interface for connecting a computer with peripheral Devices It allows hot swapping connecting peripheral ...

Страница 9: ...transferring song data iPhone iPad Connection Manual Explains how to connect the instrument to smart devices such iPhone iPad etc To obtain these manuals access the Yamaha Downloads Select your country enter PSR E443 to the Model Name box then click SEARCH Yamaha Downloads http download yamaha com Online Materials for Yamaha Online members Song Book only in English French German Spanish and Japane...

Страница 10: ...R button Page 29 2 PORTABLE GRAND button Page 17 3 VOICE CONTROL section SPLIT button Page 18 DUAL button Page 18 HARMONY button Page 20 ARPEGGIO button Page 21 4 Playback Control buttons When the PATTERN lamp is turned on Pages 24 and 46 When the SONG lamp is turned on Page 26 When the STYLE lamp is turned on Pages 23 44 and 45 GrandPno 001 001 e r t y u i o 0 1 3 w 2 4 5 5 q Front Panel Display ...

Страница 11: ...ssigned to the corresponding keys in the case of Standard Kit 1 shown in the Drum Kit List of the separate Data List Rear Panel 6 USB TO HOST terminal Page 54 USB TO DEVICE terminal Page 56 7 SUSTAIN jack Page 14 8 AUX IN jack Page 29 9 PHONES OUTPUT jack Page 14 0 Power supply jack Page 12 For connecting to a computer For details refer to Computer related Operations page 9 When connecting use an ...

Страница 12: ...ng adaptor can result in damage to the instrument or overheating This adaptor is for indoor use only Do not expose the instrument to rain use it near water or in damp or wet conditions or use it to hold any containers such as vases bottles or glasses containing liquids which might spill into any openings When setting up the product make sure that the AC outlet you are using is easily accessible If...

Страница 13: ...aptor When is shown the power is supplied from the batteries When the AC power adap tor is connected with the batteries installed the power is supplied from the AC power adaptor and the indication is shown Remaining battery power indication You can confirm the approximate amount of remain ing battery power at the top left of the display When using Ni MH batteries follow the instructions that came ...

Страница 14: ...ke sure that the footswitch plug is properly connected to the SUSTAIN jack before turning on the power Do not use the instrument device or headphones for a long period of time at a high or uncomfortable volume level since this can cause permanent hearing loss If you experi ence any hearing loss or ringing in the ears consult a phy sician Before connecting the instrument to other electronic com pon...

Страница 15: ...r button to continuously increase or decrease the value in the corresponding direction CATEGORY buttons Use these buttons to jump to the first Voice Style or Song in the next or previous Category and call up the next or previous Function sequentially When using a power adaptor even when the power is off a small amount of electricity is still being consumed by the instrument When you are not using ...

Страница 16: ...or above the staff are indicated by 8va For a few specific chords not all notes may be shown due to space limitations in the display NOTE Indicates the source from which this instrument obtains power AC power adaptor or batteries Page 13 Appears when USB flash memory is connected to this instrument Page 56 Power source status USB connection status Indicates the current beat of playback Page 25 Ind...

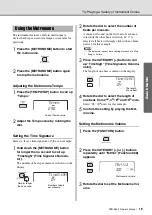
Страница 17: ...et various settings to default and simply play a Piano sound press the PORTABLE GRAND button The Voice number is set to 001 Grand Piano and the settings such as Dual and Split are turned off automat ically Selecting a Main Voice 001 234 Instrument Voices 235 258 Drum Kit Various drum and percussion sounds are assigned to individual keys Details on assign ing instruments to keys are provided in the...

Страница 18: ...n on Split The keyboard is divided into the Left hand and Right hand areas You can play a Split Voice on the Left hand area of the keyboard while playing a Main Voice and Dual Voice on the Right hand area of the key board The highest key for the Left hand area is referred to as the Split Point which can be changed from the default F 2 key For details refer to page 47 2 Press the SPLIT button again...

Страница 19: ... measure A chime will sound on the first beat of each mea sure while the other beats will click If 0 is selected all beats will simply click with no chime Select 5 for this example 3 Press the CATEGORY button to call up TimeSigD Time Signature Denomi nator The length of one beat is shown on the display 4 Rotate the dial to select the length of one beat from 2nd 4th 8th and 16th note Select 08 8th ...

Страница 20: ...t Type List of the sep arate Data List The effect and operation differs depending on the Harmony Type Refer to How to sound each Har mony Type below 4 Press the HARMONY button again to turn Harmony off Adjusting the Harmony Volume You can adjust the Harmony Volume in the Function Settings page 53 Adding Harmony Appears when the Harmony is turned on HarmType 039 Trio 02 039 Hold for longer than a s...

Страница 21: ...n The most suitable Arpeggio Type is automatically selected when you select a Main Voice but you can easily select any other Arpeggio Type 1 Hold down the ARPEGGIO TYPE but ton for longer than a second In the display ARP Type appears for a few sec onds followed by the current Arpeggio Type appears 2 Rotate the dial to select the desired Arpeggio type An Arpeggio Type List is provided in the separa...

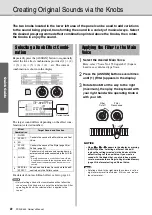
Страница 22: ...the sound of the Main Voice and Dual Voice 2 EFFECT 3 EG 4 STYLE FILTER Controls the sound of the Style page 23 or Pattern page 24 5 AUX IN Controls mainly audio sound coming from an external audio device connected to the AUX IN jack Knob B can be used to control the volume of Style Song Pattern sound with the keyboard sound main tained even if an external audio device is not con nected 6 SPECIAL ...

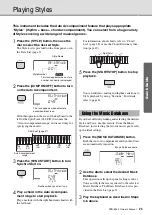
Страница 23: ...tion page 49 5 Press the START STOP button to stop playback You can add intro ending and rhythm variations to Style playback by using Sections For details refer to page 44 If you have difficulty finding and selecting the desired Style and Voice use this feature From the Music Database just selecting the favorite music genre calls up the ideal settings 1 Press the MUSIC DATABASE button Both the Aut...

Страница 24: ...ge 46 Pressing the button of the currently playing Section restarts playback from the beginning Holding down the button lets you loop play only the top portion of the Section Transposing playback by pressing any note to the left of the Split Point page 47 Unlike with the Styles only the Root can be specified the Chord Type cannot be specified Changing the sound via the Knobs Press the ASSIGN butto...

Страница 25: ...nloadable from the Yamaha website For details refer to page 9 When you transfer a Song from a computer while the USB flash memory is connected to the USB TO DEVICE terminal the transferred Song will be inserted before the first USB Song number moving all USB Song numbers later in sequence Gives you an idea of the advanced capabilities of this instrument Demonstrates many useful Voices of this inst...

Страница 26: ...mel ody percussion accompaniment etc Each of the tracks can be muted so that you can play the muted part yourself Pressing the desired Track button repeatedly will toggle the on off status Song Fast Forward Fast Reverse and Pause When the A B repeat is specified the Fast Reverse and Fast Forward will only work within the range between A and B REW FF and PAUSE button cannot be used during Song play...

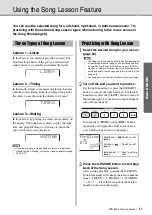
Страница 27: ...the left hand lesson press the 2 LEFT button to turn off the left hand part For the lesson using both hands turn off both the parts Pressing the 1 RIGHT and 2 LEFT buttons repeatedly will toggle the on off status of each part which can be shown on the display 3 Press the LESSON button to start play back of the Song Lesson After starting playback pressing the LESSON button repeatedly will change th...

Страница 28: ...ill play then Song playback will start again Playback of the four measures will repeat with a one measure count in To exit from this status press this button again See How You ve Done After the evaluation display has appeared the les son will start again from the beginning TIMING Lp2 007 The notation and key positions you should play are shown Both hands lesson 2 TIMING is indicated as shown Right...

Страница 29: ...UPPRESSOR but ton to turn it on 3 Press the ASSIGN button to call up b Then adjust the pan position of the sound to be cancelled with Knob A page 41 4 Press the MELODY SUPPRESSOR but ton again to turn it off When you want to adjust the volume balance between the audio device and this instrument further after the vol ume of each has been adjusted press the ASSIGN button to call up b then rotate the...

Страница 30: ...k or press the START STOP button to start recording only with playback of the Rhythm part of a Style When you select a Pattern in Step 2 play a key in the Accompaniment area or press the START STOP button to start recording with Pattern playback The current measure will be shown on the display while recording 5 Press the START STOP or REC button to stop recording When using a Style you can stop re...

Страница 31: ...While holding down the REC button press the 6 A button ACMP is auto matically turned on 3 Same as in Steps 4 to 6 page 30 in Quick Recording Recording to a Specified Track User 1 031 Song number User 1 001 pEC Track 1 will flash Press and hold User 1 001 pEC Press and hold If the memory becomes full while recording an alert message will appear and recording will stop automati cally In this case de...

Страница 32: ...e Song A clear in progress message will appear briefly on the display This lets you clear individual tracks from a User Song 1 Press the SONG button then select the desired User Song 031 040 2 From 1 5 and 6 A press the Track button to be cleared for longer than a second A confirmation message will appear on the dis play 3 Press the YES button A confirmation message will appear on the dis play To ...

Страница 33: ...elect a Registration Memory number that already contains data the previous data is deleted and overwritten by the new data Do not turn off the power while memorizing settings to the Registration Memory otherwise the data may be damaged or lost Bank 1 Bank number NOTE Writing Press and hold NOTICE Recalling Panel Settings from the Registration Memory When the SONG lamp is lit the Style or Pattern s...

Страница 34: ...key and the three highest black keys press the Standby On switch to turn the power on Connecting to a computer If you transfer the Style file from the computer to this instru ment you need to register it to this instrument for Style play back For details refer to Loading a Style File page 61 USB cable USB terminal instrument computer USB terminal NOTE Data that can be transferred from a computer t...

Страница 35: ...n 2 Use the CATEGORY and buttons to call up Chorus Function 036 After Chorus is shown for a few seconds the current Chorus Type is shown 3 Rotate the dial to select a Chorus type Play the keyboard to check the sound For infor mation about the available Chorus types refer to the Effect Type List in the Data List page 9 Some Songs and Styles use Reverb Types which cannot be selected via panel operat...

Страница 36: ...2 Hz incre ments The default value is 440 0 Hz 1 Press the FUNCTION button 2 Use the CATEGORY and buttons to call up Tuning Function 006 3 Use the dial to set the Tuning value Pitch Controls the PITCH BEND wheel The PITCH BEND wheel can be used to add smooth pitch variations to notes you play on the keyboard Roll the wheel upward to raise the pitch or downward to lower the pitch You can change the...

Страница 37: ...lecting an EQ Setting for the Best Sound Six different master equalizer EQ settings give you the best possible sound when listening through differ ent reproduction systems the instrument s internal speakers headphones or an external speaker system 1 Hold down the MELODY SUPPRESSOR button for longer than a second to call up Master EQ Function 037 MasterEQ is shown in the display for a few sec onds ...

Страница 38: ...unction 045 3 Rotate the dial to select a scale The default setting is 1 Equal Preset Scale types Setting the Base Note for Each Scale Please make sure to specify the appropriate Base Note if you select a scale other than Equal Tempera ment or create an original scale via Scale Tune func tion 1 Press the FUNCTION button 2 Use the CATEGORY or button to call up BaseNote Function 046 3 Rotate the dia...

Страница 39: ...e the note selected in step 2 The tuning range is from 64 to 63 The setting can be reset to the initial default value by pressing the YES and NO buttons simultaneously 4 Repeat steps 2 3 as desired 5 Memorize the settings here to the Regis tration Memory as desired page 33 When pressing the YES and NO buttons simulta neously after recalling an original scale memorized to Registration Memory the sc...

Страница 40: ...stom sounds that best suit your musical needs 1 Press the FUNCTION button 2 Use the CATEGORY and buttons to call up the desired item Voice parameters are indicated as below Main Voice parameters M Function 010 018 Dual Voice parameters D Function 019 028 Split Voice parameters S Function 029 034 For information about each parameter refer to the Function List on page 53 3 Rotate the dial to set the...

Страница 41: ...stain to best match the music you re playing Knob A ATTACK Adjusts the Attack Time the amount of time it takes the sound to reach maximum level when a key is played Turning the Knob to the right will increase the Attack Time thus slowing down the attack rate Knob B RELEASE Adjusts the Release Time the amount of time it takes for the sound to decay to silence after a key is released Turning the Kno...

Страница 42: ...nd like you are playing in a concert hall c EG Select the Voice 170 RsAnPad Turning Knob A all the way down makes the attack faster and lets you hear the crisp clear sound of the original Voice Turning Knob B all the way down shortens the amount of time for the sound to decay to silence after a key is released These knobs let you finely adjust the Voice to create the appropriate sound for the part...

Страница 43: ...r Quantize is shown for a few seconds the current Arpeggio Quantize value is shown 3 Rotate the dial to select a value from OFF 1 8 and 1 16 1 8 Synchronizing at the quarter notes 1 16 Synchronizing at the 8th notes OFF No synchronization Holding the Arpeggio Playback via the Footswitch You can set the instrument so that Arpeggio playback continues even after the note has been released by pressing...

Страница 44: ...ally in response on the chords you play with your left hand AUTO FILL This is automatically added before changing to Main A or B ENDING This is used for the ending of the Song When the Ending finishes the Style playback stops automatically The length of the Ending in measures differs depending on the selected Style 1 Press the STYLE button then rotate the dial to select a Style 2 Press the ACMP ON...

Страница 45: ... END ING rit button again while the Ending is playing back Synchro Stop When you press the SYNC STOP button to turn on this function the Style will only play while pressing chords in the Accompaniment range of the keyboard Releasing all the notes will stop Style playback This makes it easy to add rhythmic breaks as you perform simply by releasing your hand from the Accompani ment range of the keyb...

Страница 46: ...FECT then rotate Knob B while holding down the button of the currently playing Section Changing the Tempo A Style or Pattern can be played at any tempo you desire fast or slow 1 Press the TEMPO TAP button to call up the Tempo value in the display 2 Rotate the dial to set a tempo from 011 to 280 Press the YES and NO buttons simultane ously to instantly reset the value to the default tempo of the cu...

Страница 47: ... Split Point between 036 C1 and 096 C6 Playing Chords Without Style Playback If you press the STYLE button press the ACMP ON OFF button to turn ACMP on the ACMP ON icon appears and play the chord in the Left hand range of the keyboard with SYNC START off the chord sound will be heard without Style playback This is referred to as Stop Accompaniment The specified chord will be shown in the display a...

Страница 48: ...rument nothing is shown on the display In such a case only the rhythm and bass parts will be played Major Minor Seventh Minor Seventh Major Seventh Easy Chords This method lets you easily play chords in the accompaniment range of the keyboard using only one two or three fingers For root C To play a major chord Press the root note of the chord To play a minor chord Press the root note together with...

Страница 49: ...between CHORD TYPE and ROOT The notes you should play for the specified chord root note and chord type are conve niently shown in the display both as nota tion and in the keyboard diagram To call up possible inversions of the chord press the YES NO buttons 3 Following the notation and keyboard diagram in the display try playing a chord in the range to the left of CHORD TYPE When you ve played the ...

Страница 50: ... to start play back To stop playback press the DEMO button again Random Song Playback The order of Song repeat playback via the DEMO BGM button can be changed between the numerical order and random order 1 Press the FUNCTION button 2 Press the CATEGORY and buttons several times to call up PlayMode Function 074 PlayMode is shown for a few seconds followed by the current playback mode Normal or Ran ...

Страница 51: ...nge the Melody Voice of the current Pre set Song temporarily to any other desired Voice 1 Press the SONG button select the desired Preset Song then start play back 2 Press the VOICE button then rotate the dial to select the desired Voice 3 Hold down the VOICE button for longer than a second After SONG MELODY VOICE is shown for a few seconds the Melody Voice of the Song will be changed to that sele...

Страница 52: ...d even if you turn off the power and can be transferred to the computer as Backup Data page 34 Function List StyleVol 100 001 SplitPnt 054 008 Current item Current Function number Direct numeric entry Press simultane ously to recall the default setting Increment value by 1 Execute Decrement value by 1 Cancel Function Number Function Display Range Settings Default Value Description Volume 001 Style...

Страница 53: ...the Reverb effect 024 Chorus Depth D Chorus 000 127 Determines how much of the Dual Voice s signal is sent to the Chorus effect 025 Attack Time D Attack 000 127 064 Determines how fast the volume of the Dual Voice reaches the Attack level when the note is pressed The larger the value the slower the attack rate The smaller the value the faster the attack rate 026 Release Time D Releas 000 127 064 D...

Страница 54: ...messages generated via keyboard per formance are transmitted ON or not OFF from the USB TO HOST terminal 063 Style Out StyleOut ON OFF OFF Determines whether MIDI messages generated via Style play back are transmitted ON or not OFF from the USB TO HOST terminal 064 Song Out SongOut ON OFF OFF Determines whether MIDI messages generated via Song play back are transmitted ON or not OFF from the USB T...

Страница 55: ...termines whether Demo cancel is enabled or not When this is set to ON the Demo Song will not play even if the DEMO BGM button is pressed Auto Power Off page 15 076 Auto Power Off Time AutoOff OFF 5 10 15 30 60 120 min 30 minutes Specifies the time that will elapse before the instrument s power is automatically turned off Battery page 13 077 Battery Type Battery Type 1 Alkaline 2 Ni MH 1 Alkaline S...

Страница 56: ...device as well as read data from the connected device The number of USB flash memory to be used Only one USB flash memory device can be connected to the USB TO DEVICE terminal Formatting USB flash memory You should format the USB storage device only with this instrument page 58 A USB flash memory formatted on another device may not operate properly To protect your data write protect To prevent imp...

Страница 57: ... File Control Display List GrandPno Load STY Hold for longer than a second Display File Control function Page Format Formatting a USB Flash Memory 58 Save USR Saving User Data to a USB Flash Memory 59 Save SMF Saving a User Song as SMF to a USB Flash Memory 60 Load USR Loading User Data from a USB Flash Memory 60 Load STY Loading a Style File 61 Del USR Deleting a User File in a USB Flash Memory 6...

Страница 58: ...g so may result in data loss Format NOTICE Recognizable file location in the USB flash memory for Song playback page 25 Song title display language File names containing Japanese katakana charac ters will be properly displayed if the instrument s display language is set to Japanese All display information other than file names will be dis played in English even if Japanese is selected The display ...

Страница 59: ...or the YES button to execute the Save operation After a while a message indicating completion of the operation appears and a User file usr will be saved in a USER FILES folder which will auto matically be created on the USB flash memory 6 Press the FUNCTION button to exit from the File Control display The extension usr of the User File will not be shown on the display of this instrument Confirm th...

Страница 60: ...a USB Flash Memory A User data page 59 saved as a User file usr to the USB flash memory can be loaded to this instrument SMF Standard MIDI File format With this format various events via the keyboard performance such as note on off and Voice selec tion will be recorded as MIDI data The SMF For mat 0 and Format 1 are available A large number of MIDI devices are compatible with SMF For mat 0 and mos...

Страница 61: ...re available Loading of a Style file sty saved on the root directory on the USB flash memory Loading of a Style file sty transferred from a computer via the Musicsoft Downloader and stored in the internal memory of this instrument 1 Hold the FUNCTION button for longer than a second to call up the File Control display 2 Use the CATEGORY and buttons to call up Load STY 3 Press the 0 EXECUTE button A...

Страница 62: ...ation appears 6 Press the FUNCTION button to exit from the File Control display Deleting a SMF File in the USB Flash Memory You can delete a SMF file that has been saved in the USB flash memory via the Save SMF operation page 60 1 Hold the FUNCTION button for longer than a second to call up the File Control display 2 Use the CATEGORY and buttons to call up Del SMF 3 Press the 0 EXECUTE button As a...

Страница 63: ...is cur rently unavailable since the media is being accessed Displayed when attempting to save a User Song recorded Pattern as SMF format 0 Complet Indicates the specified job completion such as data saving and transmission Data Err Displayed when the user song contains illegal data Disk Ful Displayed when saving data cannot be exe cuted since the media memory becomes full Error Displayed when a fi...

Страница 64: ... or Song You have exceeded 32 simultaneous notes which is the maximum polyphony the maximum amount of notes that can be played simultaneously of this instrument If the Main Dual and Split Voices are being used along with playback of Arpeggio Style Pat tern or Song some notes sounds may be omitted or stolen The sound of the Voice changes from note to note This is normal The tone generation method u...

Страница 65: ...ongs 10 Number of Tracks 6 5 Melody 1 Style Pattern Data Capacity Approx 19 000 notes when only melody tracks are recorded Compatible Data Format Playback SMF Formats 0 1 Recording Original File Format SMF0 conversion function Function Lesson Guide 1 LISTENING 2 TIMING 3 WAITING Repeat Learn Chord Dictionary Registration Number of Buttons 4 8 banks Overall Metronome Yes Tempo Range 11 280 Transpos...

Страница 66: ...2 41 EG Envelope Generator 22 41 ENDING 44 EQ Setting 37 Equal 38 Error 63 Excellent 28 Exit 57 63 External Audio Device 29 External Clock 54 F Fast Forward 26 Fast Reverse 26 File Control Display List 57 File Ful 63 FILTER 22 41 Filter Cutoff 53 Filter Resonance 53 Fine Tuning 36 Flash Clear 34 Footswitch 14 43 Format 57 58 Front Panel 10 Function 16 52 Function List 52 G GM System Level 1 8 Good...

Страница 67: ...8 54 Scale Tuning 38 54 Section 24 44 46 SMF Standard MIDI File 60 62 Song 25 50 Song Book 9 Song Category 25 Song Data 9 Song Out 54 Song title display language 58 Song Volume 51 52 SPECIAL EFFECT 22 42 Specifications 65 Split Point 18 23 47 52 Split Voice 18 40 53 Style 23 44 STYLE FILE 8 STYLE FILTER 22 41 Style Out 54 Style Volume 47 52 SUPPRESSOR PAN 41 Synchro Start 23 44 Synchro Stop 45 T T...

Страница 68: ...MEMO ...

Страница 69: ...of of purchase documents will cause this warranty to be void This warranty covers only the Original Owner and is not transferable In Order to Obtain Warranty Service Warranty service will only be provided for defective products within the Warranted Area Contact your local authorized Yamaha dealer who will advise you of the procedures to be followed If this is not successful contact Yamaha at the a...

Страница 70: ......

Страница 71: ...0 FINLAND F Musiikki Oy Kluuvikatu 6 P O Box 260 SF 00101 Helsinki Finland Tel 09 618511 NORWAY Yamaha Music Europe GmbH Germany Norwegian Branch Grini Næringspark 1 N 1361 Østerås Norway Tel 67 16 78 00 ICELAND Skifan HF Skeifan 17 P O Box 8120 IS 128 Reykjavik Iceland Tel 525 5000 RUSSIA Yamaha Music Russia LLC Room 37 bld 7 Kievskaya street Moscow 121059 Russia Tel 495 626 5005 OTHER EUROPEAN C...

Страница 72: ...ZH22090 C S G DMI Development Division 2014 Yamaha Corporation Published 03 2014 PO B0 Printed in China Yamaha Global Site http www yamaha com Yamaha Downloads http download yamaha com ...

Отзывы: