■
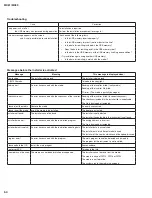
PROGRAM INSTALLATION PROCEDURE
[Caution !]
•
Check to ensure that the USB memory is connected in the correct direction.
(Incorrect connection will cause damage to the USB [TO DEVICE] terminal.)
•
Don’t turn off the power during installation.
•
Don’t remove the USB memory during installation.
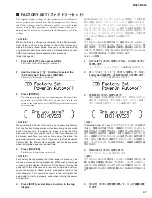
1. Connect the USB memory including the data for rewriting (MX4961SETUP.PRG) to the
USB [ TO DEVICE] terminal of the instrument.
2. While pressing [
] (Play/Pause) button, turn on the [ ] (Standby/On) switch.
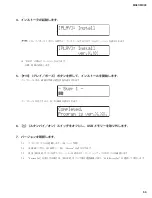
* The version displayed here varies depending on the program in the instrument, i.e., it is not always “1.00”.
Keep pressing until the following message is displayed.
* If “Please insert the media.” is displayed, no USB memory has been inserted or the USB memory cannot be recognized.
Insert the USB memory properly, and the procedure advances.
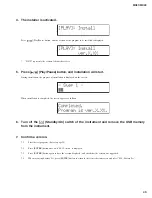
3. The installer is being read .
<Rear side>
USB memory
<Rear side>
<Front side>
[ ] (Standby/On) switch
[ ] (Play/Pause) button
48
MX61/MX49
Содержание MX61
Страница 15: ...R8A02042BG YC479A00 SWX08 DM IC101 15 MX61 MX49...
Страница 16: ...16 MX61 MX49...
Страница 21: ...B B B B DM Circuit Board 2NA ZA67560 1 Pattern side 21 MX61 MX49...
Страница 26: ...to DM CN402 to 61H CN3 F F F F 49L Circuit Board MX49 only Component side 2NA ZA13490 26 MX61 MX49...
Страница 27: ...G G G G 49L Circuit Board MX49 only 2NA ZA13490 Pattern side 27 MX61 MX49...
Страница 53: ...6 USB 7 7 1 38 7 2 ENTER 1 001 Version 7 3 ENTER 7 4 Factory Set ENTER 038 Factory Set 4 X XX 5 53 MX61 MX49...


