background image

Perio

d

ic maintenance an

d

 a

d

justment

7-30

7

EAU43602

Checkin

g

 an

d

 lu

b

ricatin

g

 the 

b

rake an

d

 clutch levers

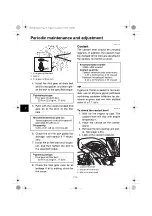
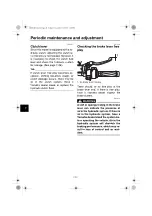
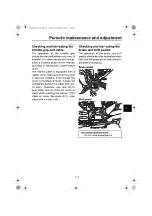
The operation of the brake and clutch
levers should be checked before each
ride, and the lever pivots should be lu-
bricated if necessary.

Brake lever

Clutch lever

EAU23215

Checkin

g

 an

d

 lu

b

ricatin

g

 the 

centerstan

d

 an

d

 si

d

estan

d

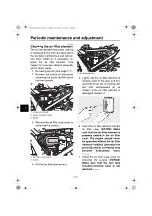
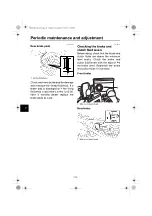
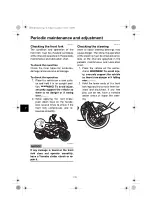
The operation of the centerstand and
sidestand should be checked before
each ride, and the pivots and metal-to-
metal contact surfaces should be lubri-
cated if necessary.

WARNING

EWA10742

If the centerstan

d

 or si

d

estan

d


d

oes

not move up an

d


d

own smoothly,

have a Yamaha 

d

ealer check or re-

pair it. Otherwise, the centerstan

d

 or

si

d

estan

d

 coul

d

 contact the 

g

roun

d

an

d


d

istract the operator, resultin

g

in a possi

b

le loss of control.

Recommen

d

e

d

 lu

b

ricant:

Silicone grease

Recommen

d

e

d

 lu

b

ricant:

Lithium-soap-based grease

UB9614E0.book  Page 30  Friday, November 15, 2019  1:30 PM

Содержание FJR13ESM 2020

Страница 1: ...DIC183 OWNER S MANUAL FJR13ESM FJR13ESMC B96 28199 15 LIT 11626 34 41 FJR1300AE MOTORCYCLE Read this manual carefully before oper ating this vehicle...

Страница 2: ...reproductive harm To minimize exposure avoid breathing exhaust do not idle the engine except as necessary service your vehicle in a well ventilated area and wear gloves or wash your hands frequently...

Страница 3: ...To maintain these high standards it is important that you and your Yamaha dealer pay close attention to the recommended maintenance schedules and operating instructions contained within this manual Ya...

Страница 4: ...hazardous situation which if not avoided could result in death or serious injury A NOTICE indicates special precautions that must be taken to avoid damage to the vehi cle or other property A TIP prov...

Страница 5: ...ut off system 4 44 Cornering lights 4 46 For your safety pre operation checks 5 1 Operation and important riding points 6 1 Starting the engine 6 2 Shifting 6 3 Engine break in 6 4 Parking 6 5 Periodi...

Страница 6: ...the fuses 7 35 Vehicle lights 7 36 Troubleshooting 7 37 Troubleshooting charts 7 38 Motorcycle care and storage 8 1 Matte color caution 8 1 Care 8 1 Storage 8 4 Specifications 9 1 Consumer information...

Страница 7: ...ey contain important in formation for safe and proper operation of your vehicle Never remove any labels from your vehicle If a label becomes difficult to read or comes off a replacement label is avail...

Страница 8: ...SION HOSE ROUTING 1MC 21686 00 VACUUM HOSE ROUTING 13S 21684 10 INTAKE MANIFOLD PRESS SENSOR 1 2 3 4 WARNING BEFORE YOU OPERATE THIS VEHICLE READ THE OWNER S MANUAL AND ALL LABELS ALWAYS WEAR AN APPRO...

Страница 9: ...d cleaner gasoline or solvent will damage windshield Use neutral detergent 4B5 2815K 00 250 kPa 2 50 kgf cm2 36 psi 290 kPa 2 90 kgf cm2 42 psi 250 kPa 2 50 kgf cm2 36 psi 290 kPa 2 90 kgf cm2 42 psi...

Страница 10: ...Safe Riding Perform the pre operation checks each time you use the vehicle to make sure it is in safe operating condition Failure to inspect or maintain the vehi cle properly increases the possibilit...

Страница 11: ...main tain control of the motorcycle The passenger should always hold onto the operator the seat strap or grab bar if equipped with both hands and keep both feet on the passenger footrests Never carry...

Страница 12: ...of the motorcycle is changed To avoid the possibility of an accident use extreme caution when adding cargo or accessories to your motorcycle Use extra care when riding a motorcycle that has added car...

Страница 13: ...formed to your vehicle that change any of the vehicle s design or operation characteristics can put you and others at greater risk of serious injury or death You are responsible for injuries related t...

Страница 14: ...Transporting the Motorcycle Be sure to observe following instruc tions before transporting the motorcy cle in another vehicle Remove all loose items from the motorcycle Check that the fuel cock if eq...

Страница 15: ...4 Final gear oil filler bolt page 7 15 5 Final gear oil drain bolt page 7 15 6 Air filter element page 7 18 7 Shift pedal page 4 22 8 Engine oil filler cap page 7 11 9 Engine oil filter cartridge page...

Страница 16: ...ment page 4 33 2 Fuel tank cap page 4 26 3 Electronically adjustable suspension system page 4 38 4 Windshield page 4 10 5 Fuses page 7 35 6 Battery page 7 33 7 Brake pedal page 4 23 8 Rear brake fluid...

Страница 17: ...ge 4 20 4 Clutch fluid reservoir page 7 26 5 Multi function meter unit page 4 7 6 Main switch steering lock page 4 1 7 Front brake fluid reservoir page 7 26 8 Right handlebar switches page 4 20 9 Brak...

Страница 18: ...d EAU10662 OFF All electrical systems are off The key can be removed WARNING EWA10062 Never turn the key to OFF or LOCK while the vehicle is moving Otherwise the electrical systems will be switched of...

Страница 19: ...sponding turn signal lights are flashing EAU11061 Neutral indicator light This indicator light comes on when the transmission is in the neutral position EAU11081 High beam indicator light This indicat...

Страница 20: ...this occurs have a Yamaha dealer check the on board diagnostic system TIP When the vehicle is turned on the light will come on for a few seconds and then go off If the light does not come on or if the...

Страница 21: ...to maintain a set cruising speed The cruise control system operates only when riding in 3rd 4th or 5th gear at speeds between about 50 km h 31 mi h and 160 km h 100 mi h or 6th gear at speeds between...

Страница 22: ...0 km h 1 2 mi h Hold ing the RES or SET side of the cruise control setting switch down will increase or decrease the speed contin uously until the switch is released You can also manually increase yo...

Страница 23: ...od el is electronically controlled and is linked with the other control systems The cruise control system will auto matically become deactivated under the following conditions The cruise control syste...

Страница 24: ...akes When the brakes are applied the cruise control system will become deac tivated EAU58215 Multi function meter unit WARNING EWA12423 Be sure to stop the vehicle before making any setting changes to...

Страница 25: ...s the vehicle s traveling speed Tachometer The electric tachometer allows the rid er to monitor the engine speed and keep it within the ideal power range When the key is turned to ON the ta chometer n...

Страница 26: ...icle is stopped TIP Consider the following tips to reduce fuel consumption Avoid high engine speeds during acceleration Travel at a constant speed Select the transmission gear that is appropriate for...

Страница 27: ...he grip warmer This vehicle is equipped with grip warmers which can only be used when the engine is running There are 4 grip warmer settings To increase the grip warmer tempera ture push the side of t...

Страница 28: ...tance traveled by the vehicle Tripmeter displays TRIP 1 and TRIP 2 show the dis tance traveled since they were last set to zero TIP The odometer will lock at 999999 The tripmeters will reset and con t...

Страница 29: ...e that can be shown is 99 59 This timer automatically resets when the key is turned to OFF TIP There are also TIME 2 and TIME 3 elapsed time displays but they cannot be set to the information display...

Страница 30: ...the information display that contains the average fuel consumption display Push the RESET button briefly so that the average fuel consumption dis play flashes and then push the RE SET button again fo...

Страница 31: ...and high settings to 10 tem perature levels This function allows you to check and reset the OIL oil change interval dis tance traveled and the FREE 1 and FREE 2 maintenance intervals This function al...

Страница 32: ...Use the select switch to highlight Middle or Low and then chan ge the setting using the same pro cedure that was used for the high setting 5 When you are finished changing the settings use the select...

Страница 33: ...m to reset 3 While the selected item is flashing push the RESET button for at least 2 seconds 4 Push the MENU switch to return to the setting mode menu Selecting the units 1 Use the select switch to h...

Страница 34: ...d then push the MENU switch again 7 Use the select switch to highlight and then push the MENU switch to return to the setting mode menu Selecting the display items 1 Use the select switch to highlight...

Страница 35: ...the select switch to highlight Brightness 2 Push the MENU switch 3 Use the select switch to select the desired brightness level and then push the MENU switch to return to the setting mode menu Setting...

Страница 36: ...sh the MENU switch to return to the setting mode menu Resetting all of the display items 1 Use the select switch to highlight All Reset 2 Push the MENU switch 3 Use the select switch to highlight YES...

Страница 37: ...e low speed range to the high speed range Sports mode S This mode offers a sportier engine re sponse in the low to mid speed range compared to the touring mode EAU1234M Handlebar switches Left Right E...

Страница 38: ...rd lights are used in case of an emergency or to warn other drivers when your vehicle is stopped where it might be a traffic hazard NOTICE ECA10062 Do not use the hazard lights for an extended length...

Страница 39: ...on of the clutch lever can be adjusted To adjust the distance be tween the clutch lever and the handle bar gently push the lever away from the handlebar and rotate the position adjusting dial TIP Make...

Страница 40: ...adjusting dial Make sure the setting number on the adjust ing dial aligns with the match mark on the brake lever EAU39542 Brake pedal The brake pedal is located on the right side of the vehicle This...

Страница 41: ...raking if a malfunction occurs TIP The ABS performs a self diagno sis test each time the vehicle first starts off after the key is turned to ON and the vehicle has traveled at a speed of 10 km h 6 mi...

Страница 42: ...while braking and cannot prevent front wheel slip ping As with any vehicle approach surfaces that may be slippery with caution and avoid especially slip pery surfaces Turning TCS off or on When the ve...

Страница 43: ...or engine trou ble warning light remain on after reset ting ride cautiously and have a Yamaha dealer check the vehicle as soon as possible EAU13076 Fuel tank cap To open the fuel tank cap Open the fue...

Страница 44: ...f spilled fuel with a clean dry soft cloth since fuel may deteriorate painted surfaces or plastic parts ECA10072 4 Be sure to securely close the fuel tank cap WARNING EWA15152 Gasoline is poisonous an...

Страница 45: ...anol is not recommended by Yamaha because it can cause damage to the fuel system or vehicle performance problems EAU48792 Fuel tank breather overflow hose TIP For California See page 7 11 for breather...

Страница 46: ...work Do not allow the engine to idle more than a few minutes Long idling can cause a build up of heat NOTICE ECA10702 Use only unleaded gasoline The use of leaded gasoline will cause unre pairable dam...

Страница 47: ...1 Insert the projection on the front of the rider seat into the seat holder as shown and then push the rear of the seat down to lock it in place 2 Install the passenger seat TIP Make sure that the sea...

Страница 48: ...tion adjuster by pulling it upward 3 Move the rider seat holder cover to the lower position as shown 4 Install the rider seat height posi tion adjuster so that the H mark is aligned with the match ma...

Страница 49: ...the rider seat height posi tion adjuster so that the L mark is aligned with the match mark 5 Insert the projection on the front of the rider seat into seat holder A as shown 6 Align the projection on...

Страница 50: ...to strong shocks or moisture Do not obstruct the IMU breath er hole and do not clean it with compressed air When storing documents or other items in a storage compartment be sure to wrap them in a pla...

Страница 51: ...accessory box 1 Fold the accessory box lid down 2 Remove the key NOTICE ECA11802 Do not place heat sensitive items in the accessory box The accessory box can get hot when the engine is running or the...

Страница 52: ...ng more or less load than usual Obey local laws and regulations when ad justing the headlights To raise the headlight beams turn the knobs in direction a To lower the headlight beams turn the knobs in...

Страница 53: ...the up per slots and then slide the panel backward 4 Install the quick fastener To close a cowling vent 1 Remove the quick fastener 2 Slide the cowling vent panel for ward to unhook its projections fr...

Страница 54: ...of this vehicle can be folded forward or backward for parking in narrow spaces Fold the mir rors back to their original position be fore riding WARNING EWA14372 Be sure to fold the rear view mirrors...

Страница 55: ...pension damping forces accord ingly See page 4 40 About cold temperature opera tion When using the preload adjust ing function there should be no weight on the vehicle When using the preload adjust in...

Страница 56: ...witch is turned off or the engine is stopped while the preload is being set the following preload setting pictogram will flash to alert you that the current preload setting does not match the pictogra...

Страница 57: ...ly adjust the damping force each damping for ce setting can be set to 7 different lev els TIP If the preload setting was not complet ed correctly The damping force setting and setting level will flash...

Страница 58: ...absorber assembly contains highly pressurized nitrogen gas Read and understand the fol lowing information before handling the shock absorber assembly Do not tamper with or attempt to open the cylinder...

Страница 59: ...CE ECA15432 The accessory connected to the auxiliary DC jack should not be used with the engine turned off and the load must never exceed 30 W 2 5 A otherwise the fuse may blow or the battery may disc...

Страница 60: ...lowing section for an explanation of the ignition circuit cut off system WARNING EWA10242 The vehicle must not be ridden with the sidestand down or if the side stand cannot be properly moved up or doe...

Страница 61: ...the sidestand is up Also it will stop the running engine should the sidestand be lowered while the trans mission is in gear Periodically check the system via the following procedure TIP This check is...

Страница 62: ...er the engine has stalled 11 Move the sidestand up 12 Pull the clutch lever 13 Push the start switch Does the engine start The system is OK The motorcycle can be ridden The neutral switch may not be w...

Страница 63: ...ing to the direction of the turn the cornering lights for that side come on The lights come on in sequence from the inside outward depending on the lean angle of the vehicle TIP When the vehicle is fi...

Страница 64: ...tions cracks or damage and check hose connection 4 27 4 28 Engine oil Check oil level in engine If necessary add recommended oil to specified level Check vehicle for oil leakage 7 11 Final gear oil C...

Страница 65: ...dition and tread depth Check air pressure Correct if necessary 7 21 7 23 Brake and shift pedals Make sure that operation is smooth Lubricate pedal pivoting points if necessary 7 29 Brake and clutch le...

Страница 66: ...U73461 TIP This model is equipped with an inertial measurement unit IMU that will stop the engine in case of turnover In this case turn the main switch off and then back on before attempting to restar...

Страница 67: ...in dicator light remains on see page 4 2 for the corresponding warning and indicator light circuit check The ABS warning light should come on when the key is turned to ON and then go off after travel...

Страница 68: ...e 1 Pull the clutch lever to disengage the clutch 2 Shift the transmission into first gear The neutral indicator light should go out 3 Open the throttle gradually and at the same time release the clut...

Страница 69: ...period in the life of your engine than the period between 0 and 1600 km 1000 mi For this reason you should read the fol lowing material carefully Since the engine is brand new do not put an excessive...

Страница 70: ...y from the main switch WARNING EWA10312 Since the engine and exhaust system can become very hot park in a place where pedestri ans or children are not likely to touch them and be burned Do not park on...

Страница 71: ...ntain the vehi cle or performing maintenance ac tivities incorrectly may increase your risk of injury or death during service or while using the vehicle If you are not familiar with vehicle ser vice h...

Страница 72: ...y repair establishment or individual that is certified if applicable Yamaha dealers are trained and equipped to perform these particular services EAU85230 Tool kit The tool kit is in the location show...

Страница 73: ...Spark plugs Check condition Adjust gap and clean Replace 3 Valve clearance Check and adjust valve clear ance when engine is cold Every 26600 mi 42000 km 4 Crankcase breather system Check breather hose...

Страница 74: ...akage Replace brake pads if neces sary 6 Brake hoses Check for cracks or damage Check for correct routing and clamping Replace Every 4 years 7 Brake fluid Change Every 2 years 8 Wheels Check runout an...

Страница 75: ...peration and for oil leakage Replace if necessary 21 Shock absorber as sembly Check operation and for oil leakage Replace if necessary 22 Rear suspension link pivots Apply molybdenum disulfide grease...

Страница 76: ...ce the oil seals on the inner parts of the brake or clutch master cylin ders caliper cylinders and clutch release cylinder every two years Replace the brake and clutch hoses every four years or if cra...

Страница 77: ...talled EAU54133 Panel A To remove the panel 1 Remove the bolts and the quick fasteners 2 Release the slot at the rear of the panel from the projection on the right side cowling 3 Release the slot at t...

Страница 78: ...as shown TIP Make sure that the fuses are covered and located to the inside of the panel lip 2 Install the bolts and the quick fas teners Panels B and C To remove a panel 1 Remove the seats See page 4...

Страница 79: ...slide the panel forward to release it in the rear as shown To install a panel 1 Place the panel in the original po sition and then install the bolts and the quick fastener screws 2 Install the seats 1...

Страница 80: ...cessive carbon or other deposits it should be replaced Before installing a spark plug the spark plug gap should be measured with a wire thickness gauge and if necessary adjusted to specification Clean...

Страница 81: ...lter car tridge replaced at the intervals speci fied in the periodic maintenance and lubrication chart To check the engine oil level 1 Place the vehicle on the center stand A slight tilt to the side c...

Страница 82: ...3 Place an oil pan under the engine to collect the used oil 4 Remove the engine oil filler cap the engine oil drain bolt and its gasket to drain the oil from the crankcase TIP Skip steps 5 7 if the oi...

Страница 83: ...clutch do not mix any chemical additives Do not use oils with a diesel speci fication of CD or oils of a high er quality than specified In addition do not use oils labeled ENERGY CONSERVING II or hig...

Страница 84: ...alube YAMALUBE oil is a Genuine YAMAHA Part born of the engineers passion and belief that engine oil is an impor tant liquid engine component We form teams of specialists in the fields of me chanical...

Страница 85: ...ing 2 Remove the final gear oil filler bolt and its gasket and then check the oil level in the final gear case TIP The oil level should be at the brim of the filler hole 3 If the oil is below the brim...

Страница 86: ...itors for alu minum engines and mix with distilled water at a 1 1 ratio EAU54164 To check the coolant level 1 Wait for the engine to cool The coolant level will vary with engine temperature 2 Place th...

Страница 87: ...ne If water has been used instead of coolant replace it with cool ant as soon as possible other wise the cooling system will not be protected against frost and corrosion If water has been added to the...

Страница 88: ...ement to remove most of the dust and dirt and then blow the remaining dirt out with compressed air as shown If the air filter element is damaged replace it 6 Insert the air filter element into the air...

Страница 89: ...nd the quick fastener screws 9 Install the panel EAU44735 Checking the engine idling speed Check the engine idling speed and if necessary have it corrected by a Yamaha dealer 1 Fuel tank breather over...

Страница 90: ...rance changes with use they must be checked and adjusted at the intervals specified in the periodic maintenance chart Unadjusted valves can result in improper air fuel mixture engine noise and eventua...

Страница 91: ...re air pressure must be adjusted in accordance with the riding speed and with the total weight of rider passenger car go and accessories approved for this model WARNING EWA10512 Never overload your ve...

Страница 92: ...accompanied by carcass deformation is an evidence of ageing Old and aged tires shall be checked by tire specialists to ascertain their suitability for further use WARNING EWA10902 The front and rear...

Страница 93: ...armed up before a high speed run Always adjust the tire air pres sure according to the operating conditions EAU21963 Cast wheels To maximize the performance durabil ity and safe operation of your vehi...

Страница 94: ...r bleed or replace the hydraulic clutch fluid EAU37914 Checking the brake lever free play There should be no free play at the brake lever end If there is free play have a Yamaha dealer inspect the bra...

Страница 95: ...checked for wear at the intervals spec ified in the periodic maintenance and lubrication chart EAU43432 Front brake pads The front brake calipers are equipped with two sets of brake pads Each front b...

Страница 96: ...eplace the brake pads as a set EAU40272 Checking the brake and clutch fluid levels Before riding check that the brake and clutch fluids are above the minimum level marks Check the brake and clutch flu...

Страница 97: ...may result in vapor lock and dirt may clog the ABS hy draulic unit valves NOTICE ECA17641 Brake fluid may damage painted surfaces or plastic parts Always clean up spilled fluid immediately The brake o...

Страница 98: ...h hoses Replace every four years EAU23098 Checking and lubricating the cables The operation of all control cables and the condition of the cables should be checked before each ride and the ca bles and...

Страница 99: ...lled Even though the cover is installed correctly it does not completely protect the cable from wa ter entry Therefore use care not to pour water directly onto the cover or cable when washing the vehi...

Страница 100: ...the centerstand and sidestand should be checked before each ride and the pivots and metal to metal contact surfaces should be lubri cated if necessary WARNING EWA10742 If the centerstand or sidestand...

Страница 101: ...ified in the periodic maintenance and lubrication chart EAUM2703 Lubricating the swingarm piv ots The swingarm pivots must be lubricat ed by a Yamaha dealer at the intervals specified in the periodic...

Страница 102: ...everal times to check if the front fork compresses and re bounds smoothly NOTICE ECA10591 If any damage is found or the front fork does not operate smoothly have a Yamaha dealer check or re pair it EA...

Страница 103: ...te or to add distilled water However the battery lead connections need to be checked and if necessary tight ened WARNING EWA10761 Electrolyte is poisonous and dangerous since it contains sul furic aci...

Страница 104: ...e battery To store the battery 1 If the vehicle will not be used for more than one month remove the battery fully charge it and then place it in a cool dry place NOTICE When removing the battery be su...

Страница 105: ...to the electrical system and possibly a fire EWA15132 1 Main fuse 2 Spare fuse 3 Cruise control fuse 4 Brake light fuse 5 Fuse box 6 Main fuse 2 5 1 3 4 2 5 2 6 1 ABS motor fuse 2 ABS solenoid fuse 3...

Страница 106: ...E ECA16581 Do not affix any type of tinted film or stickers to the headlight lens Specified fuses Main fuse 50 0 A Main fuse 2 30 0 A Terminal fuse 1 3 0 A Headlight fuse 7 5 A Brake light fuse 1 0 A...

Страница 107: ...ire any repair take it to a Yamaha dealer whose skilled technicians have the necessary tools experience and know how to service the motorcycle properly Use only genuine Yamaha replace ment parts Imita...

Страница 108: ...ave a Yamaha dealer charge the battery if necessary 2 Battery The battery is good The engine does not start Check the ignition 3 Ignition Wet Operate the electric starter Dry There is compression Ther...

Страница 109: ...d press down on the cap while turning it counterclockwise and then remove the cap TIP If coolant is not available tap water can be temporarily used instead provided that it is changed to the recommend...

Страница 110: ...of the vehicle more frequently Be sure to wash the vehicle after riding in the rain or near the sea because salt is corro sive to metals TIP The roads of heavy snowfall areas may be sprayed with salt...

Страница 111: ...llow product instructions ECA26290 Washing 1 Rinse off any degreaser and spray down the vehicle with a garden hose Use only enough pressure to do the job Avoid spraying wa ter directly into the muffle...

Страница 112: ...ch up minor paint damage caused by stones etc 7 Wax all painted surfaces using a non abrasive wax or use a detail spray for motorcycles YAMALUBE Spray Polish Ins tant Detailer 8 When finished cleaning...

Страница 113: ...he fuel cock lever to the off position 5 For vehicles with a carburetor To prevent fuel deposits from build ing up drain the fuel in the carbu retor float chamber into a clean container Retighten the...

Страница 114: ...moisture from entering it 10 Remove the battery and fully char ge it or attach a maintenance charger to keep the battery opti mally charged NOTICE Confirm that the battery and its charger are compatib...

Страница 115: ...I service SG type or higher JASO standard MA Engine oil quantity Oil change 3 80 L 4 02 US qt 3 34 Imp qt With oil filter removal 4 00 L 4 23 US qt 3 52 Imp qt Final gear oil Type Yamaha genuine shaft...

Страница 116: ...nger cargo and accessories Unified brake system Operation Activated by rear brake Front brake Type Hydraulic dual disc brake Rear brake Type Hydraulic single disc brake Front suspension Type Telescopi...

Страница 117: ...NUMBER ENGINE SERIAL NUMBER MODEL LABEL INFORMATION KEY IDENTIFICATION NUMBER EAU26401 Vehicle identification number The vehicle identification number is stamped into the steering head pipe Record thi...

Страница 118: ...r is stamped into the key tag Record this number in the space provided and use it for reference when ordering a new key EAU48271 Vehicle Emission Control Informa tion label The Vehicle Emission Contro...

Страница 119: ...icle such as when maintenance checks or service proce dures are performed Vehicle data uploaded will be handled appropriately according to the follow ing Privacy Policy Privacy Policy Yamaha will not...

Страница 120: ...Consumer information 10 4 10 When the data is not related to an individual vehicle nor owner UB9615E0 book Page 4 Friday July 17 2020 10 40 AM...

Страница 121: ...finds that a safety defect exists in a group of vehicles it may order a recall and remedy campaign However NHTSA cannot become involved in individual problems between you your dealer or Yamaha Motor C...

Страница 122: ...e for the purpose of noise control prior to its sale or delivery to the ultimate purchaser or while it is in use or 2 the use of the vehicle after such device or el ement of design has been removed or...

Страница 123: ...equired It is not acceptable proof of maintenance work Maintenance interval Date of service Mileage Servicing dealer name and address Remarks 600 mi 1000 km or 1 month 4000 mi 7000 km or 6 months 8000...

Страница 124: ...rchaser to any subsequent purchaser it is imperative that the machine be inspected and registered for warranty by an authorized Yamaha motorcycle dealer In order for this warranty to remain in effect...

Страница 125: ...upon your request at any later date 3 Each Yamaha motorcycle dealer is held responsible for his setup service and warranty repair work Q Is the warranty transferable to second owners A Yes The remaind...

Страница 126: ...limitations Coverage isn t limited to moving parts or the drivetrain like many other plans And Y E S covers manufacturing defects just like the warranty See the sample contract at your Yamaha dealer t...

Страница 127: ...protection even after your Yamaha Limited Warranty expires A special note If visiting your dealer isn t convenient contact Yamaha with your VIN number and we ll be happy to help you get the Y E S cov...

Страница 128: ...e warning light 4 3 F Final gear oil 7 15 Front and rear brake pads checking 7 25 Front fork checking 7 32 Fuel 4 27 Fuel tank breather overflow hose 4 28 Fuel tank cap 4 26 Fuses replacing 7 35 H Han...

Страница 129: ...free play checking 7 20 Tires 7 21 Tool kit 7 2 Traction control system 4 25 Traction control system indicator light 4 3 Troubleshooting 7 37 Troubleshooting charts 7 38 Turn signal indicator lights 4...

Страница 130: ...UB9614E0 book Page 3 Friday November 15 2019 1 30 PM...

Страница 131: ...right right out of the box Yamalube Take care of your Yamaha with legendary Yamalube oils lubricants and care products They re formulated and approved by the toughest judges we know the Yamaha enginee...

Страница 132: ...DIC183 PRINTED IN JAPAN 2020 11 0 3 1 CR E...

Отзывы: