CVP-809/CVP-805 Reference Manual
108
Wireless LAN Settings
This icon is shown only when the USB Wireless LAN adaptor (UD-WL01) is connected to the [USB TO DEVICE]
terminal. Make sure the adaptor is connected before executing any operations.
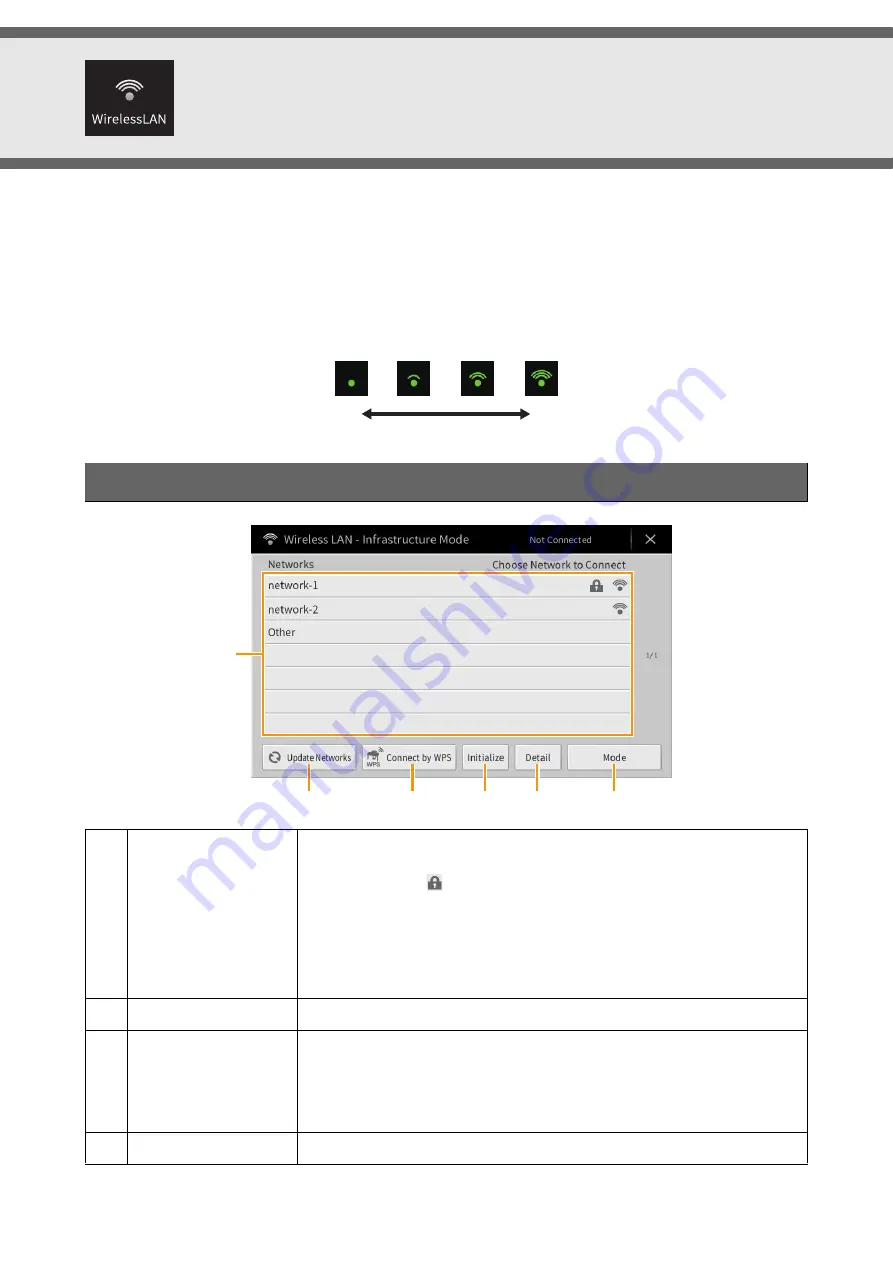
This instrument can be connected to a smart device via wireless LAN. For general operating instructions, refer to the
“Smart Device Connection Manual” (separate PDF). This section covers only operations that are specific to this
instrument.
When the connection is done successfully, “Connected” is shown at the top of the display, and one of the icons shown
below appears indicating the signal strength.
Infrastructure Mode
1
Networks
Connecting to a network listed on the display:
From the Networks listed on the display, select the desired one. For a network
having a lock icon (
), you need to enter the password and touch [Connect]; for
a network without a lock icon, you can connect the network only by selecting it.
Manual Setup:
Touch [Other] displayed at the very end of the list to call up the Manual Setup
display, for making SSID, security, and password settings. After entering them,
touch [Connect] on the Manual Setup display to connect to the network.
2
Update Networks
Updates the Network List on the display.
3
Connect by WPS
Connects this instrument to the network via WPS. After touching [Start WPS] in
the window appeared by touching here, press the WPS button of the desired
wireless LAN access point within two minutes.
NOTE
Make sure that your access point supports WPS. About the confirmation and
changes in the access point settings, refer to the manual of the access point.
4
Initialize
Initializes the connection setup to the default factory status.
Strong
Weak
1
2
3
4
5
6


