325
Reference section
Stereo page
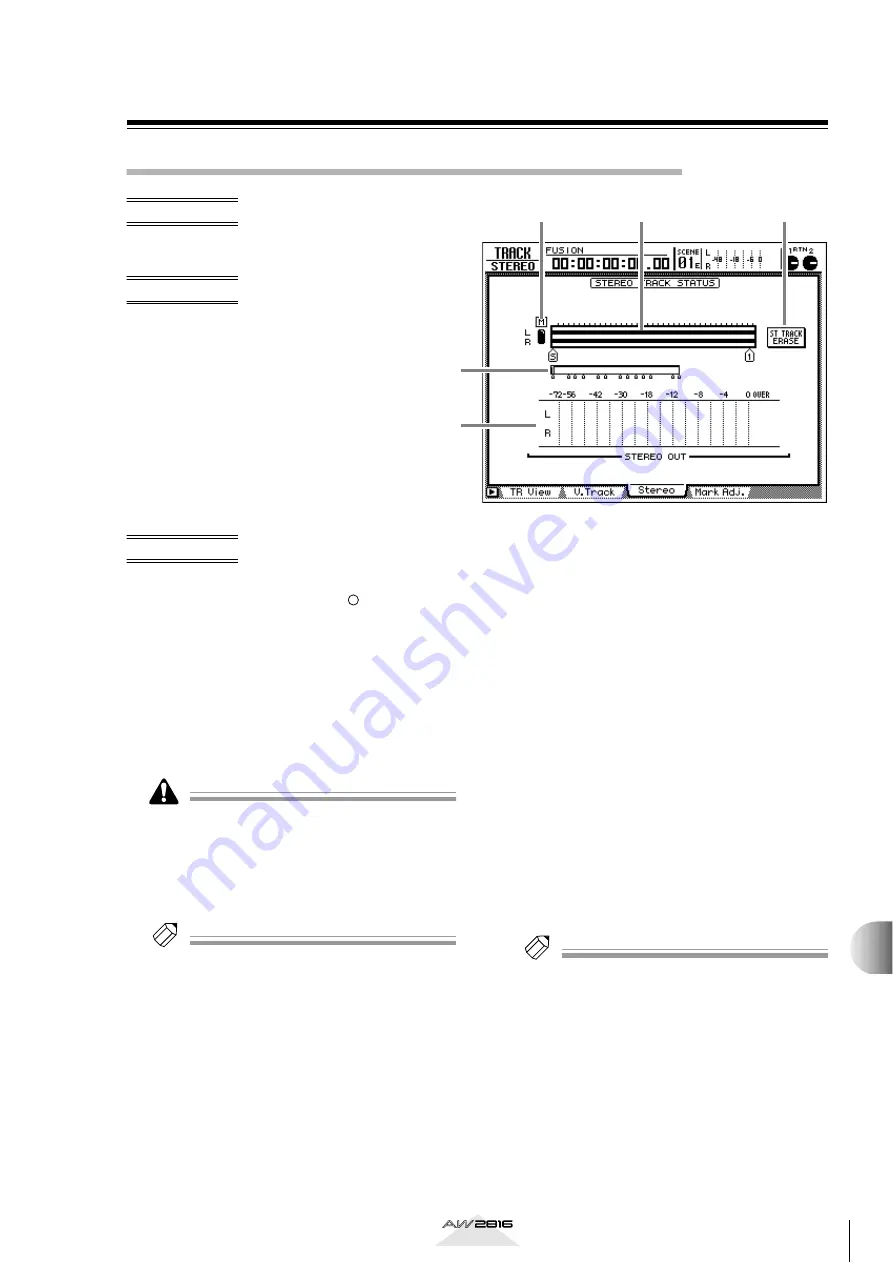
Playing or erasing the stereo track
Play back the stereo track, or erase the
recorded contents of the stereo track.
• [TRACK] key
→
[F3] (Stereo) key
• Repeatedly press the [TRACK] key
until the screen shown at the right
appears.
A
M (Mute) button
This switches muting on (
●
)/off ( ) for the stereo
track. When muting is switched off, the L/R output
of the stereo track will be sent directly to monitor
channels 1/2, and at the same time, muting will be
forced on for tracks 1–16.
By playing back a song in this state, you can mon-
itor the stereo track via monitor channels 1/2
→
stereo bus. When you switch muting back on for
the stereo track, muting of tracks 1–16 will be
defeated, returning to the normal state.
In order to listen to the stereo track via the stereo bus,
monitor channels 1/2 must each be assigned to the ste-
reo bus. Be aware that in this case, the settings of
parameters such as pan, EQ, and dynamics processor
for monitor channels 1/2 and the stereo output chan-
nel will directly affect the playback sound of the stereo
track.
Tip!
If you want to hear the stereo track “flat” (unproc-
essed), you can either press the [TRACK CUE] key
→
REC TRACK SELECT [ST] key to send the output of the
stereo track directly to the MONITOR OUT/PHONES
jacks, or you can prepare a scene memory that con-
tains “flat” settings for monitor channels 1/2 and the
stereo output channel.
B
Track view
This bar graph shows the region of the stereo track.
The symbols displayed below the track view indi-
cate locate points and markers that are assigned to
those locations. The displayed symbols have the
following significance.
• S.......................... Start point
• E.......................... End point
• I .......................... In point
• O......................... Out point
• A ......................... A point
• B ......................... B point
• 1–99.................... Markers 1–99
• R ......................... Relative time zero location
(displayed only when the
counter is switched to rela-
tive time)
C
Current position
The vertical line in this box indicates the approxi-
mate current location between the beginning of
the song and the end point. The small symbols
below the box indicate the approximate location
of the locate points and markers.
D
STEREO OUT
This meter indicates the output level of the stereo
output channel.
Tip!
By using the PRE/POST button in the HOME screen/
Omni/ST page, you can select whether the pre-fader
level or the post-fader level will be displayed.
E
ST TRACK ERASE (Stereo track erase) but-
ton
This button erases the recorded content of the ste-
reo track. When you move the cursor to this button
and press the [ENTER] key, a confirmation popup
window will appear. Move the cursor to the OK
button and press the [ENTER] key, and the stereo
track will be erased.
1
5
2
3
4
TRA
CK scr
een


