133
Tr
ac
k editing
12
6
If necessary, move the cursor to the NAME
field, press the [ENTER] key, and input a file
name in the TITLE EDIT popup window.
For details on how to input a name, refer to page
24.
Note
Note
• If you selected Tr1-16 as the export-source, the first six
characters of the song name + track “.WAV”
will automatically become the file name. This name
cannot be changed.
• In the file name you can use only uppercase alphabeti-
cal characters, numerals, and “_” (underscore). Lower-
case alphabetical characters used in a song name will
be converted to uppercase characters, and all symbols
other than alphabetical characters and numerals will be
converted to “_”.
• If you selected SMPL as the export-source, the filename
will automatically be “SMPL” + pad “_” +
bank “.WAV.” This name cannot be changed.
7
When you have finished setting the parame-
ters, move the cursor to the EXEC button and
press the [ENTER] key.
A popup window with “Execute EXPORT?” will
appear, asking you to confirm the operation.
8
To execute the export, move the cursor to
the OK button and press the [ENTER] key.
Exporting will begin. If you move the cursor to the
CANCEL button (instead of the OK button) and
press the [ENTER] key, the export operation will be
cancelled. (However, it is not possible to abort the
export process once it has been started.)
Only if you selected “Tr1-16” as the export-source,
the maximum of sixteen WAV files can be distrib-
uted between multiple volumes of media as they
are exported. (Even in this case, it is not possible to
write a single WAV file that is larger than the capac-
ity of the media.) When the “Exchange Next Media”
popup window appears, exchange the media and
press the [ENTER] key.
Tip!
Tip!
• All WAV files will be written to the root directory.
• Since the AW16G does not have a concept of the real-
world date and time, dummy values will be written as
the file creation date and time of the WAV files.
Note
Note
• If CD-R/RW media that contains no data is inserted,
WAV file export will begin.
• If CD-RW media that contains data is inserted, a mes-
sage of “Erase CD-RW media?” will appear, suggesting
that you erase the media. Move the cursor to the OK
button and press the [ENTER] key to erase the media, or
exchange the media.
• If media other than the above is inserted, it will auto-
matically be ejected, and a message of “Change Media,
Please.” will appear. If this message appears, exchange
the media.
• Tracks that do not contain data in the specified region
will not be exported.
Importing from an audio CD or
WAV file
CD audio data (CD-DA) or a WAV file from a CD-ROM
or CD-R can be imported (loaded) into an AW16G audio
track. After being imported, this data can be handled in
the same way as any recorded audio track.
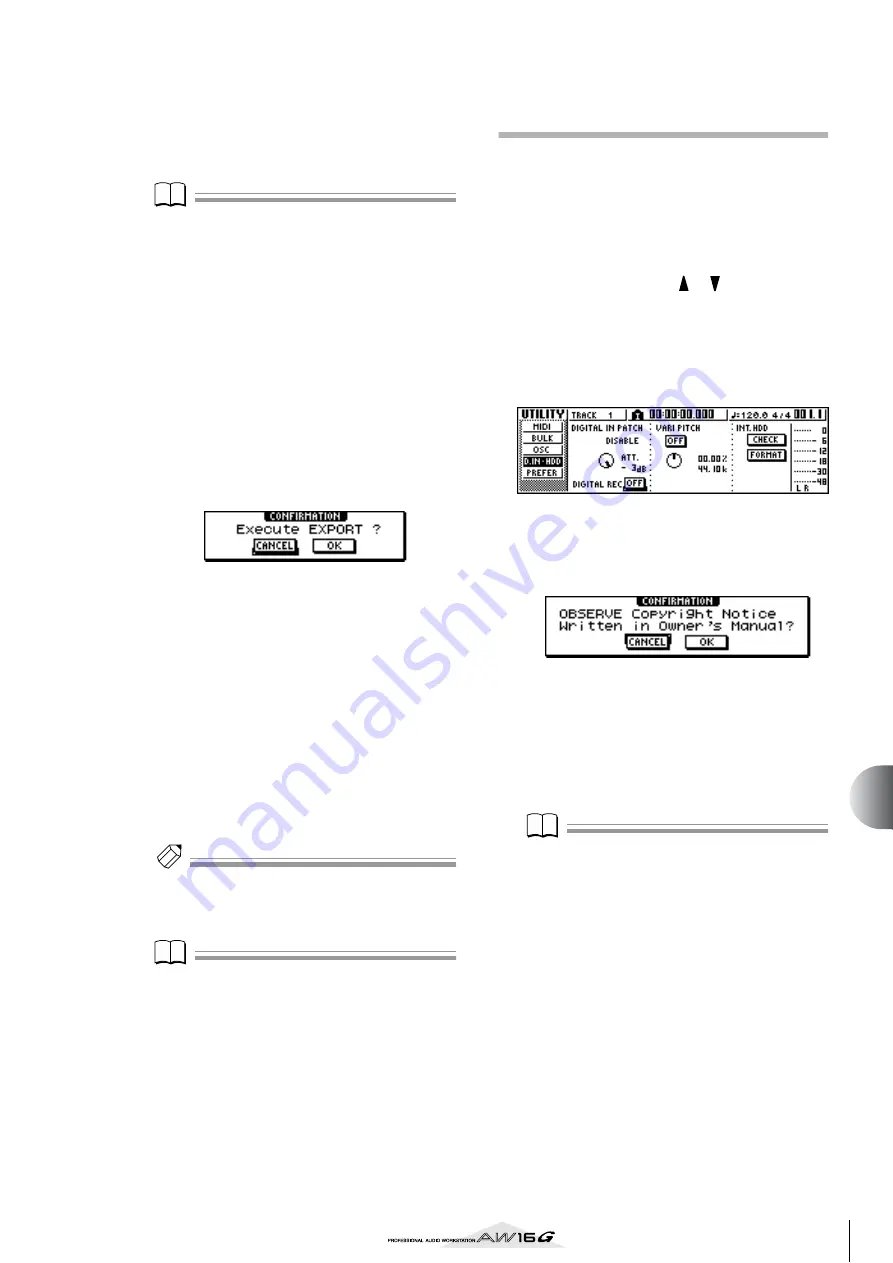
1
If you want to import from an audio CD,
repeatedly press the Work Navigate section
[UTILITY] key or hold down the [UTILITY] key
and use the CURSOR [
]/[
] keys to access
the D.IN • HDD page of the UTILITY screen.
Immediately after the AW16G is powered-on, it will
be set to prohibit digital recording from an external
source or importing from a CD. Before you can
import, you will need to disable this prohibition in
the D.IN - HDD page of the UTILITY screen.
2
Move the cursor to the DIGITAL REC button,
and press the [ENTER] key.
A message will ask you to confirm that you will
observe the applicable copyright laws.
3
Carefully read “Copyright Notice” (
and if you accept these terms, move the cur-
sor to the OK button and press the [ENTER]
key.
The button display will change from OFF to ON,
and digital recording and importing from a CD will
be enabled.
Note
Note
The DIGITAL REC button will return to the OFF setting
each time you turn on the power.
Содержание AW 16G
Страница 1: ...E Owner s Manual Owner s Manual Owner s Manual Keep This Manual For Future Reference ...
Страница 8: ...Contents 8 ...
Страница 26: ...Introducing the AW16G 26 ...
Страница 32: ...Listening to the demo song 32 ...
Страница 38: ...Recording to a sound clip 38 ...
Страница 54: ...Track recording 54 ...
Страница 136: ...Track editing 136 ...
Страница 218: ...Appendix 218 Block diagram ...


