198
Chapter 16—Automix
03D—Owner’s Manual
Extracting Events
Events in the current automix can be deleted or moved and fader levels can be trimmed
by a specified amount using the Extract page (this page cannot be accessed during auto-
mix playback or recording).
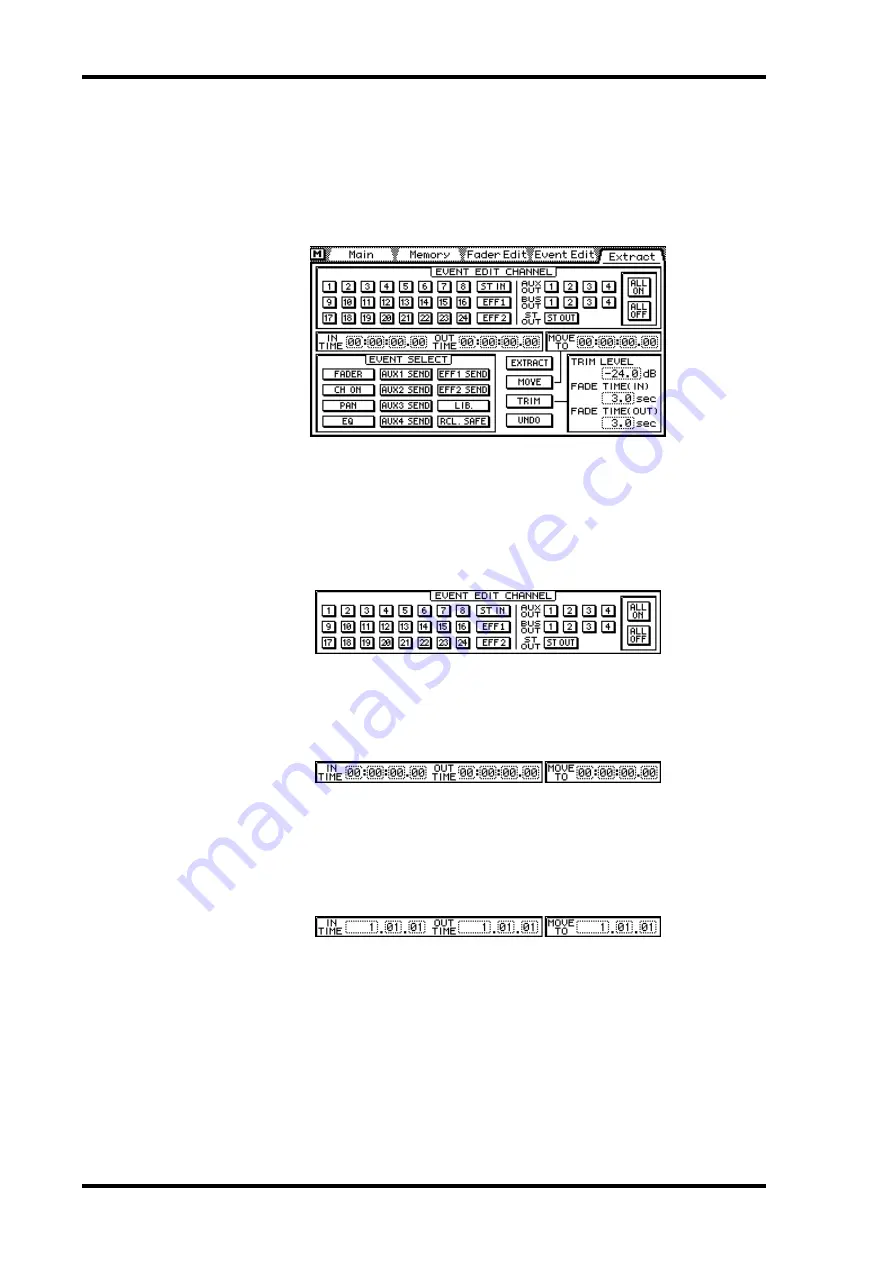
1. Use the [AUTOMIX] button to locate the Extract page.
2. Use the cursor buttons to select an EVENT EDIT CHANNEL switch, and
then press the [ENTER] button to activate that channel.
If you are using a mouse, simply click the EVENT EDIT CHANNEL switch.
The EVENT EDIT CHANNEL switches are used to select the channel whose event you
want to edit. Use the ALL ON and ALL OFF switches to turn on or off all EVENT EDIT
CHANNEL switches together.
3. Use the cursor buttons to select the IN TIME, OUT TIME, and MOVE TO
time values, and the PARAMETER wheel to set them.
If you are using a mouse, position the mouse cursor over the a time value, press and
hold the left mouse button, and then drag the mouse.
Events between the IN and OUT times are extracted, moved, or trimmed. The MOVE
TO time is used to specify the destination when events are moved.
When the time base is set to MIDI Clock, the IN and OUT times are displayed in mea-
sures, beats, and MIDI clocks, as shown below, and you can specify measures in single
steps or in 100-measure steps.
If the MOVE TO or OUT TIME is set to a time before the specified offset, the OUT
TIME set to a point before the IN TIME, or the IN TIME or OUT TIME set to a point
after the last recorded event, the selected function is not executed. Likewise, if the values
specified exceed the maximum recording time, the selected function is not executed.
4. Use the cursor buttons to select an EVENT SELECT switch, and then press
the [ENTER] button to activate it.
If you are using a mouse, simply click an EVENT SELECT switch.


