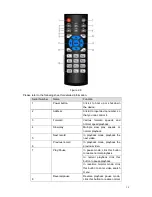
4
11
Rec
Manually start/stops the recording. Can be used in conjunction with the direction
keys to select the recording channel
12
IR Panel
Receives the signal from the IR remote control
13
Direction / Numeral
Keys
Use keys (up/down/left/right) to scroll through menu functions
Use Keys to control PTZ functions
Use keys to control playback
Use numeral keys (1-4) to move between the available channels
14
Enter
Confirm current operation
Go to default button
Go to Menu
15
Power Button
Press this button for 3 seconds to boot up or shut down the NVR
2.1.2
XP400R/XP400H
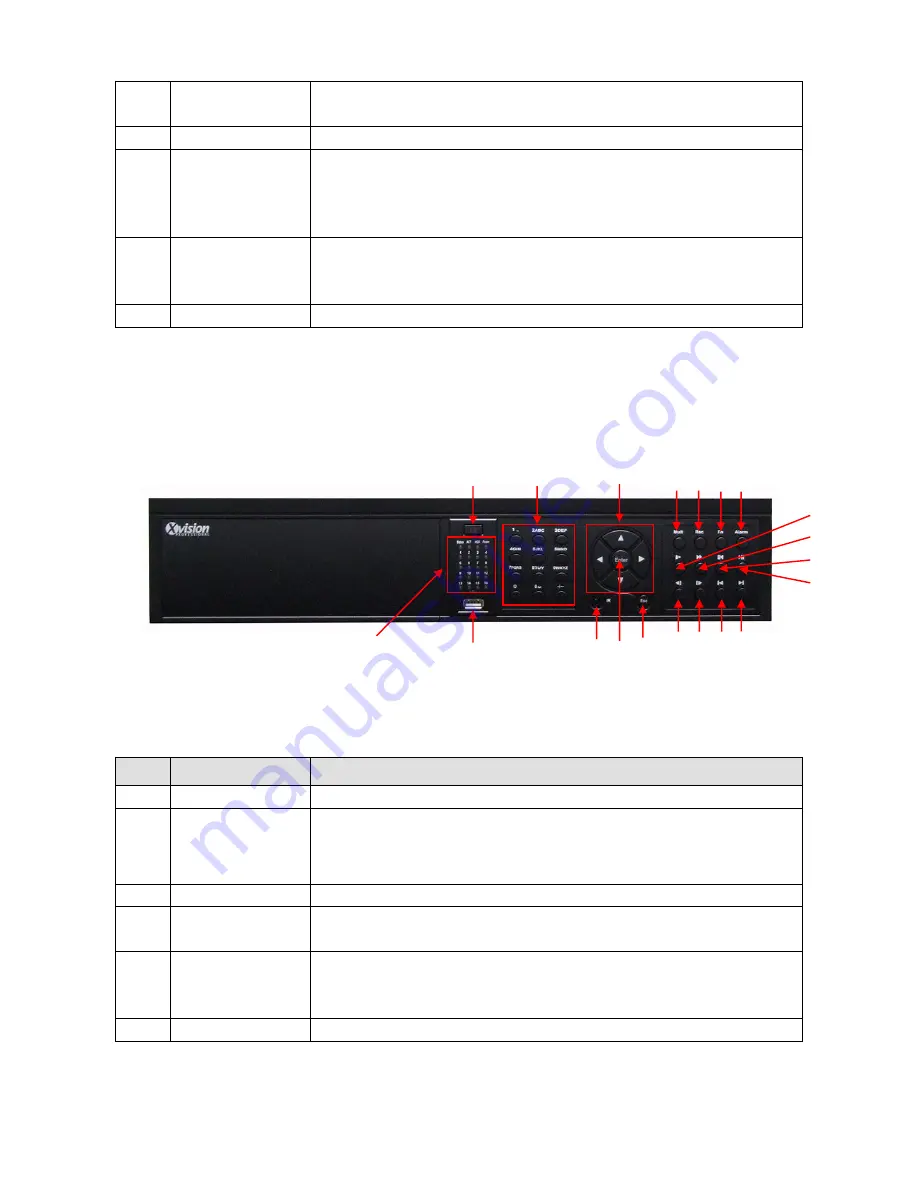
The front panel is shown as in
Figure
2-2
.
Figure 2-2
Please refer to the following sheet for front panel button information.
#
Name
Function
1
Power Button
Press this button for 3 seconds to boot up or shut down the NVR
2
LED Display
Highlights the cameras that are connected and those that correspond to each
channel being used
3
USB Port
For USB devices such as memory drives, mouse and CD/DVD writers
4
Numeric Buttons
Use numeral keys (1-9 and additional buttons) to move between the available
channels/cameras
5
Direction Keys
Use keys (up/down/left/right) to scroll through menu functions
Use Keys to control PTZ functions
Use keys to control playback
6
IR Receiver
Receives the signal from the IR remote control
1
5
2
3
6
4
7
8
9 10 11 12
13
14
15
16
18 19 20
17
Содержание X100R
Страница 1: ...X100R X400R XP400R XP400H USER MANUAL ...
Страница 51: ...44 Figure 6 45 Figure 6 46 Figure 6 47 Figure 6 48 ...
Страница 67: ...60 Figure 6 77 ...
Страница 70: ...63 Figure 7 5 ...
Страница 93: ...86 Figure 8 32 UNPN 8 3 2 6 Alarm Alarm setup interface is shown as in Figure 8 33 Figure 8 33 Alarm Setup ...
Страница 103: ...96 Figure 8 44 Account Figure 8 45 Add user Parameter Function User Input the user name of the new established account ...
Страница 120: ...113 Teclast Ti Cool 512M Teclast Ti Cool 1G Teclast Ti Cool 2G ...
Страница 128: ...121 Figure 14 12 ...


