CPU Water-Cooling Kit
Last updated: 21/08/05
For the lastest revision of this manual please visit
http://www.xspc.biz
Page 1/12
Страница 1: ...CPU Water Cooling Kit Last updated 21 08 05 For the lastest revision of this manual please visit http www xspc biz Page 1 12...
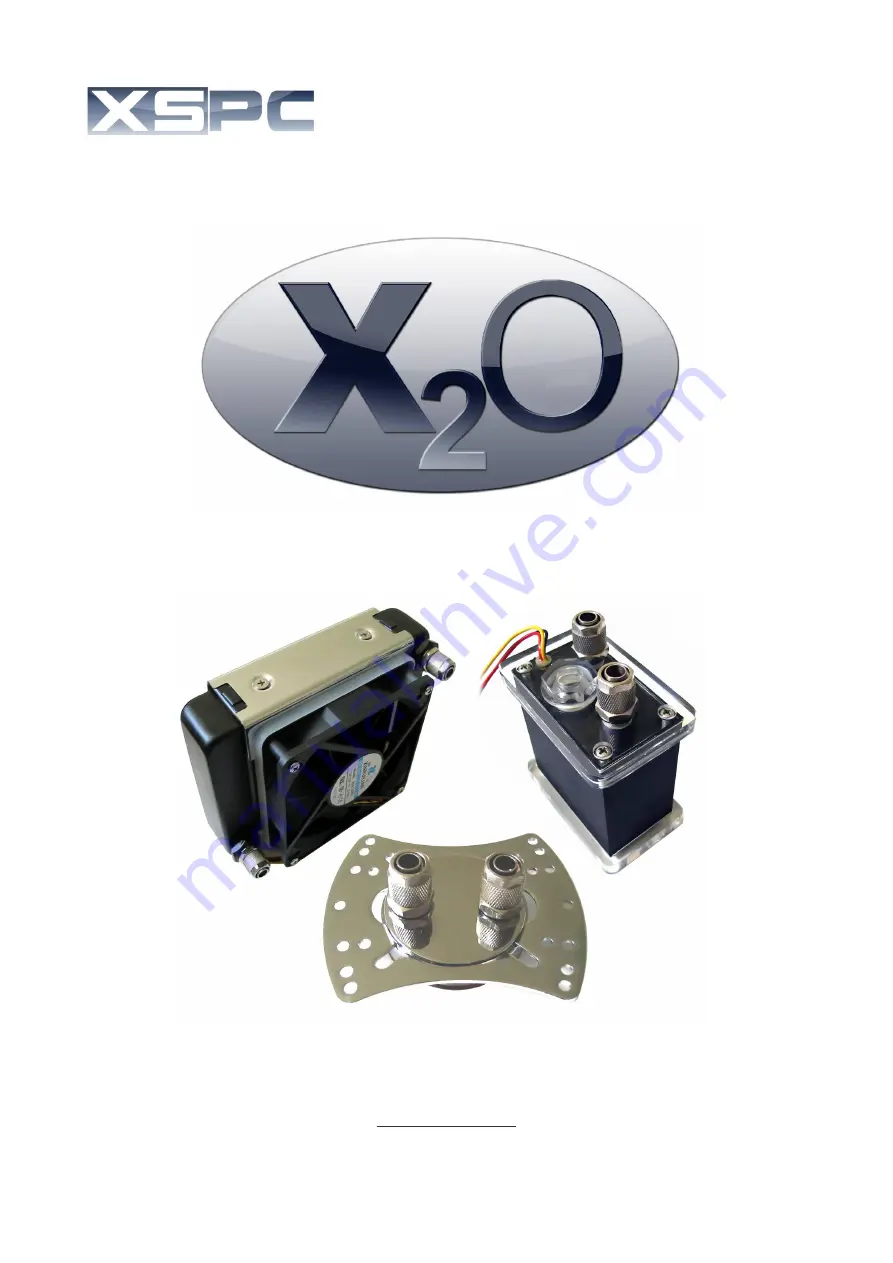
Страница 2: ...d Questions P11 6 1 Disclaimer P12 7 1 Support Contact Information P12 1 1 Introduction Thank you for purchasing the XSPC X2O CPU water cooling kit The X2O water cooling kit is designed as a low noise...
Страница 3: ...in Single Pass Crossflow Dual Pass horizontal and Dual Pass vertical versions 2 2 Features Specification CPU Water Block Materials Copper base with plated brass top Dimensions 57x57mm Port thread size...
Страница 4: ...plastic washer over the bolt to prevent an electrical short 2 Push the bolt through one of the socket holes around the socket from the back of the board 3 Turn the board over and place a second plast...
Страница 5: ...a 80mm mount or mounting externally on a flat surface See page 6 The radiator can be positioned either way up and both tubing connectors can be used for either the inlet or the outlet Example radiator...
Страница 6: ...four brackets to the chrome shroud using the provided screws and rubber washers Radiator Washer Non threaded end of bracket small screw 2 Line up the radiator and four mounts to the 80mm fan mount Us...
Страница 7: ...sing compression fittings Connecting the tubing can be done in 3 easy steps 1 Place the screw cap over the tubing and push the open end of the tubing over the barbed fitting 2 Move the cap down the tu...
Страница 8: ...the system and reservoir appear full turn off the pump and leave to settle for 2min then Re Start the pump and top up if necessary 7 Once you are happy that all the air has been removed from the syste...
Страница 9: ...rer s instructions 3 Place the waterblock over the CPU socket and line up the universal CPU mount with the bolts 4 Place the CPU water block onto the CPU and slide the universal mount down into place...
Страница 10: ...ector using the provided adapters Once all the components are secured in place your system is ready for use 4 1 Maintanance To ensure correct operation after installation it is recommended that you do...
Страница 11: ...re the airflow to the radiator is not restricted 3 Double check all of the air has been removed from the radiator 4 Inspect the tubing for kinks and twist which may restrict flow 5 Remove the CPU wate...
Страница 12: ...per use or installation of this equipment The components in this kit are supplied with a 12 month warrantly against failure This excludes consumable items such as tubing water addtives and thermal pas...