134
7 Maintenance
Replacing the Belt Unit
This section describes procedures for replacing the Belt Unit.
Caution on Handling the Belt Unit
When handling the Belt Unit, take note of the following points:
• Avoid bright light and try to finish the replacement within 5 minutes.
• Make sure nothing touches or scratches the surface (black-colored film) of the belt unit.
Scratches, dirt, or oil from your hands on the film of the belt unit may reduce print quality.
Replacing the Belt Unit
1.
Make sure that the printer is turned off.
2.
Remove any print jobs from the output tray.
3.
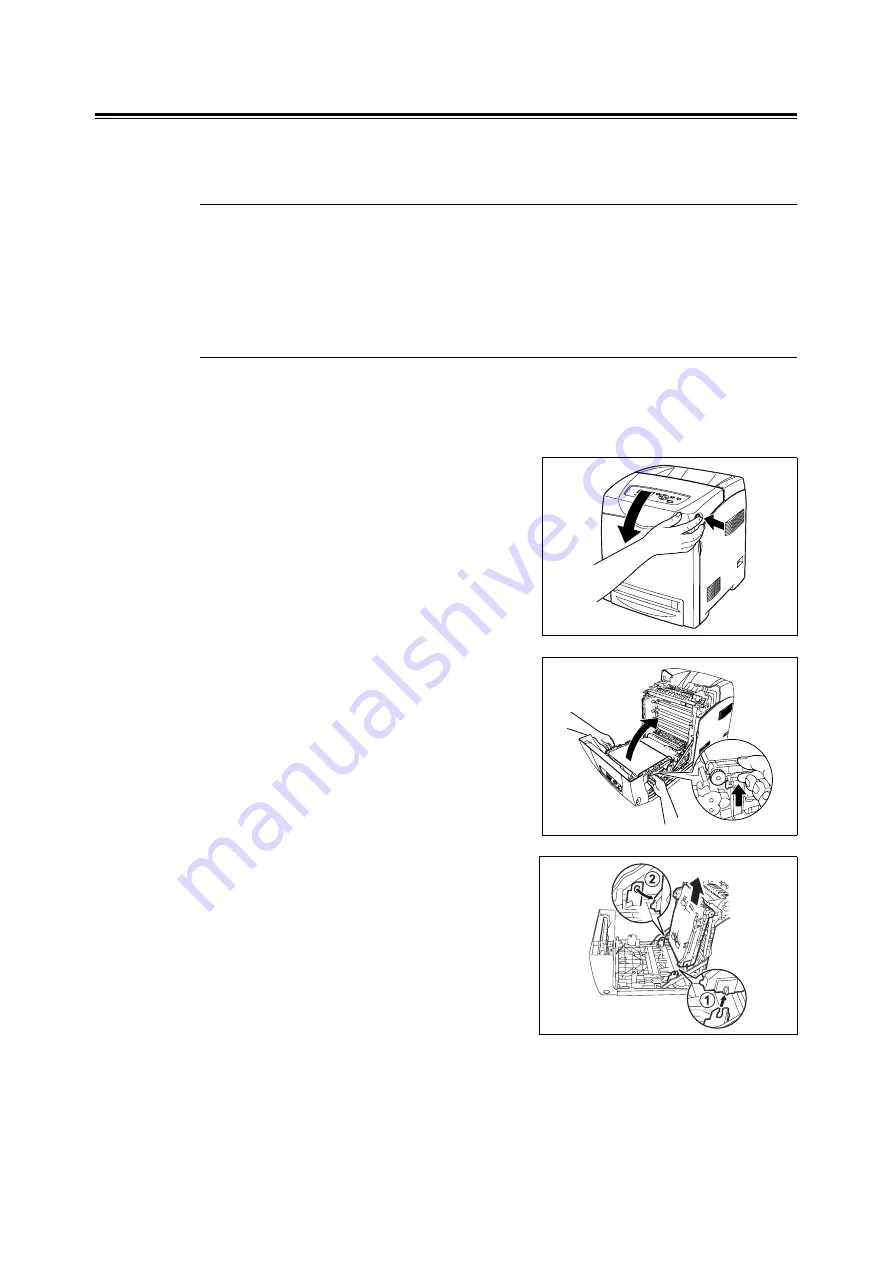
Press the side button and open the front
cover.
4.
Hold the knobs of the Belt Unit and open
the unit fully.
Important
• Do not touch the inside of the printer with your hands.
Some parts may be hot. Allow time for the printer to
cool before attempting to remove parts in this area.
5.
Hold both sides of the Belt Unit with both
hands and pull up the right side of the unit
until the knob on the right side comes out of
the groove. Then, shift the Belt Unit to the
right and remove the unit from the printer.
6.
Unpack a new Belt Unit.


