background image

© Copyright 2018 WyreStorm Technologies 

wyrestorm.com


Enado Installation Manual | 180913 

25 of 38 

UK: +44 (0) 1793 230 343 | ROW: 844.280.WYRE (9973)   

Email

[email protected]


Command Assignment Tool 

The Command Assignment Tool (CAT) is used to perform bulk command assignments to buttons located in an Activity Layout. 
To access the CAT, navigate to the Tools Menu>Command Assignment. 

The CAT will automatically list all assigned Activity Layouts for a project. Activity Layouts must be assigned to Activity Buttons in 
order to appear in the CAT. 

1.


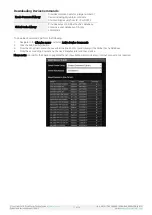
From the drop down menus choose the appropriate Manufacturer and Device command set. If no values appear in the drop 
down menu, the Enado command database does not contain any commands and must be downloaded. Refer to the 
section: Downloading Device Control Commands. 

2.


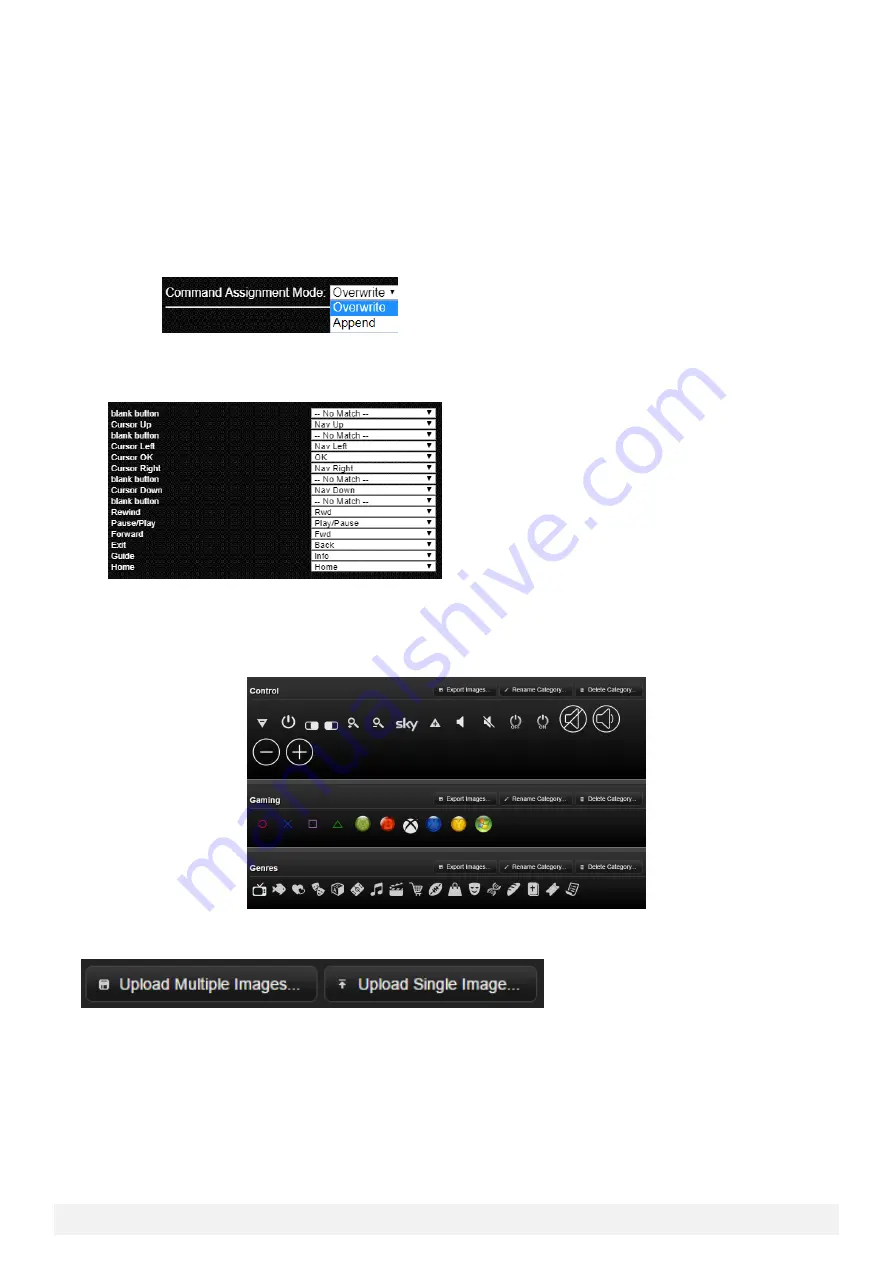
Choose the appropriate Assignment Mode.  

a.


Overwrite: will erase any existing commands associated with Activity Layout buttons and write new commands. 

b.


Append: will keep any existing commands associated with Activity Layout buttons and will append any newly 
written commands. 


3.


Press Next, to begin assigning commands. By default, Enado will attempt to automatically associate the names of buttons 
to the command names in the chosen library.  

4.


Manually select commands from the drop down menus for any remaining buttons. 


Uploading Custom Icons 

Enado comes pre-loaded with a library of Room, Activity and Button icons. All of these images can be viewed by navigating to 
the Libraries menu and selecting Images/Icons. Initially a drop down menu will appear which lists the different icon categories. 
Once a category is selected the corresponding icons will appear. 


Custom icons can be uploaded in the Icon/Image library by selecting either the Upload Multiple or Single Image button. The 
format of any icon that is uploaded into the Icon/Image library needs to be a PNG. 


Visual Theme 

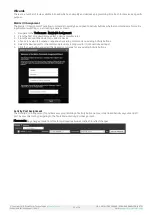
The visual theme for a project can be adjusted by navigating to the Project menu and selecting Visual Theme. To create a 
custom theme, perform the following steps. 

1.


Click the New Theme button and give it a name 

2.


Select Custom Hue to adjust the colors of the top and bottom menu bars 

3.


Select Background to upload a custom background image. This must be in a PNG or JPEG format 

Содержание Enado ENA-001-010

Страница 1: ...Storm Technologies Product specifications or appearance subject to change without notice Enado Installation Guide ENA 001 010 ENA MINI 010 Document Revision v3 1 Document Date September 13 2018 Suppor...

Страница 2: ...ter reference 2 Follow all instructions and heed all warnings 3 Do not expose this apparatus to rain moisture sprays drips or splashes and ensure that no objects containing liquids are placed on the a...

Страница 3: ...2 Updating Firmware 12 Setting a Static IP 12 Creating Your First Project 12 Configuring Control IR IP RS232 14 Downloading Device Commands 17 Viewing and Testing Commands 19 Adding Control Buttons 20...

Страница 4: ...amiliar with the product s features prior to starting the installation process Before Beginning WyreStorm recommends visiting the product page before installing this product for updates to this Instal...

Страница 5: ...ogrammed via a simple but advanced web browser application and is designed to offer maximum control flexibility eliminating the requirement for proprietary applications The powerful software can run o...

Страница 6: ...on or off Rear Panel Ground Terminal Can be used to ground the chassis AC Power Plug Connects to a 100 240V AC 50 60Hz AC mains outlet 8 Port Ethernet Switch 10 100Mbps unmanaged network switch Conne...

Страница 7: ...ss Rear Panel LAN Port 10 100 Mbps Ethernet port Connects to a LAN with a DHCP server for Enado to acquire an IP address RS 232 Service Port For WyreStorm use only Power Supply Adapter Connects to a 5...

Страница 8: ...Copyright 2018 WyreStorm Technologies wyrestorm com Enado Installation Manual 180913 8 of 38 UK 44 0 1793 230 343 ROW 844 280 WYRE 9973 Email support wyrestorm com Basic Wiring Diagram...

Страница 9: ...opyright 2018 WyreStorm Technologies wyrestorm com Enado Installation Manual 180913 9 of 38 UK 44 0 1793 230 343 ROW 844 280 WYRE 9973 Email support wyrestorm com ENA MINI 010 with Global Cache Adapte...

Страница 10: ...e use of patch panels wall plates cable extenders kinks in cables and electrical or environmental interference will have an adverse effect on signal transmission which may limit performance Steps shou...

Страница 11: ...onnections are only natively possible on the ENA 001 010 These control methods can be added to the ENA MINI 010 via supported Global Cach adapters This process is explained Adding a Global Cache Adapt...

Страница 12: ...t firmware release To do this perform the following steps 1 Navigate to the Application menu and select Update Manager 2 If a firmware update appears click the Install button 3 Allow the Enado to perf...

Страница 13: ...Project 1 Navigate to the Project menu and select New 2 Name the project and click the Create Project button Downloading Pre Configured Projects Pre configured project can be downloaded and imported i...

Страница 14: ...y Settings 2 Select the Add Ethernet Device button located at the bottom right of the UI 3 Method 1 Detect Devices a Press the Detect Devices button for Enado to scan the local area network b Select t...

Страница 15: ...ame r n Password Prompt Prompt which appears from a terminal window when attempting to login to the device For example a password prompt could show as password Password Password required by the device...

Страница 16: ...Adapter Expander button 2 Select an adapter model number from the drop down menu 3 Once added select Edit to input the adapter s IP Address Please note As of Enado v5 0 0 firmware the following Globa...

Страница 17: ...Global Cache Library Provides access to Global Cache s database Contains a vast database of IR only commands To download commands perform the following 1 Navigate to the Libraries menu and select Act...

Страница 18: ...ration of commands 1 Header 1 information device name manufacturer 2 Header 2 information allcommands generated by 3 Command string information command id type DEVICE COMMAND DATA command 4 Closing br...

Страница 19: ...ge return line feed and delimiter information IR Learning accomplished by clicking the Start Learning button and pointing an IR remote at either the IR RX on the front panel or by plugging an IR RX ca...

Страница 20: ...e or can double as a matrix input selection Added to an Activity page by pressing the Quick Insert plus button Shortcut Unique per Zone Room Always appear at the top right of the interface Can be prog...

Страница 21: ...made Allows a command to be assigned to the button from commands available in local Enado database Can be used to remote execute any commands that have been added to the button Allows a function to be...

Страница 22: ...d select Edit Button Properties 3 Click Edit pencil icon next to Function 4 Select Launch Application and then choose the desired app 5 Click Add Function Note Enado must have an active internet conne...

Страница 23: ...a pre configured Activity Layout perform the following steps 1 Navigate to the Libraries menu Online Libraries or click here 2 Select the Activity Templates link at the top of the page 3 Download any...

Страница 24: ...menu Matrix I O Assignment 2 From the first drop down menu select a device manufacturer 3 From the second drop down menu select a device 4 Choose to overwrite prepend or append any existing commands o...

Страница 25: ...uttons and will append any newly written commands 3 Press Next to begin assigning commands By default Enado will attempt to automatically associate the names of buttons to the command names in the cho...

Страница 26: ...iguration UI for access into any Project or Room or Activity in a Project The project QR code is available when publishing or to generate QR codes for specific rooms or activities in rooms perform the...

Страница 27: ...ol UI settings are enabled 7 Open the live user interface and select the Gear icon at the bottom right 8 Click Manage System Passwords then choose Create New Password 9 Enter in the desired password a...

Страница 28: ...t To create a separate timed command outside of existing project buttons perform the following 1 Navigate to the Tools Menu and select Triggered Commands 2 Select Add Edit Commands button to add the c...

Страница 29: ...b stream from an Axis encoder please review the Enado Video Integration Guide Application Note or visit the online user manual via the Help menu To add a web stream from a CCTV DVR or IP camera please...

Страница 30: ...Function 4 When prompted type in the phrase you wish to be recognized by Alexa For example if the corresponding button was programmed to power on a TV the voice phrase could be called Turn on Living...

Страница 31: ...Copyright 2018 WyreStorm Technologies wyrestorm com Enado Installation Manual 180913 31 of 38 UK 44 0 1793 230 343 ROW 844 280 WYRE 9973 Email support wyrestorm com...

Страница 32: ...f room in Enado project a voice command exists within Congratulations device has connected to room voice service Repeat the above dialog for additional rooms that have voice commands When finished you...

Страница 33: ...ate a QR code that can be scanned from a mobile device The QR code will automatically direct a device to the live user interface To copy the QR code for use elsewhere simply right click it and select...

Страница 34: ...sword if remotely accessing the interface Control UI Settings Icon Enabled A settings icon will appear in the control UI and will be accessible to the end user allowing limited settings to be adjusted...

Страница 35: ...urrently selected project To select a different project for exporting navigate to the Project menu hover over Open Import and then My Projects GPIO Relays Sensors The ENA 001 010 features a set of rel...

Страница 36: ...Navigate to the Device Command Creator located in the Tools menu 2 Select the command to be tested by choosing the Manufacturer Device and then the Command 3 In the Testing section click the Set Test...

Страница 37: ...ual 180913 37 of 38 UK 44 0 1793 230 343 ROW 844 280 WYRE 9973 Email support wyrestorm com 7 Document Revision History V3 1 September 2018 Creating End User Programmable Buttons Added section to Page2...

Страница 38: ...material contained in this document consists of information that is the sole property of WyreStorm This document is intended to provide information to allow interfacing to the relevant WyreStorm equip...

Отзывы: