TReX User Manual v2.14 Firmware
Upgrade Process
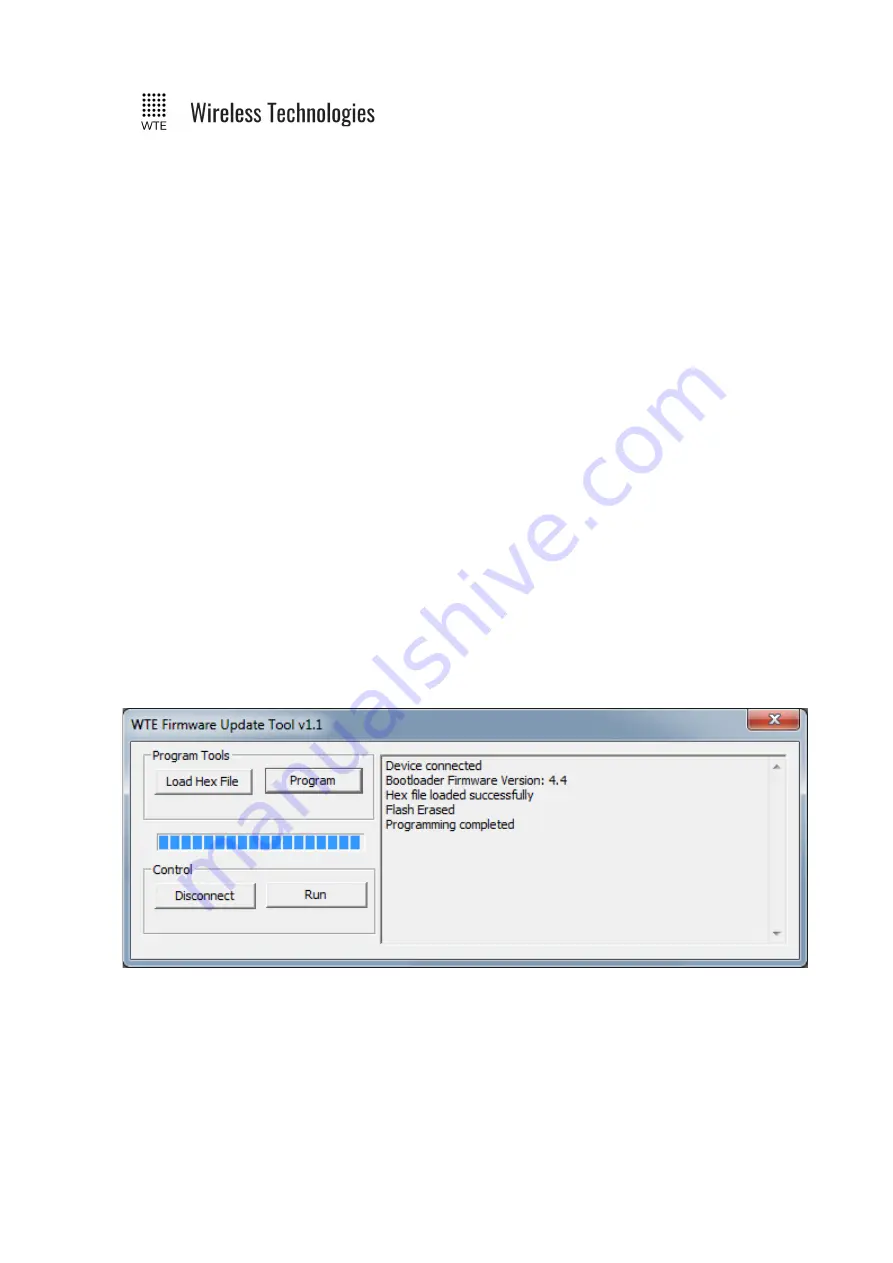
1. Run the application WTE-UBL.exe – this is the WTE Firmware Update Tool as shown
above.
2.
BEFORE
applying power to the TReX, press the “UP” button, and
HOLD
the button
down.
3. Apply power to the TReX.
4. The TReX backlight will flash on and off (approximately once every second) –
keep
the “UP” button pressed
. You now have 10 seconds to press the PC application
“Connect” button on the WTE Firmware Update Tool before the TReX exits the
bootloader mode of operation.
5. Press the WTE Firmware Update Tool “Connect” button. If connected, the PC
application will display the message saying “Device Connected”. The TReX backlight
will now stay constantly on.
6. You can now
RELEASE
the TReX “UP” button.
7. On the PC application press the “Load Hex File” button.
8. Select the supplied TReX hex file. NOTE: the firmware used must MATCH the TReX
receiver variant. A TReX can only be used with TReX encrypted firmware. Failure to
comply will leave the device inoperable.
9. Press the WTE Firmware Update Tool “Program” button.
10. Wait for the WTE Firmware Update Tool to indicate that programming has been
completed.
11. When programming is complete press the “Run” Button, or remove power to the TReX
and apply power again.
12. If successful the TReX will start normally when power is applied. If the TReX does
not correctly start, then repeat the procedure.
© WTE Limited, 2018 – Christchurch New Zealand
Page 138 of 158


