PROOF S6
Montage- und Bedienungsanleitung
DE
Assembly and operating instructions
EN
Страница 1: ...PROOF S6 Montage und Bedienungsanleitung DE Assembly and operating instructions EN ...
Страница 2: ...imTec PROOF S6 Duschearmatur Edelstahl Art Nr 118 940 Chrom Art Nr 118 957 Lieferumfang Frontplatte mit integrierter Elektronik Montagerahmen Thermostatgriff mit Heißwassersperre und sämtliches Befestigungsmaterial Wichtige Installationshinweise UP Dose für optionales Netzteil außerhalb des Schutzbereichs vor sehen Die Montage und Installation darf nur durch einen konzessi onierten Fachbetrieb gem...
Страница 3: ...benutzung für 10 s Spülstoppzeit von 10 s bis 10 min im Manuell Programm von 10 s bis 60 s Reinigungsstopp für 10 min Fließdruck 0 05 bis 0 6 MPa 0 5 bis 6 bar Statischer Druck max 0 8 MPa 8 bar Wassertemperatur max 70 C max 80 C für max 10 min Durchflussmenge max 22 l min bei 0 3 MPa 3 bar Wasserzulauf R 1 2 IG Wasserablauf R 1 2 IG Frontplatte Edelstahl Messing verchromt Thermostatgriff Messing ...
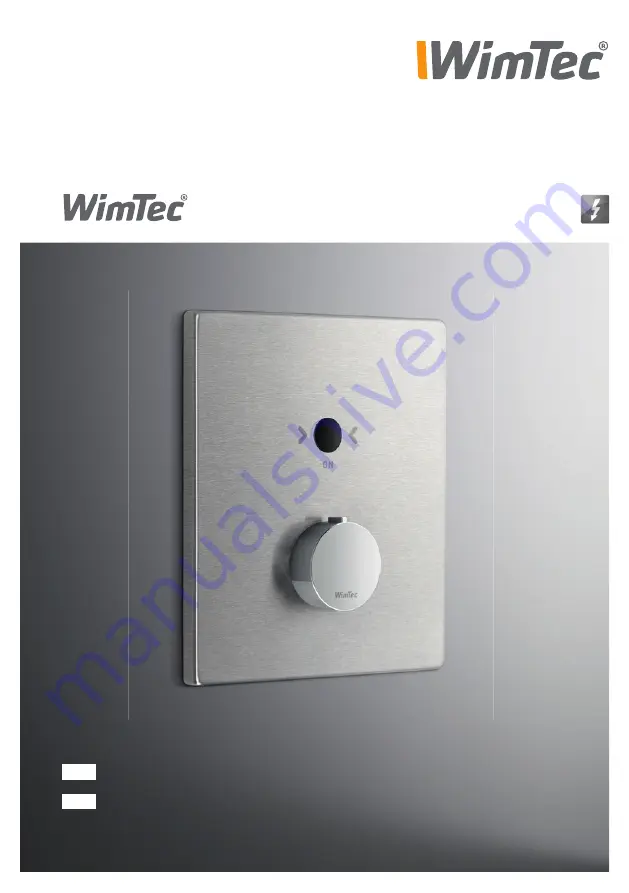
Страница 4: ... 4 5 6 ON OFF A Infrarot Sensor zum Ein Ausschalten der Kopfbrause und zur Benutzererkennung Ansprechbereich B Thermostatgriff zur Temperatur regelung mit Taste zum Ent riegeln der 38 C Sicherheits sperre C Reichweiten Regler D Zeit Regler E Intervall Regler F Dip Schalter zum Einstellen der Funktionen G Anschluss für Potential ausgleich H Anschluss MV Kopfbrause I Anschlussklemme für 12 V Spannun...
Страница 5: ...ellt 10 s bis 10 min einstellbar Selbstschluss Programm 10 s bis 60 s einstellbar Nach Ablauf der eingestellten Maximallaufzeit schaltet die Duschearmatur automatisch ab Um bei einer unbeab sichtigten Daueraktivierung Wasser zu sparen E Intervall Regler für die Stagnationsfreispülung 3 h 48 h einstellbar Wird die Duschearmatur für die voreingestellte Zeit nicht benutzt löst die Armatur selbstständ...
Страница 6: ...ntil für Kopfbrause 3 Thermostat mit Adapter 4 Absperrventil bei Auslieferung geschlossen 5 Schmutzsieb und Rückflussverhinderer 6 Fixierschraube zum Anschluss des Kabels für den Potential ausgleichs WW KW 1 2 6 3 4 5 5 4 12 V Netzteil nicht in Rohbauset oder Schutzbereichen anbringen ...
Страница 7: ...dig abschneiden 3 Ggf zwischen Wand und Rohbauset mit Silikon abdichten 4 Wasserzuleitung absperren 5 Beide Vorabsperrungen mit einem Schraubendreher öffnen 6 Markierungen an Mischerwelle und Thermatostatkartusche kontrollieren und ggf richtig ausrichten ACHTUNG Folgende Schritte unbe dingt in beschriebener Reihenfolge ausführen 4 6 ...
Страница 8: ...gen achten und die Kabel nicht quetschen 10 Montagerahmen exakt ausrichten und Schrauben festziehen Beim Festziehen der Schrauben darauf achten dass sich der Montagerahmen nicht verformt Beigelegtes Spezialfett an der Dichtung vorne auftragen 11 Magnetventil an der Elektronik anstecken und Kabel für den Potentialausgleich der Elektronik an der dafür vorgesehenen Schraube befestigen 12 Elektro Ansc...
Страница 9: ... 14 Position des Thermostatknopfes kontrollieren Absperrknopf zeigt senkrecht nach oben 15 Frontplatte schräg aufsetzen und mit Druck in die waag rechte Position nach links drehen 16 Frontplatte mit Sicherungsschraube rechts unten sichern 17 Wasserleitung öffnen 18 Funktionstest durchführen ACHTUNG Folgende Schritte unbe dingt in beschriebener Reihenfolge ausführen 15 17 16 18 ...
Страница 10: ...4 5 6 ON OFF Halbautomatik Vollautomatik Manuell ON OFF 1 2 3 4 5 6 ON OFF 1 2 3 4 5 6 ON OFF 1 2 3 4 5 6 ON OFF 1 2 3 4 5 6 Reinigungsstopp ON OFF 1 2 3 4 5 6 Hygienespülung ON OFF 1 2 3 4 5 6 AUSSCHALTEN Infrarot Sensor Durch erneutes Antippen des Infrot Sensors schaltet die Dusche ab Automatik Dusche stoppt nach Ablauf der Nachlaufzeit wenn der Benutzer den Ansprechbereich verlässt oder nach Ab...
Страница 11: ...automatisch 2 s nach der Benutzererkennung ein AUSSCHALTEN Infrarot Sensor Antippen des Infrarot Sensors schaltet die Dusche ab Automatisch 1 2 3 4 5 6 ON OFF Halbautomatik Vollautomatik Manuell ON OFF 1 2 3 4 5 6 ON OFF 1 2 3 4 5 6 ON OFF 1 2 3 4 5 6 ON OFF 1 2 3 4 5 6 Hygienespülung ON OFF 1 2 3 4 5 6 15 50 cm Dusche stoppt nach Ablauf der Nachlaufzeit wenn der Benutzer den Ansprechbereich verlä...
Страница 12: ...ensors schaltet die Dusche ein AUSSCHALTEN Infrarot Sensor Durch erneutes Antippen des Infrot Sensors schaltet die Dusche ab Sicherheitsspülstopp Nach Ablauf der eingestellten Spülstopp Zeit siehe S 5 schaltet die Dusche auto matisch ab 1 2 3 4 5 6 ON OFF Halbautomatik Vollautomatik Manuell ON OFF 1 2 3 4 5 6 ON OFF 1 2 3 4 5 6 ON OFF 1 2 3 4 5 6 ON OFF 1 2 3 4 5 6 ...
Страница 13: ...ert Betrieb Das Wasser läuft für 30 s zuzüglich der eingestellten Nachlaufzeit ohne dass sich der Benutzer im Ansprech bereich befinden muss und schaltet danach automatisch ab Tritt während dieser 30 s der Benutzer für mindestens 5 s in den Ansprechbereich geht die Dusche in den Nor malbetrieb über 1 2 3 4 5 6 ON OFF Halbautomatik Vollautomatik Manuell Warmlauf ON OFF 1 2 3 4 5 6 ON OFF 1 2 3 4 5 ...
Страница 14: ...48 h siehe Seite 5 Automatische Stagnationsfreispülung Wird die Armatur für die ein gestellte Zeit nicht benützt löst die Armatur eine automa tische Stagnationsfreispülung für 10 s aus Sicherheit Befindet sich ein Benutzer im Ansprechbereich oder ist der Reinigungsstopp aktiviert löst die Stagnationsfreispülung erst 2 min nach deren De aktivierung aus 3 48h 10s 1 2 3 4 5 6 ON OFF Halbautomatik Vol...
Страница 15: ...ivieren Nach einer Verweilzeit von 5 s im Abstand von 1 5 cm vor dem Infrarot Sensor wird der Wasserfluss gestoppt und der Reinigungsstopp ist für 10 min aktiviert Während dieser Zeit blinkt die rote LED im Infrarot Sensor Reinigungsstopp deaktivieren Automatisch wenn 10 Minuten kein Benutzer erkannt wurde Zum manuellen Deaktivieren gleich vorgehen wie beim Aktivieren Nach Verlassen des Ansprechbe...
Страница 16: ...netventil 1 Stk Schmutzfilter 1 Stk Rückflussverhinderer 1 Stk Filterabdeckung 1 Stk Absperrung 1 Stk Thermostat komplett Adapter für Thermostat 231 205 119 770 119 787 119 794 119 763 120 530 120 547 Bezeichnung Art Nr Art Nr 231 205 119 770 119 794 119 763 120 530 120 547 119 787 ...
Страница 17: ...OF S6 Bezeichnung Art Nr Montagerahmen Frontplatte mit Mischergriff Edelstahl Frontplatte mit Mischergriff Chrom Thermostatgriff Sicherungsschraube Elektronikmodul Netzteil 1 fach Netzteil 5 fach 120 646 120 677 120 660 115 536 113 877 120 363 117 899 113 792 ...
Страница 18: ...ng frame thermostat handle with hot water barrier and necessary fixing materials Important installation notes Mounting and installation may only be performed by a qualified service provider in accordance with DIN 1988 ÖVE ÖNORM E8001 and VDE 0100 Part 701 When planning and installing sanitary facilities all relevant local national and inter national standards and provisions must be observed Provid...
Страница 19: ...ivatable after 3 h 48 h of none use for 10 s Flushing stop from 10 s 10 min in manual program from 10 s 60 s Cleaning stopp for 10 min Flow rate 0 05 0 6 MPa 0 5 6 bar Static pressure max 0 8 MPa 8 bar Water temperature max 70 C max 80 C for max 10 min Flow rate max 22 l min at 0 3 MPa 3 bar Water inlet R 1 2 IT Water outlet R 1 2 IT Front plate Stainless steel chromed brass Thermost handle Chrome...
Страница 20: ...ntrols A Infrared sensor to turn off the showerhead and for user recognition B Thermostat knob to adjust the temperature including a button for releasing the 38 C safety lock C Range control D Time control E Interval control F DIP switches for configuring the functions G Connection potential equalisation H Connection MV shower head I Connection clips for 12 V power supply 1 2 3 4 5 6 ON OFF 1 2 3 ...
Страница 21: ...r stops automatically to prevent unintentional conti nuous activation F Interval control for stagnation rinse configurable from 3 h to 48 h If the fitting has not been used for the set period the device will automatically perform a 10 s rinse to flush stagnant water from the pipes Program activation DIP switches 1 and 2 Program DIP switch 1 DIP switch 2 Description Semi automatic mode 1 OFF ON Pag...
Страница 22: ...r 2 Magnetic valve for rain shower 3 Thermostat with adapter 4 Cut off valve closed upon delivery 5 Dirt filter and return flow valve 5 Fixing screw for connection of potential equalisation Power supply not mountable in basic kit or in any protective areas WW CW 1 2 6 3 4 5 5 4 12 V ...
Страница 23: ...ount box so it aligns with the tiles 3 Where necessary seal off space between wall and flush mount set with silicone 4 Close the main water valve 5 Open both integrated stop valves using a screwdriver 6 Control marks on mixing shaft and thermostat cartridge and align them if necessary ATTENTION Perform the following steps in the order indicated 4 6 ...
Страница 24: ... Make sure that the cable con nections remain intact and the cables are not crimped 10 Correctly align the mounting frame and securely fasten the screws When tightening the screws ensure that the mounting frame does not get warped Apply the included special grease to the front of the valve 11 Connect the magnetic valve to the electronics module 12 Connect the power cables to the electronics module...
Страница 25: ...thermostat handle shutter button points vertical upwards 15 Insert the front plate at an angle and apply some pressure while turning it to the left to align it horizontally 16 Arrest front plate by fastening the locking screw at the lower right 17 Open the main water valve and turn on the power supply 18 Perform a system test ATTENTION Perform the following steps in the order indicated 14 13 15 17...
Страница 26: ... 6 ON OFF Halbautomatik Vollautomatik Manuell ON OFF 1 2 3 4 5 6 ON OFF 1 2 3 4 5 6 ON OFF 1 2 3 4 5 6 ON OFF 1 2 3 4 5 6 Reinigungsstopp ON OFF 1 2 3 4 5 6 Hygienespülung ON OFF 1 2 3 4 5 6 SWITCH OFF Infrared sensor Tap on the infrared sensor again to switch off Automatic function The water flow stops at the end of the shut off delay once the user leaves the sensor range or after the configured ...
Страница 27: ...ly activates 2 s after detecting the user SWITCH OFF Infrared sensor Tap on the infrared sensor to switch off Automatic function 1 2 3 4 5 6 ON OFF Halbautomatik Vollautomatik Manuell ON OFF 1 2 3 4 5 6 ON OFF 1 2 3 4 5 6 ON OFF 1 2 3 4 5 6 ON OFF 1 2 3 4 5 6 Hygienespülung ON OFF 1 2 3 4 5 6 15 50 cm The water flow stops at the end of the shut off delay once the user leaves the sensor range or af...
Страница 28: ... soon as you tap the infrared sensor SWITCH OFF Infrared sensor Tap on the infrared sensor again to switch off Safety flow arrest After the configured water arrest time see p 21 has elapsed the shower will auto matically shut off 1 2 3 4 5 6 ON OFF Halbautomatik Vollautomatik Manuell ON OFF 1 2 3 4 5 6 ON OFF 1 2 3 4 5 6 ON OFF 1 2 3 4 5 6 ON OFF 1 2 3 4 5 6 ...
Страница 29: ...ill flow for 30 s plus the configured shut off delay without the need for you to re main within the sensor range it will then automatically shut down again If you enter the sensor range for at least 5 s during these 30 s the shower will switch to normal operation Warm water rinse DIP switch 4 1 2 3 4 5 6 ON OFF Halbautomatik Vollautomatik Manuell Warmlauf ON OFF 1 2 3 4 5 6 ON OFF 1 2 3 4 5 6 ON O...
Страница 30: ... the interval control see p 21 Automatic stagnation rinse If the fitting has not been used for the set period the stagnati on rinse operation is automati cally executed for 10 s Safety If you are in the sensor range or if the cleaning stop function is enabled the stagnation rin se function will not start until 2 min after it has been disabled 3 48h 10s 1 2 3 4 5 6 ON OFF Halbautomatik Vollautomati...
Страница 31: ... After a dwell period of 5 s in 1 5 cm distance infront of the infrared sensor the water flow stops and the cleaning stop will be activated for 10 min During this period the red LED inside the infrared sensor flashes Disable cleaning stop The function automatically stops if no user was detected for 10 minutes You can manually disable the function following the same procedure used to enable it The ...
Страница 32: ...netic valve 1 pc Dirt filter 1 pc Return flow valve 1 pc Filter cover Blocking pin 1 pc Complete thermostat Adapter for thermostat 231 205 119 770 119 787 119 794 119 763 120 530 120 547 Description Art no Art Nr 231 205 119 770 119 794 119 763 120 530 120 547 119 787 ...
Страница 33: ...rt Nr Mounting frame Front plate stainless steel inc thermostat handle Front plate chrome inc thermostat handle Thermostat handle Locking screw Electronics module Power supply 1 connection Power supply 5 connections 120 646 120 677 120 660 115 536 113 877 120 363 117 899 113 792 ...
Страница 34: ...34 Shower control WimTec PROOF S6 EN PROOF S6 ...
Страница 35: ...Shower control WimTec PROOF S6 35 EN PROOF S6 ...
Страница 36: ...WIMTEC Sanitärprodukte GmbH p A 3325 Ferschnitz Freidegg 50 AUSTRIA t 43 0 7473 5000 f 43 0 7473 5000 500 m verkauf wimtec com i www wimtec com www wimtec com Auflage 09 09 2014 Art Nr 1002044 ...