background image

8

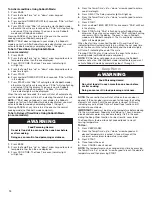
Use the following chart as a guide for cookware material 

characteristics.

Cookware

Characteristics

Aluminum


Heats quickly and evenly.


Suitable for all types of cooking


Medium or heavy thickness is best for 

most cooking tasks.


May leave aluminum residues, 

which may be diminished if cleaned 

immediately after cooking.

Cast iron


Heats slowly and evenly.


Good for browning and frying


Maintains heat for slow cooking


Rough edges or burrs may scratch 

the cooktop.

Ceramic or 

ceramic glass


Follow manufacturer’s instructions.


Heats slowly, but unevenly.


Ideal results on low-to-medium heat 

settings


May scratch the cooktop.

Copper


Heats very quickly and evenly.


May leave copper residues which may 

be diminished if cleaned immediately 

after cooking.


Can leave a permanent stain or bond to 

the cooktop if overheated.

Earthenware


Follow manufacturer’s instructions.


Use on low heat settings.


May scratch the cooktop.

Porcelain 

enamel-on-steel 

or cast iron


See stainless steel or cast iron.


Porcelain enamel bakeware without the 

metal base may bond to the cooktop if 

overheated.

Stainless steel


Heats quickly, but unevenly.


A core or base of aluminum or copper 

on stainless steel provides even heating.

Use flat-bottomed cookware for best cooking results and energy 

efficiency. The cookware should be about the same size as the 

cooking area outlined on the cooktop. Cookware should not 

extend more than 

1

/

2

" (13 mm) outside the area.

Home Canning

Canning can be performed on a glass smooth top cooking surface 

or traditional coil element cooktop. When canning for long periods, 

alternate the use of surface cooking areas or elements between 

batches. This allows time for the most recently used areas to cool.


Center the canner on the largest surface cooking area or 

element. On electric cooktops, canners should not extend 

more than 

1

/

2

" (13 mm) beyond the surface cooking area 

or element.


Do not place canner on 2 surface cooking areas or elements 

at the same time.


On ceramic glass models, use only flat-bottomed canners 

to avoid damage to the cooktop and elements.


For more information, contact your local agricultural extension 

office or refer to published home canning guides. Companies 

that manufacture home canning products can also offer 

assistance.

Содержание WFE520S0FS

Страница 1: ...erencia futura tome nota de los números de modelo y de serie de su producto Puede encontrarlos en la etiqueta ubicada en el lado superior derecho del marco frontal del horno Table of Contents ELECTRIC RANGE USER INSTRUCTIONS W10866295B RANGE SAFETY 2 The Anti Tip Bracket 2 FEATURE GUIDE 4 COOKTOP USE 6 Cookware 7 Home Canning 8 OVEN USE 9 Electronic Oven Controls 9 Sabbath Mode 9 Keep Warm 10 Alum...

Страница 2: ...ed and engaged Failure to follow these instructions can result in death or serious burns to children and adults To verify the anti tip bracket is installed and engaged Slide range forward Look for the anti tip bracket securely attached to floor or wall Slide range back so rear range foot is under anti tip bracket See installation instructions for details WARNING Anti Tip Bracket Range Foot State o...

Страница 3: ...f these pans or bowls during cooking may subject wiring or components underneath to damage Protective Liners Do not use aluminum foil to line surface unit drip bowls or oven bottoms except as suggested in the manual Improper installation of these liners may result in a risk of electric shock or fire Glazed Cooking Utensils Only certain types of glass glass ceramic ceramic earthenware or other glaz...

Страница 4: ...ngth of time 3 Press START to begin the countdown If enabled end of cycle tones will sound at end of countdown 4 Press TIMER SET OFF to cancel the Timer Do not press CANCEL because the oven will turn off START Cooking start The Start keypad begins any oven function If Start is not pressed within 5 seconds a tone will sound and Start will blink until pressed or canceled If Start is not pressed with...

Страница 5: ...vection fan will shut off when the oven door is opened If the oven door remains open for too long the heating elements will shut off until the oven door is closed All timers including any active Cook Time or Timed Cook functions will continue to count down BROIL Broiling 1 Position cookware in the oven and close the oven door 2 Press BROIL 3 Press the Temp Time up or down arrow keypad until desire...

Страница 6: ...o the cooktop and can cause pitting and permanent marks To avoid scratches do not slide cookware or bakeware across the cooktop Aluminum or copper bottoms and rough finishes on cookware or bakeware could leave scratches or marks on the cooktop Do not cook popcorn in prepackaged aluminum containers on the cooktop They could leave aluminum marks that cannot be removed completely To avoid damage to t...

Страница 7: ...l appear 3 Press the up and down element arrow keypads to adjust the heating element to the desired level 4 To switch back to the single element press SIZE 5 Press ON OFF for the selected element to turn the element off Melt Cooking Element The Melt cooking element offers flexibility due to a wide range of settings between High and Melt The High heat option can be used to boil small amounts of liq...

Страница 8: ...e metal base may bond to the cooktop if overheated Stainless steel Heats quickly but unevenly A core or base of aluminum or copper on stainless steel provides even heating Use flat bottomed cookware for best cooking results and energy efficiency The cookware should be about the same size as the cooking area outlined on the cooktop Cookware should not extend more than 1 2 13 mm outside the area Hom...

Страница 9: ...ling The oven provides accurate temperatures however it may cook faster or slower than your previous oven so the temperature can be adjusted to personalize it for your cooking needs It can be changed in Fahrenheit or Celsius To Adjust Oven Temperature 1 Press and hold the Temp Time down arrow keypad for 5 seconds until the oven display shows the current setting for example 0 F CAL or 00 2 Press th...

Страница 10: ... The Delay indicator light will light up 6 Press the Temp Time up or down arrow keypad to enter a start time 7 Press START 8 Press and hold TIMER SET OFF for 5 seconds SAb will flash in the display 9 Press START while SAb is flashing to enter Sabbath mode otherwise the entire cycle cancels out SAb will stop flashing and remain ON in the display The oven is now in Sabbath mode and is Sabbath compli...

Страница 11: ...ve Cook Time or Timed Cook functions will continue to count down ACCUBAKE Temperature Management System The ACCUBAKE system electronically regulates the oven heat levels during preheat and Bake to maintain a precise temperature range for optimal cooking results The bake and broil elements or burners cycle on and off in intervals On convection range models the fan will run while preheating and may ...

Страница 12: ...ime to cook 5 Press START The display will count down the time When the time ends the oven will shut off automatically 6 Press CANCEL to clear the display To Set a Delayed Timed Cook Before setting make sure the clock is set to the correct time of day See the Clock keypad feature in the Feature Guide section 1 Press BAKE 2 Press the Temp Time up or down arrow keypad to enter a temperature other th...

Страница 13: ...amp cloth to the inner door glass before it has completely cooled To stop the Self Cleaning cycle at any time press CANCEL If the temperature is too high the oven door will remain locked and cool and locked will be displayed The cooling fan may continue to run The oven light will not function during the Self Cleaning cycle Electronic Oven Control with Adjustable Clean Time on some models The Self ...

Страница 14: ...ood residue with the Cooktop Scraper For best results use the Cooktop Scraper while the cooktop is still warm but not hot to the touch It is recommended to wear an oven mitt while scraping the warm cooktop Hold the Cooktop Scraper at approximately a 45 angle against the glass surface and scrape the residue It will be necessary to apply pressure in order to remove the residue Allow the cooktop to c...

Страница 15: ...ned when oven cools At high temperatures foods react with porcelain Staining etching pitting or faint white spots can result Cleaning Method See Self Cleaning Cycle section Oven Light The oven light is a standard 40 watt appliance bulb Before replacing make sure the oven and cooktop are cool and the control knobs are in the OFF position To Replace 1 Unplug range or disconnect power 2 Turn the glas...

Страница 16: ...tructions Cooktop element cycles on and off on High setting Element cycling due to a temperature limiter This is normal operation The element may cycle on and off to keep the cooktop from overheating Oven will not operate Delay Start is set See the Electronic Oven Controls section Control lock is ON Press and hold CONTROL LOCK for 3 seconds to unlock Control is in Demo mode Demo mode will deactiva...

Страница 17: ...higher position in the oven Lighter browning of food caused by shiny or light colored bakeware Move rack to a lower position in the oven Incorrect length of cooking time was used Adjust cooking time Oven door was not closed Be sure that the bakeware does not keep the door from closing Oven door was opened during cooking Oven peeking releases oven heat and can result in longer cooking times Oven do...

Страница 18: ...051 affresh Stainless Steel Cleaner stainless steel models Order Part Number W10355016 affresh Kitchen and Appliance Cleaner Order Part Number W10355010 Cooktop Scraper ceramic glass models Order Part Number WA906B Granite Cleaner and Polish Order Part Number W10275756 Standard Flat Oven Rack Order Part Number W10268578 Porcelain Broiler Pan and Grid Order Part Number 4396923 Premium Broil Pan and...

Страница 19: ...utions etc 5 Defects or damage caused by the use of non genuine Whirlpool parts or accessories 6 Conversion of products from natural gas or L P gas 7 Damage from accident misuse abuse fire floods acts of God or use with products not approved by Whirlpool 8 Repairs to parts or systems to correct product damage or defects caused by unauthorized service alteration or modification of the appliance 9 C...

Страница 20: ...W10866295B SP PN W10878025 2016 Whirlpool All rights reserved 5 16 ...

Отзывы: