background image

Содержание SF514OEY

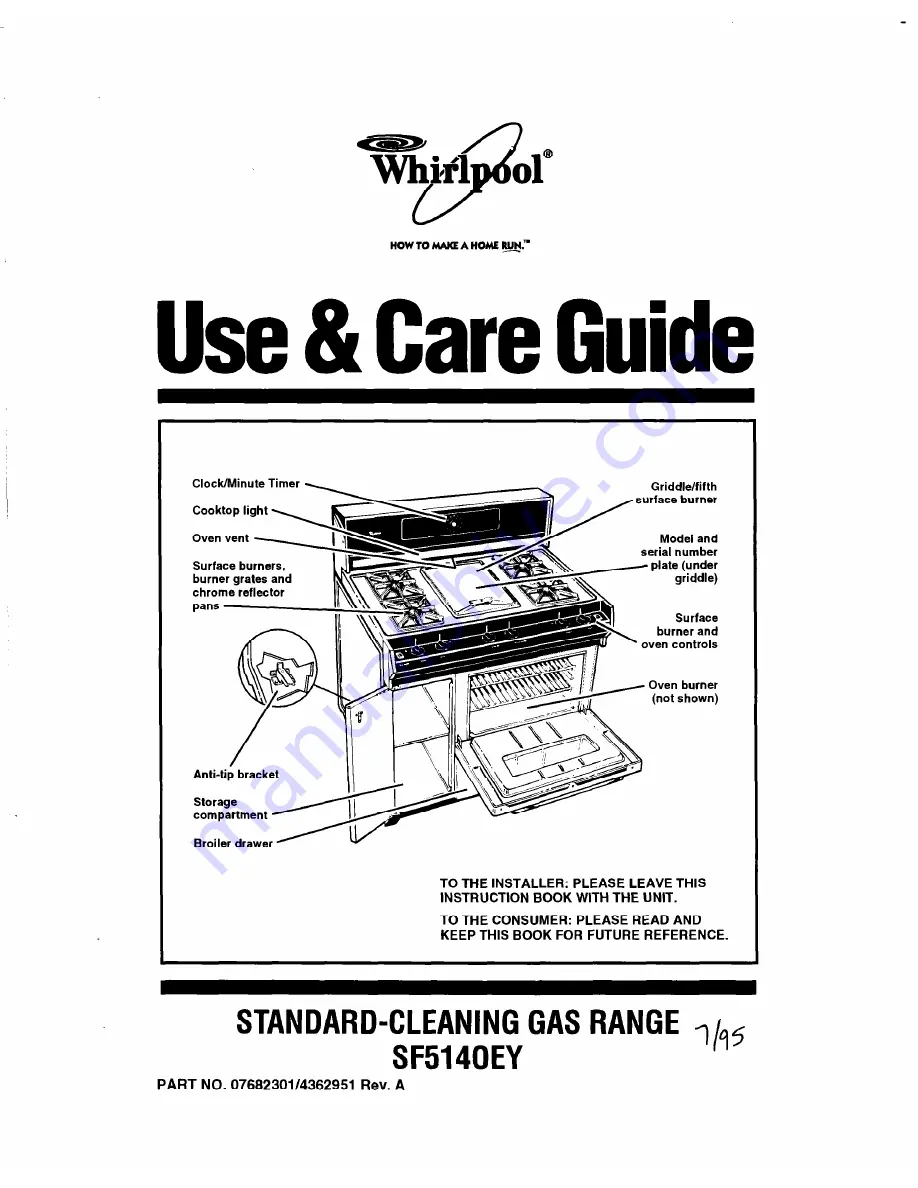
Страница 1: ...rner grates and chrome reflector pans Surface burner and Broiler drawer y u TO THE INSTALLER PLEASE LEAVE THIS INSTRUCTION BOOK WITH THE UNIT TO THE CONSUMER PLEASE READ AND KEEP THIS BOOK FOR FUTURE REFERENCE STANDARD CLEANING GASRANGE SF5140EY PART NO 07682301 4362951 Rev A ...

Страница 2: ...arranty 24 01995 Whirlpool Corporation Thank you for buying a WHIRLPOOL appli ance Please complete and mail the Owner Registration Card provided with this product Then complete the form below Have this information ready if you need service or call with a question l Copy model and serial numbers from plate located under griddle and purchase date from sales slip l Keep this book and sales slip toget...

Страница 3: ... in this manual is not followed exactly a fire or explosion may result causing death personal injury or property damage DO NOT STORE OR USE GASOLINE OR OTHER FLAMMABLE VAPORS AND LIQUIDS IN THE VICINITY OF THIS OR ANY OTHER APPLIANCE WHAT TO DO IF YOU SMELL GAS l DO NOT TRY TO LIGHT ANY APPLIANCE l DO NOT TOUCH ANY ELECTRICAL SWITCH DO NOT USE ANY PHONE IN YOUR BUILDING l IMMEDIATELY CALL YOUR GAS...

Страница 4: ...se the range only for its intended use as described in this manual l Do not wear loose or hanging garments when using the range They could ignite if they touch a hot surface burner and you could be burned l Do not touch surface burners areas near surface burners or interior surfaces of oven Areas near surface burners and interior surfaces of an oven become hot enough to cause burns During and afte...

Страница 5: ...Do not clean door heat seal It is essential for a good seal Care should be taken not l Never leave surface burners unattended at high heat settings A boilover could result to rub damage or move the seal Clean only parts recommended in this Use and and cause smoking and greasy spillovers Care Guide that may ignite l Do not repair or replace any part of the l Use care when opening oven door Let hot ...

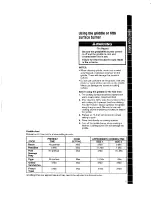
Страница 6: ...ide For best results start cooking at the high settings then turn the control knob down to continue cooking Use LITE to light the burner After the burner lights turn control back to a desired setting to stop the clicking of the ignition Use HI to start foods cooking to bring liquids to a boil Use a medium setting to continue cooking or to fry chicken or pancakes for gravy pudding and icing to cook...

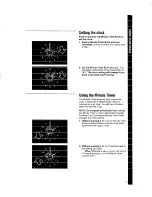
Страница 7: ... start or stop the oven It works like a kitchen timer Set it in minutes up to an hour You will hear a buzzer when the set time is up NOTE Do not push in the knob when setting the Minute Timer or when stopping the buzzer Pushing in and turning the Minute Timer Knob changes the clock setting 1 Without pushing it in turn the Minute Timer Knob counterclockwise until the timer hand passes the setting y...

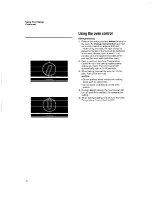
Страница 8: ...f the pan and the oven walls and other pans 2 Push in and turn the Oven Temperature Control Knob to the baking roasting temp erature you want The oven burner will automatically light in 50 60 seconds 3 When baking preheat the oven for 10 min utes Put food in the oven NOTES l Do not preheat when roasting or cooking items such as casseroles l Do not place food directly on the oven bottom 4 During ba...

Страница 9: ...erature Control Knob to the off position Pull knob straight off and flip it over so the back matches the illustration in Step 2 2 Loosen the locking screws Note the posi tion of the indicator 3 To lower the temperature hold knob handle firmly and turn knob skirt clockwise to move the indicator one marker line to the left Each line equals about 10 F 5 C 4 To raise the temperature hold knob handle f...

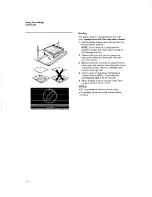
Страница 10: ...id so grease can drain down sides into lower part of broiler pan See picture Before the broiler is turned on place food on broiler pan and position the broiler pan at one of the three levels Refer to a reliable cook book for broiling chart Push in and turn the Oven Temperature Control Knob to BROIL The broiler will automatically light in 50 60 seconds When broiling is done turn the Oven Tem peratu...

Страница 11: ...vent food from sticking You don t have to season grease the griddle every time you use it Be sure to use only cooking oil not shortening or butter to season the griddle 3 Preheat on HI then turn control to a lower setting to cook 4 Place food directly on cooking surface 5 Turn off the griddle burner when cooking is finished Leaving burner ON will damage the griddle Fire Hazard Be sure the griddle ...

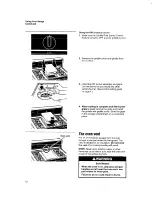
Страница 12: ...ate is cool remove the grate and install the griddle and griddle cover Store the grate in the storage compartment or a convenient place The ovenvent Hot air and moisture escape from the oven through a vent just under the backguard The vent is needed for air circulation Do not block the vent Poor baking roasting will result NOTE Never store plastics paper or other items that could melt or burn near...

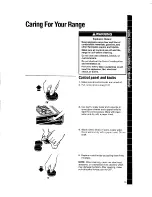
Страница 13: ...lectrical shock or burns L Control panel and knobs 1 Make sure all control knobs are turned off 2 Pull control knobs straight off 3 Use warm soapy water and a sponge or spray glass cleaner and a paper towel to wipe the control panels Wipe with clean water and dry with a paper towel 4 Wash control knobs in warm soapy water Rinse well and dry with a paper towel Do n soak 5 Replace control knobs by p...

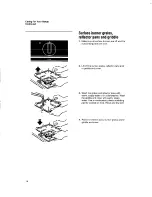
Страница 14: ...re cool 2 Lift off the burner grates reflector pans and or griddle and cover 3 Wash the grates and reflector pans with warm soapy water or in a dishwasher Wash the griddle and cover with warm soapy water Use a nonabrasive plastic scrubbing pad for cooked on food Rinse and dry well 4 Replace reflector pans burner grates and or griddle and cover 14 ...

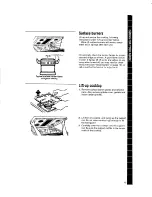
Страница 15: ...r If flames lift off ports are yellow or are noisy when turned off you may need to clean the burners see Cleaning tips on page 19 or call a qualified technician for adjustment Lift up cooktop 1 Remove surface burner grates and reflector pans Also remove griddle cover griddle and insert under griddle 2 3 Lift front of cooktop and swing up the support rod Do not raise cooktop high enough to hit the ...

Страница 16: ...upport rod down Lower front of cooktop Avoid hitting the control panel Replace reflector pans surface burner grates insert griddle and griddle cover Removable oven door Removing the oven door will help make it easier to clean the oven Electrical Shock Hazard Make sure all controls are off and the oven is cool before removing oven door Failure to do so can result in electrical shock or burns 1 Open...

Страница 17: ...id Slightly lift broiler carriage and pull all the way out To replace Push broiler carriage in until carriage is locked under placement tab in rear of broiler carriage body Make sure spring clip at front of carriage snaps into slot in broiler carriage body Carriage must be snapped into body whenever you are baking Replace broiler pan and grid Close broiler drawer all the way Spring clip ...

Страница 18: ...tion is needed for the oven to operate properly Poor cooking results could occur 9 Do not allow commercial oven cleaner to contact the heat seal thermostat or exterior surfaces of the oven Damage will occur 1 Turn off all controls 2 Put foil or pan under the cooking con tainer Make sure the foil is centered and large enough to catch any spillovers Cleaning tips Control knobs Clean with warm soapy ...

Страница 19: ...ver Clean with warm soapy water and a sponge or nonabrasive plastic scrubbing pad l Clean after each use l Remove griddle and drip pan located under the griddle to wash rinse and dry well l Do not use metal scouring pads or harsh cleansers l Use a nonabrasive plastic scrubbing pad for cooked on food Broiler drawer pan and grid Clean with warm soapy water and a nonabra sive plastic scrubbing pad l ...

Страница 20: ...light 1 Turn off the control knobs and unplug appliance or disconnect at the main power supply 2 Lift up the cooktop and disconnect the electrical plug to the backguard Lower the cooktop 3 Grasp each side of the backguard and lift it straight up 4 Turn backguard over Remove the four screws holding the back cover panel then remove the cover 5 Roll bottom of fluorescent tube away from you until both...

Страница 21: ...e cool and power to the range has been turned off before replacing the light bulb Be careful not to drop the bulb Failure to follow the above could result in electrical shock burns or injury from broken glass To replace the oven light 1 Unplug appliance or disconnect at the main power supply 2 Remove the light bulb from its socket Replace with a 40 watt appliance bulb Plug in appliance or reconnec...

Страница 22: ... page 19 If burner flames lift off ports are yellow or are noisy when turned off l The air gas mixture may be incorrect Call for service If burner makes a popping noise when ON l Is the burner wet from washing Let dry If control knob s will not turn l Did you push in before trying to turn If cooking results are not what you expected Is the range level l Does the oven temperature seem too low or to...

Страница 23: ...s or See Whirlpool Applmces or Authowed WhIrlpool Serwce Authorized Whirlpool Serwce Example XYZ Sewlce Co Example XYZ Serace Co 4 If you need FSP replacement parts FSP is a registered trademark of Whirlpool Corporation for quality parts Look for this symbol of quality whenever you need a replace ment part for your WHIRLPOOL appliance FSP replacement parts will fit right and work right because the...

Страница 24: ...epairs to parts or systems caused by unauthorized modifications made to the appliance 3195 WHIRLPOOL CORPORATION SHALL NOT BE LIABLE FOR INCIDENTAL OR CONSEQUENTIAL DAMAGES Some states do not allow the exclusion or limitation of incidental or consequential damages so this exclusion or limitation may not apply to you This warranty gives you specific legal rights and you may also have other rights w...

Отзывы: