VM167 Getting Started
Installation Guide
Thank you for buying the VM167 USB Interface Board! This document will guide you through the
necessary steps to install the board on your system.
Plugging in your board for the first time
First, you will need to plug your VM167 into an available USB (1.1/2.0) port on your computer so
Windows can detect this new device.
Follow the instructions to install the hardware driver.
Step-by-step screenshot images for following operating systems are included here for Windows XP
and Windows 7.
Note that you need administrative privileges to install new hardware.
Note: If you are using the Velleman K8061 or VM140 USB board in the same PC with the VM167,
you have to install the driver from the folder \VM167DriverWinUSB.
Also if you encounter any problems with the driver installed from the folder \VM167Driver, you can
remove this driver and install the driver from the folder \VM167DriverWinUSB.
Note: Only the driver from the folder \VM167Driver is usable with Windows 2000.
Hardware Installation
Windows 2000/XP(32/64 bit)
After you've plugged in your device you should be prompted with the Windows 'Found New
Hardware Wizard'.
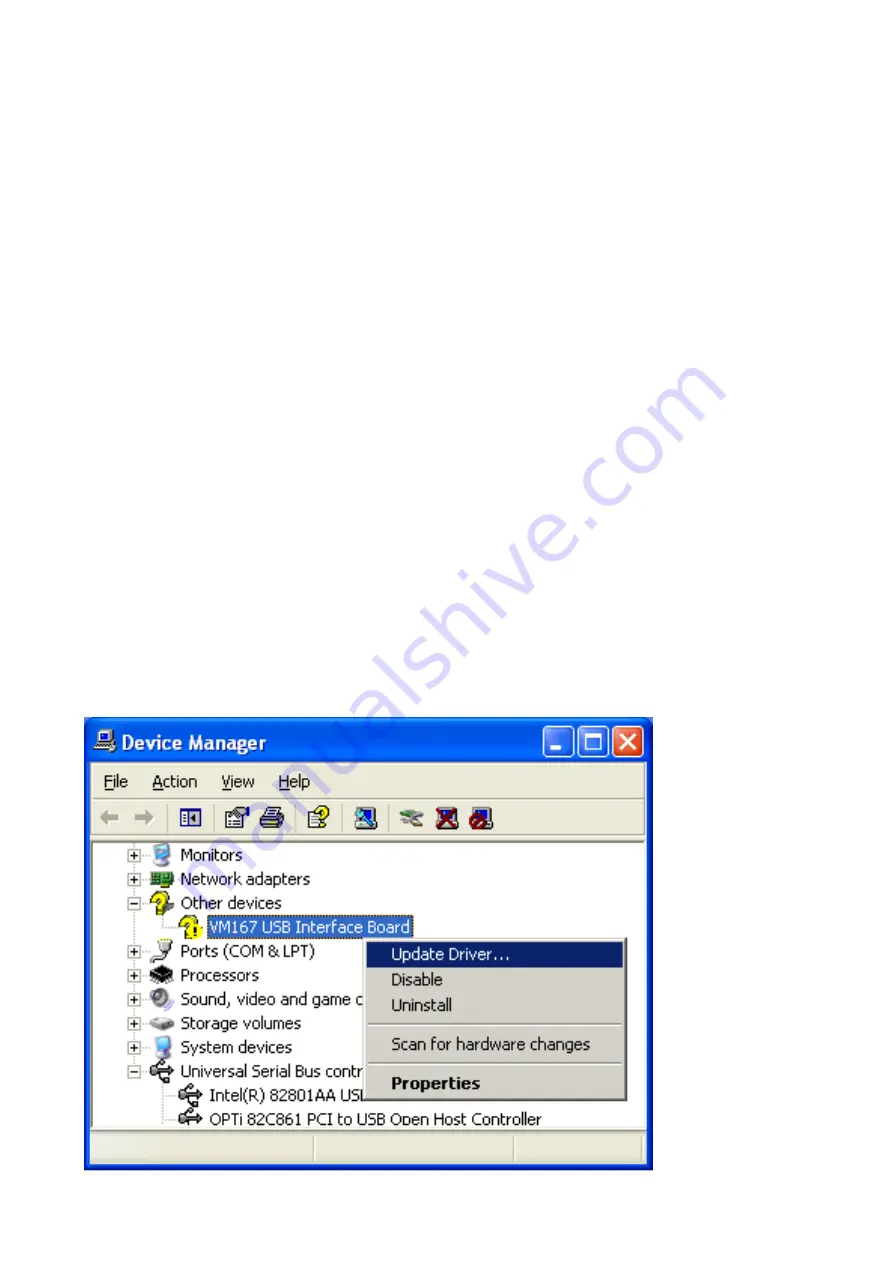
If the wizard did not open, you can open it manually through the following steps:
• Click Start -> Run..
• Type devmgmt.msc and press OK
• Search for a 'VM167 USB Interface Board' entry under the Other devices category
• Right-click the entry and click Update Driver..


