


10
clockwise when the wire is out;
Step 4: the welding wire passes through the correcting wheel (or guiding tube), the wire feeding wheel slot, and
then the guiding nozzle is inserted;
Step 5: pressing the pressing arm to press the welding wire, then lifting the handle to press the pressing arm, and
rotating the handle to a moderate pressure;
Step 6: Check the welding nozzle of the welding torch. The hole diameter should be the same as the diameter of the
wire used.
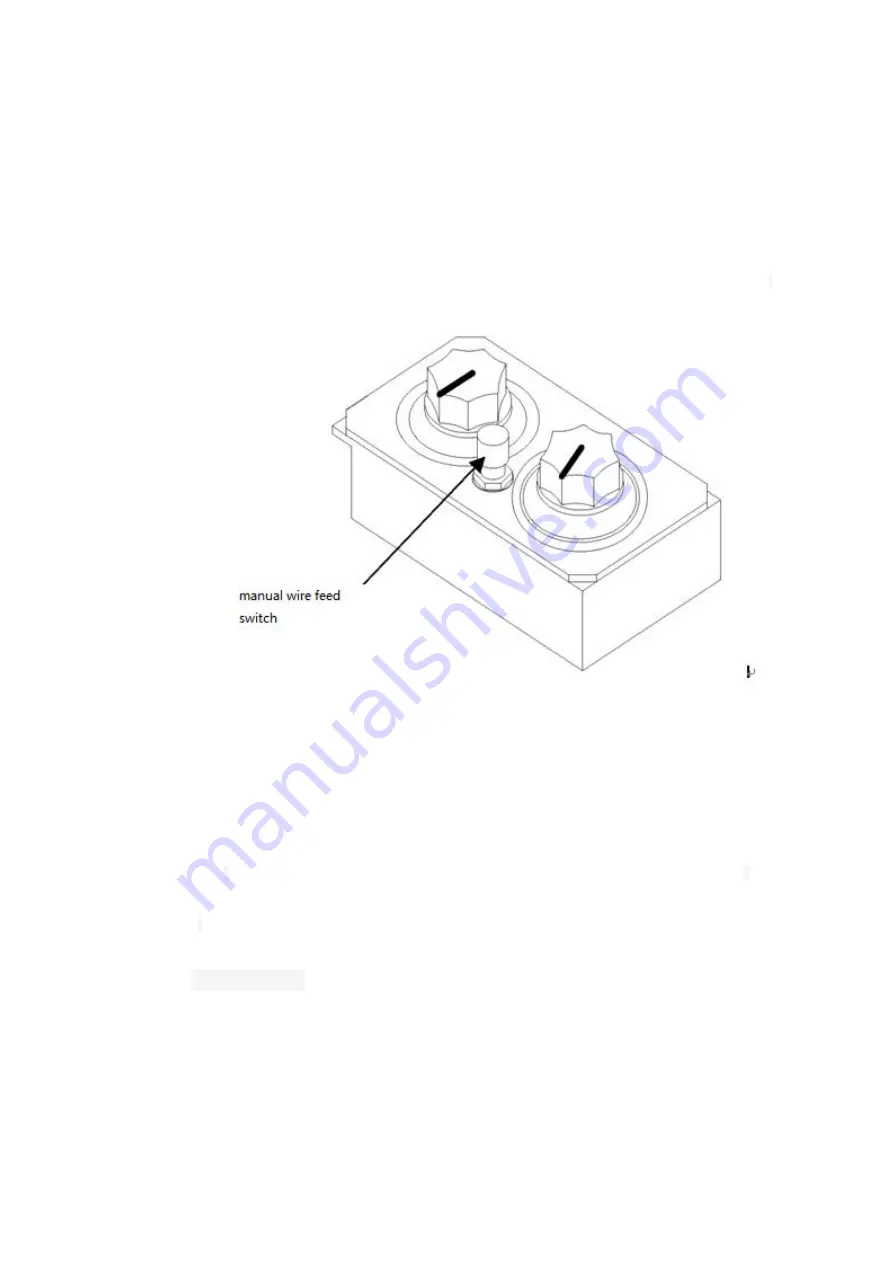
Step 7: Press the “manual wire feed” button of the wire feeder control box and adjust the “welding current
adjustment knob” to make the wire feed speed suitable until the 15-20 mm wire is exposed at the torch head.
(Manual wire feed switch is shown in Figure 7)
Fig.7 Wire feeder control box
Step 8: Adjust the screw sleeve of the wire handle to make the pressing force appropriate. The ideal pressing force is
that the wire can be transported normally. It is not suitable for slipping on the wire feeding wheel. Please adjust according
to the diameter of the wire marked on the adjusting handle.
DANGER! When jogging the wire, do not bring the end of the torch close to the face, eyes, or body. If the wire
suddenly jumps out into the face, eyes, or body, it will cause injury.
Note! Do not put your hands, fingers, hair, sleeves, clothes, etc. close to the rotating part of the wire feed wheel
when you feed the wire. If it is caught, it will cause injury.
6.2
Weld operation
(
1
)
4-Step weld operation (Non initial)
● Suitable for welding long or medium thick plates
● The filling of the arc pit at the end of the welding can be achieved by welding with the arc;
● During the welding process, when the continuous arc breaking occurs for more than 0.5 seconds, the self-locking is
automatically released and the welding is completed.
Содержание NB-350MK
Страница 1: ...MANUAL INSTRUCTION PLEASE READ CAREFELLY BEFORE OPERATION NB 350 500MK MIG MAG CO2 WELDING MACHINE...
Страница 15: ...7 Fig 4 Welder installation...
Страница 28: ...20 12 Annex 1 NB350MK diagram...
Страница 29: ...21 2 NB500MK diagram...


