# QL0232
UTILITY SINK, STORAGE CABINET & FAUCET
ÉVIER UTILITAIRE, ARMOIRE DE RANGEMENT ET ROBINET
ALL-IN-ONE
TOUT-EN-UN
OWNER’S MANUAL
MANUEL DE L’UTILISATEUR
Страница 1: ...QL0232 UTILITY SINK STORAGE CABINET FAUCET VIER UTILITAIRE ARMOIRE DE RANGEMENT ET ROBINET ALL IN ONE TOUT EN UN OWNER S MANUAL MANUEL DE L UTILISATEUR...
Страница 2: ...y Information READ AND SAVE THESE INSTRUCTIONS 1 Inspect your unit before proceeding Once you unpack your unit check for chips scratches cracks dents or scuff marks If any damage is noticed do not ins...
Страница 3: ...s of use of this product costs incurred for labour or materials removal and installation of replacement units or any other incidental or consequential damages Costs relating to obtaining access for re...
Страница 4: ...ALS REQUIRED NOT SUPPLIED Adjustable wrench Needle nose pliers Phillips screwdriver Utility knife Pipe wrench Sealant Hacksaw Carpenter s level Hex key Safety gloves Safety goggles PARTS REQUIRED NOT...
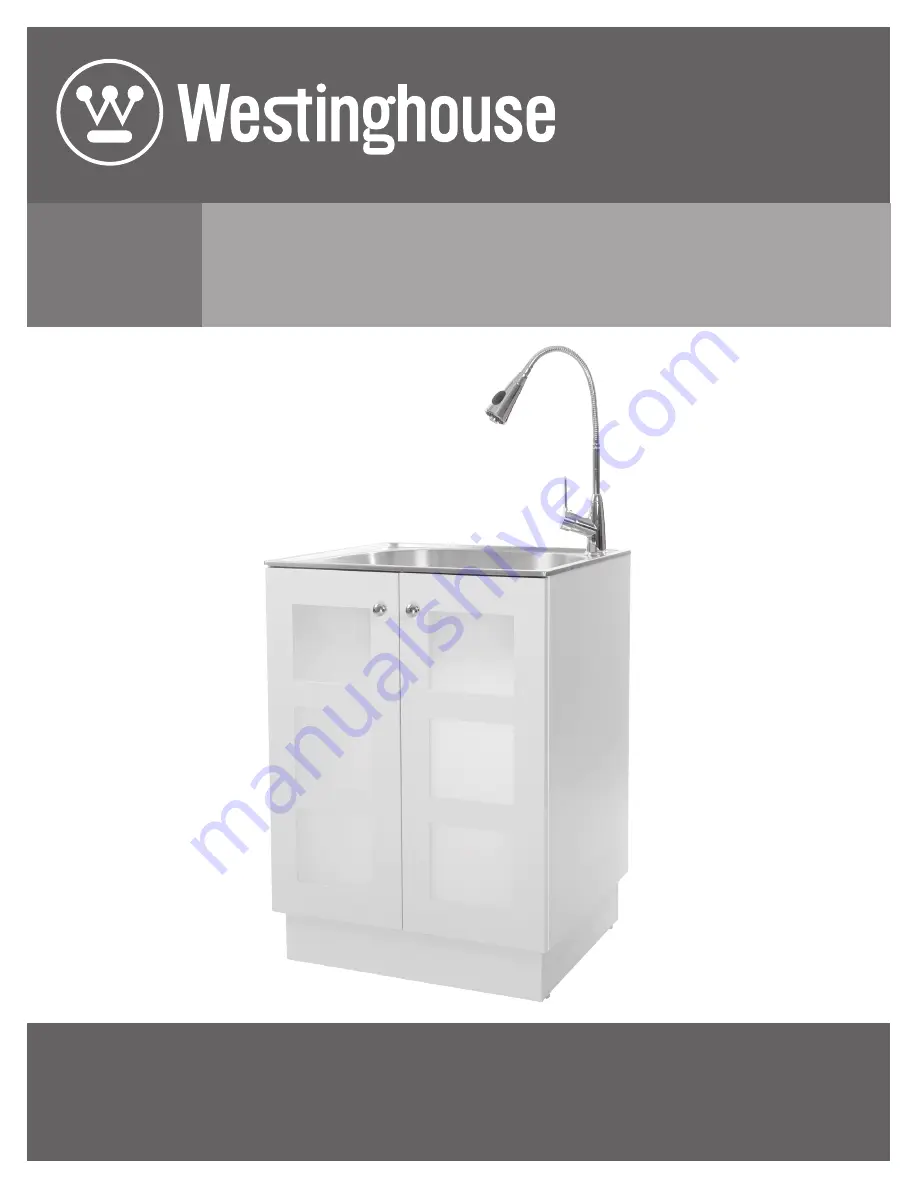
Страница 5: ...sistance ENGLISH Pre Installation continued PACKAGE CONTENTS A B C E F G H J K D FRONT Part Description Quantity A Cabinet 1 B Utility Sink 1 C Faucet 1 D Strainer Assembly 1 E Door Knobs 2 F Cabinet...
Страница 6: ...urer Do not dispose of packaging before you are satisfied with your new utility sink Remove the utility sink B and place it on a soft protective surface Turn the cabinet A upside down onto a protectiv...
Страница 7: ...door Attach the door knob E and tighten the door knob screw G Repeat on other door ADJUSTING THE DOOR POSITION If the doors need to be repositioned the hinges can be adjusted to ensure a precise fit w...
Страница 8: ...l it is snug Using a wrench or pliers tighten the assembly 5 Gently tighten the two screws on the retaining ring Do not over tighten 6 Screw the sprayer head onto the gooseneck 7 Connect the water sup...
Страница 9: ...ed MOUNTING THE UTILITY SINK 1 Carefully place a bead of sealant all around the top of the cabinet A Sealant 2 Ease the utility sink B into the cabinet A Ensure that it is placed evenly and is centere...
Страница 10: ...t C 2 Take off the plastic water temperature sign by hand then use the Hex key to take out the screw and pull out the handle body The top lever of the cartridge will be exposed 3 Unscrew the cap and r...
Страница 11: ...roducts as they will dull and scratch the finish Do not use scouting pads on the deck as they will dull the mirror finish Never use steel wool pads as they will leave iron particles on the sink which...
Страница 12: ...ilable in English and French Monday Friday from 8 30am 5pm EST Identify the required part s and have the part number s ready E F G H C A B D Part Description Code Quantity A Sprayer Head QHS135 1 B Ce...
Страница 13: ...DIRECTIVES 1 V rifier soigneusement l unit avant l installation pour vous assurer qu elle ne comporte aucun dommage Une fois que vous d ballez votre unit v rifiez pour les rayures les fissures les bos...
Страница 14: ...aucun autre dommage caus par un incident ou accessoire Les co ts encourus pour obtenir l acc s pour la r paration ou le remplacement sont la responsabilit de l utilisateur Nos obligations se limitent...
Страница 15: ...l mentaire FRAN AIS Pr installation OUTILS MAT RIAUX REQUIS NON INCLUS Cl Pinces Tournevis Phillips Couteau lame retractable Cl molette Mastic Scie m taux Niveau bulle Cl hexagonale Gants de s curit L...
Страница 16: ...H J K D DEVANT Pi ce Description Quantit A Armoire 1 B vier utilitaire 1 C Robinet 1 D Assemblage de la cr pine 1 E Poign es de l armoire 2 F Base de l armoire 1 G Vis de poign es de l armoire 2 H Vis...
Страница 17: ...de l emballage jusqu ce que vous soyez satisfait avec ce produit D baller l unit et placer l vier B sur une couverture ou un morceau de carton pour prot ger la surface Tourner l armoire A l envers sur...
Страница 18: ...G R peter pour l autre porte AJUSTEMENT DE LA POSITION DES PORTES Si les portes doivent tre repositionn es les charni res peuvent tre r gl es de fa on s adapter pr cisement avec l armoire 1 La vis de...
Страница 19: ...a bague de retenue la main jusqu ce qu elle soit bien serr e En utilisant une cl ou une pince serrer l assemblage 5 Serrer l g rement les deux vis sur la bague de retenue Ne pas trop serrer 6 Visser l...
Страница 20: ...de la partie sup rieure du meuble A Mastic 2 Introduire l evier B sur l armoire A en vous assurant que celui ci soit de niveau et centr sur le meuble Essuyer l exc s de scellant en silicone Utiliser d...
Страница 21: ...CARTOUCHE Si l avenir la cartouche en c ramique devait tre remplac e 1 Couper l alimentation en eau du robinet 2 Retirer la poign e la main Lib rer la vis avec la cl hexagonale fournie et retirer le c...
Страница 22: ...de nourriture de d tergent de savon de graisse ou de condiment pendant des p riodes prolong es Ne jamais employer des produits abrasifs car ils peuvent ternir et rayer le fini Ne pas utiliser des tam...
Страница 23: ...3 0098 service disponible en anglais et fran ais de lundi au vendredi 8h30 17h H N E Veuillez identifier les pi ces n cessaires et ayez les codes port e de main E F G H C A B D Pi ce Description Code...
Страница 24: ...t Laurent Qu bec H4S 2C3 1 877 333 0098 cs conglomkb com service available in English and French Monday Friday from 8 30am 5pm EST service disponible en anglais et fran ais du lundi au vendredi 8h30 1...