background image


OSD Menu 

Sub-Menu 

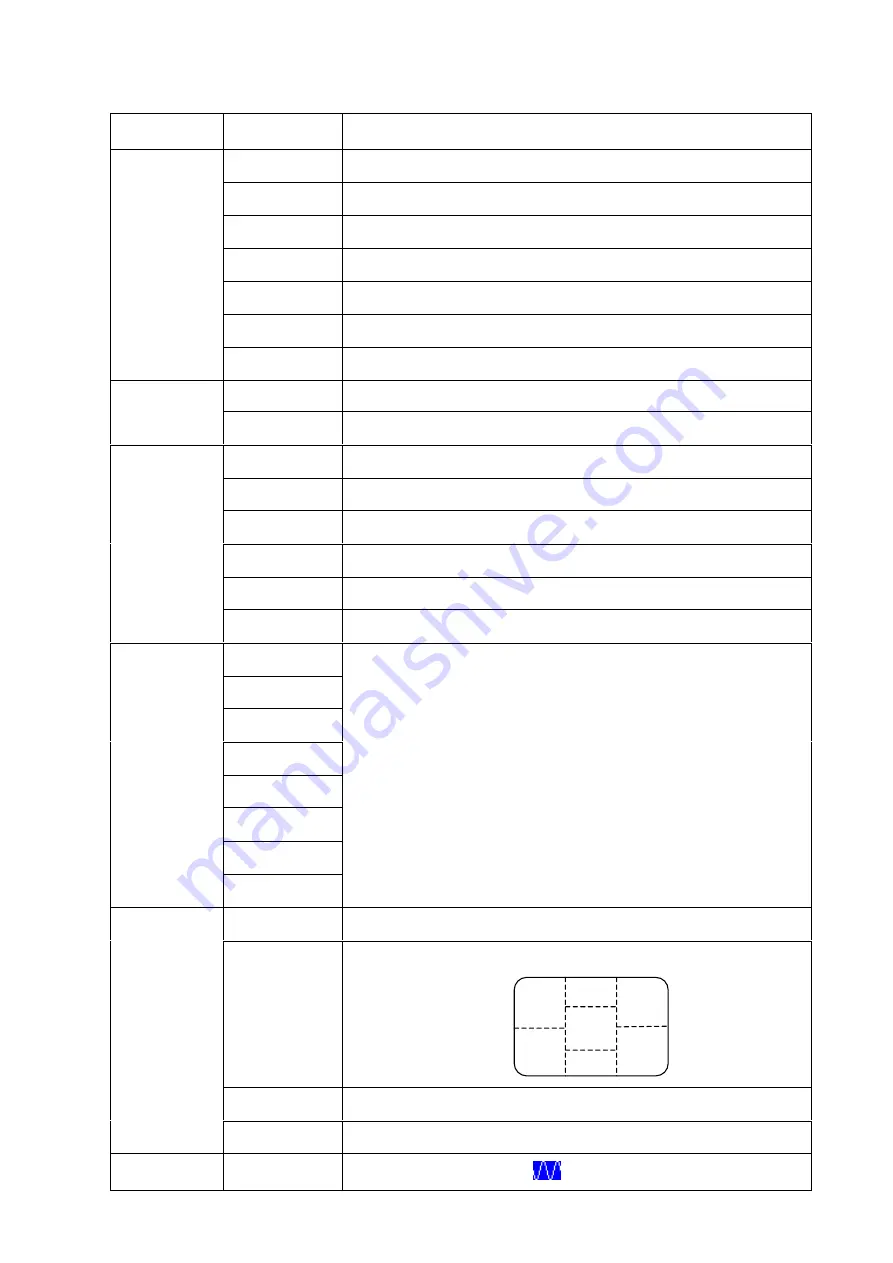
Description and Function


Image Brightness 

Adjust the brightness of the screen 

 Contrast


Adjust the contrast of the image 

 Clock


Adjust the clock pulse of the image 

 Phase


Adjust the focus of the image 

 H. 

Position


Move the image left and right on the screen 

 V. 

Position


Move the image up and down on the screen 

 Sharpness 

Adjust the picture sharpness of lower resolutions 

Audio Volume 

Adjust the audio volume 

 Mute 

Turn on or off audio muting 

Color 9300K 

Set the color temperature to 9300K white color 

 7500K


Set the color temperature to 7500K white color 

 6500K 

Set the color temperature to 6500K white color 

 User/Red 

Adjust red gain 

 User/Green 

Adjust green gain 

 User/Blue 

Adjust blue gain 

Language English


Select the OSD language 

 Français


 Italiano


 Deutsch 


 Español 


日本語


简体中文


繁體中文


Settings OSD 

Timeout 

Adjust OSD display time setting 

 OSD 

Position 

Move the OSD display position to one of the following 5 positions
within the overall screen. 


 Auto 

Setting 

Adjust clock, phase and positions automatically 

 Recall


Restore to factory settings 

Input Source 

Analog 

Select Analog input source: 


4

1

3

      8 

Содержание LCM-15V5

Страница 1: ...15 LCD MONITOR Model LCM 15v5 ...

Страница 2: ...ER ON 6 OSD MENU FUNCTIONS 7 OSD MENUS 8 BACKLIGHT CONTROL 9 DISPLAY MODES 9 9IMAGE PROBLEM 10 NO SIGNAL INPUT 10 OUT OF RANGE 10 APPENDIX 11 SPECIFICATIONS 11 TROUBLESHOOTING 12 No Power 12 No Image 12 Power is ON but no Screen Image 12 Out Of Range 12 Fuzzy Image 12 Image Too Bright or Too Dark 12 Distorted Image 12 Image is Not Centered size is not scaled correctly 12 Colors are Not Correct 12 ...

Страница 3: ...e monitor to rain water moisture or high humidity Do not place it near basins or sinks where it may come in contact with water Never place heavy or sharp objects on the LCD monitor video cable or power cord Overloading Outlets Do not overload electrical power sources when installing the LCD monitor Overloading wall outlets circuits or extension cords can result in overheating fire or electric shoc...

Страница 4: ...e The LCD monitor contains high voltage parts You may be seriously injured if you touch them Do not attempt repairs yourself The warranty does not cover repairs or attempted repairs by anyone not authorized by Westinghouse Digital Refer all servicing and repairs to qualified service personnel If the monitor begins to emit smoke an abnormal noise or a strange odor immediately turn it off and unplug...

Страница 5: ...e cloth to clean the screen To Clean the Case 1 Use a soft dry cloth 2 If it still is not clean use a small amount of non ammonia non alcohol based mild non abrasive detergent on a clean soft lint free cloth to clean the surface Disclaimer Westinghouse Digital does not recommend the use of any ammonia or alcohol based cleaners on the LCD screen or case Some chemical cleaners have been reported to ...

Страница 6: ...he selection criteria for power cords used in the United States and Canada Cord Type Size of Conductors in Cord Maximum Current Rating of Unit SJT 18 AWG 16 AWG 14 AWG 10 Amps 12 Amps 12 Amps SVT 18 AWG 17 AWG 10 Amps 12 Amps FCC Compliance Statement This equipment has been tested and found to comply with the limits for a Class B digital device pursuant to part 15 of the FCC Rules These limits are...

Страница 7: ...connector labeled D SUB and an audio cable to the connector labeled LINE IN from the back panel of the LCD monitor to your PC 3 Connect the Power Cable Connect the DC power adapter cord to the monitor to the connector labeled DC IN and then connect the female AC power cord to the adapter Plug the AC power cord into a properly grounded AC outlet 4 Turn the Power On Press the power button on the fro...

Страница 8: ... press the Menu keypad button on the control keys Note The OSD menu display will disappear automatically after approximately 10 seconds if no action is taken The LCD monitor has been adjusted to optimal settings before shipment Adjustments to the monitor settings can be made using the OSD menu Press the Menu keypad button to display the OSD menu Press the or keypad button to select the function to...

Страница 9: ...ing Color 9300K Set the color temperature to 9300K white color 7500K Set the color temperature to 7500K white color 6500K Set the color temperature to 6500K white color User Red Adjust red gain User Green Adjust green gain User Blue Adjust blue gain Language English Select the OSD language Français Italiano Deutsch Español 日本語 简体中文 繁體中文 Settings OSD Timeout Adjust OSD display time setting OSD Posi...

Страница 10: ...ent Volume Adjustment Backlight Control Display Modes The monitor backlighting can be controlled by using the Turbo button on the keypad There are 3 modes Economy Text and Picture To toggle between these modes press the Turbo key until the mode you desire is selected These modes automatically change the backlighting levels between bright brighter and brightest 9 ...

Страница 11: ...re is no source connected to the monitor the following error message will be displayed Out of Range If the monitor settings are not compatible with the PC or out of range of the LCD monitor the following error message will be displayed 10 ...

Страница 12: ... male male Speaker Output Built in audio amplifier and speakers 2 5 watts 2 channels Power Voltage 100 240 VAC 50 60 Hz auto switch 1 5A Operating Conditions Temperature 32 F to 95 F 0 C to 35 C Humidity 20 to 80 no condensation Altitude Up to 3 000 meters Storage Conditions Temperature 4 F to 130 F 20 C to 55 C Humidity 20 to 85 no condensation Altitude Up to 12 000 meters Dimensions Physical 16 ...

Страница 13: ... output resolution and frequency and compare the value with the preset values of the computer s graphics card Fuzzy Image Adjust the Phase setting on the monitor Image is Too Bright or Too Dark Adjust the brightness and contrast levels using the OSD Make sure that the computer is not displaying an irregular image Check the VGA connection between the computer and LCD monitor Perform Auto Adjust Dis...

Страница 14: ...m VESA hole pattern to secure a mounting plate to the LCD monitor Use professional installation to reduce the risk of injury and damage Additional Questions See our website at www westinghousedigital com Contact Westinghouse Digital Customer Service at 866 287 5555 or write us at service westinghousedigital com 13 ...

Страница 15: ...SE UM 1502 0501 ...

Отзывы: