


1980en05.docx
2018-06-08
5 (6)
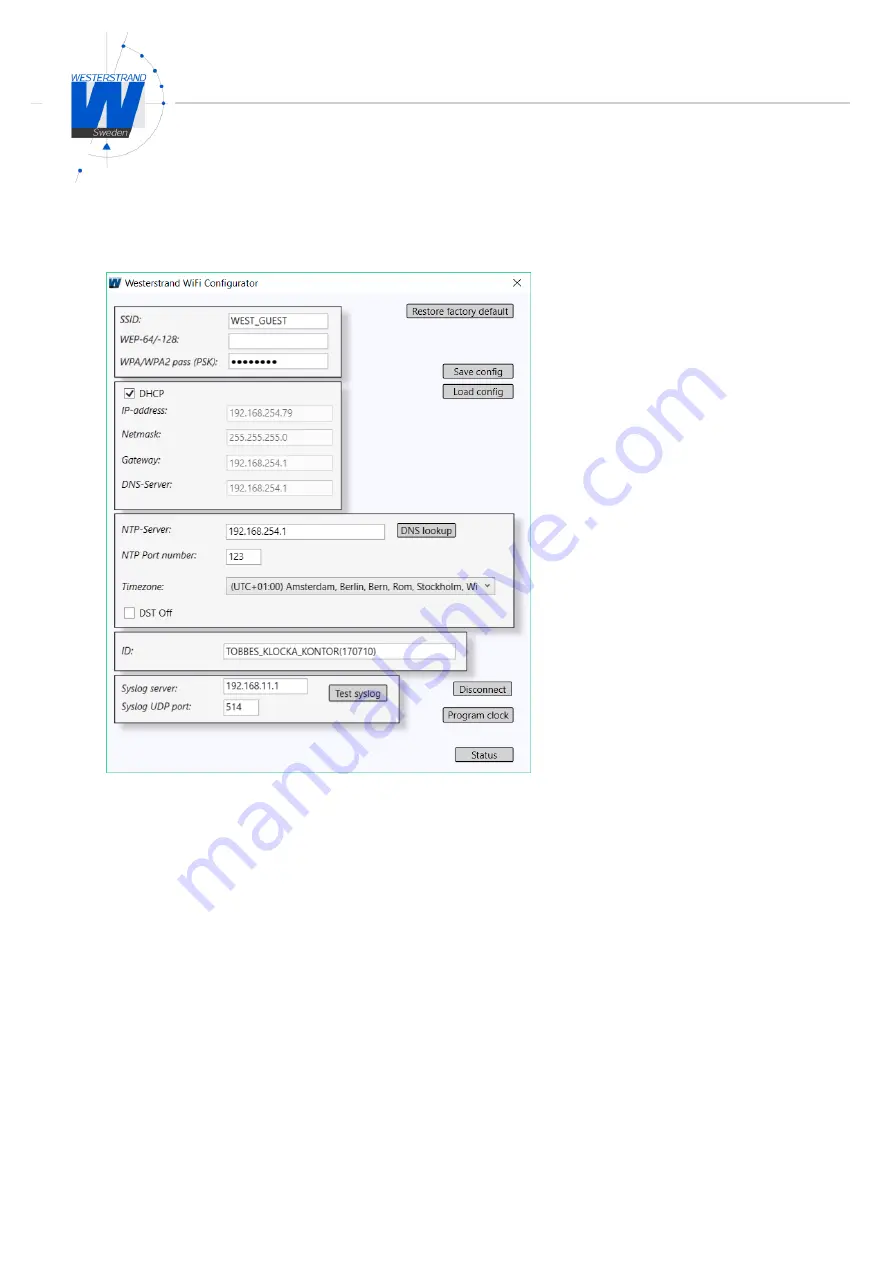
Settings
Select
”Settings”
to configure the clock.
First, find out which network should be connected and type this in the "SSID" field. SSID with spaces
is not supported. Fill in the current network settings. In addition to the IP address, the NTP server can
also be entered as a DNS name. In this case, enter the DNS name in the "NTP Server" field and press
"DNS Lookup." If the name is found, it will be converted to a valid IP address. Examples of ntp server
may be "ntp.se".
At each synchronization, the clock can send messages with status and battery information to a syslog
server. On the installation disk, you will find a simpler demo program for managing syslog messages.
When all settings are made, press "Program clock" to program the clock. A message will appear if the
programming has been successful. To check that the clock has been connected to the network, press
"Status" and then "Find clock" to update the information. If the clock is connected to the network, it
says "YES" after "Connected". After the configuration, the USB cable must be disconnected to
synchronize and work normally.
Several clocks can be programmed sequentially without the need to reboot the program. The ID can
then be changed between each programming if desired. The settings can be saved to a file by
pressing "Save config" and then retrieved with "Load config".


