


Common Things To Be Mindful Of During Cutting
It will take you a few cuts and some time to get familiar with WAZER. To help start you off on
the right foot we have accumulated a list of common failure modes and things to look out for.
Follow all Safety Advisories when performing a Cut:
•
ALWAYS wear eye protection.
•
NEVER leave WAZER unattended while in operation.
•
ALWAYS know how to quickly turn off water and power in the event of an emergency.
Pay Attention!
It is important to monitor WAZER while it is cutting. Some issues may require intervention to avoid
damaging WAZER or Material.
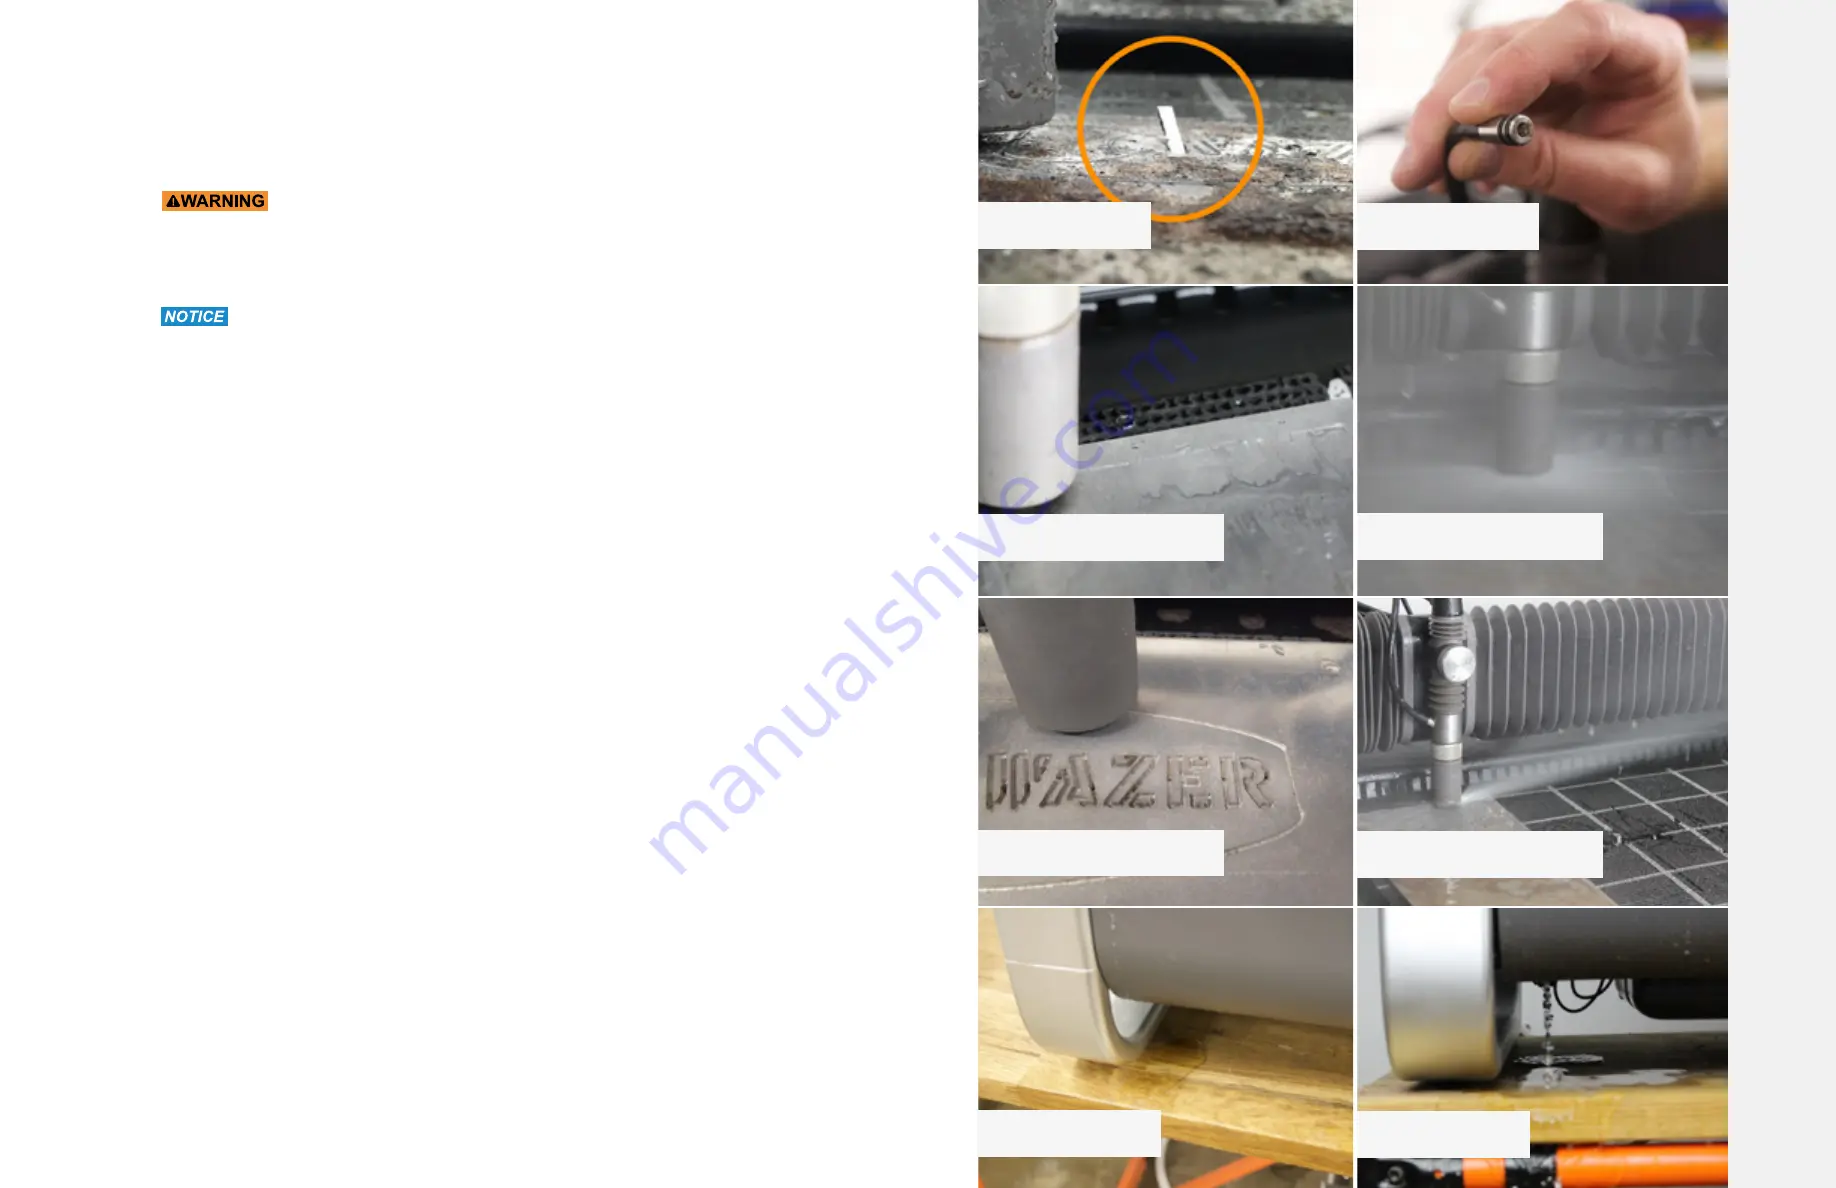
Pop-Ups:
Pop-Ups are when a section of material pops up above the original surface of the Material,
dislodging itself from its original position as it is cut. An edge may come into contact with the Nozzle,
resulting in the Gantry losing its position. This will cause a Failed Cut due to registration errors.
Pop-Ups occur if you have not sufficiently connected the cut portions of your Design to the outer
section that is fastened to the Cut Bed using the “Tab” feature in Wam (more on this feature in
Section 6: Creating Cut Files). If you see a Pop-Up, press Start/Stop immediately and attempt to fix
the problem before the gantry jams against it.
Abrasive Clogs:
Abrasive Clogs can sometimes occur on the Abrasive Hose, preventing Abrasive from flowing into
the Nozzle. This will be easy to identify since WAZER will stop cutting through the Material. Instead,
the Nozzle will spray water all over, and there will be a significant change in the sound of WAZER’s
operation. If there is an Abrasive Clog, press Start/Stop immediately. Refer to the website resources
section for more information.
Leaks:
Despite WAZER being an enclosed system it is not completely sealed. You will inevitably find an
occasional drip or some Used Abrasive outside of the WAZER. However, you should monitor for any
abnormal drips, leaks or puddles. If you notice this, press Start/Stop immediately and trace where
the leak originates. Refer to the website resources section for more information.
Expected potential drip areas on WAZER:
•
When opening and closing the Door.
•
Water may spray through the cracks between the Door and Hoops.
•
There may be occasional drips around the Side Windows.
Solution After Leaks Detected:
If there is a leak or things get wet that likely shouldn’t have, turn everything off, unplug power
cords if they didn’t get wet, wipe the leak, and turn everything off, unplug power cords if they didn’t
get wet, wipe the leak, and LET IT DRY overnight before seeing if anything was damaged and is still
working. Water doesn’t damage electronics, it’s the combination of water with electricity that does,
so letting them air dry lets you be sure that the next turn on won’t destroy something.
Water Exiting Under the Abrasive Hopper:
If you notice water leaking or spraying out of WAZER
from underneath the Abrasive Hopper, press Start/Stop immediately as you have just experienced
a “backflow”. Refer to the online resources section for more information on how to resolve this.
Popup
Abrasive Clog
Abrasive Clog Identification
Abrasive Clog Identification
Partial Cutting
Partial Cutting Identification
Leak
Leak
C
ut
tin
g W
ith W
AZER |
SE
C
TION 5
70
71


