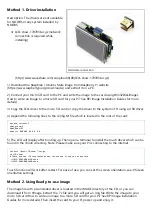
Method 1. Driver installation
Description: The drivers are not available
for NOOBS or any system installed by
NOOBS.
LCD-show-170703.tar.gz (network
connection is required while
installing)
(http://www.waveshare.com/w/upload/0/00/LCD-show-170703.tar.gz)
1) Download the Raspbian / Ubuntu Mate image from Raspberry Pi website
(https://www.raspberrypi.org/downloads/) and extract it on a PC.
2) Connect your micro SD card to the PC and write the image to the card using Win32DiskImager.
How to write an image to a micro SD card for your Pi? See RPi Image Installation Guides for more
details)
3) Copy the LCD driver to the micro SD card (or copy the driver to the system of Pi using a USB drive).
4) Append the following lines to the config.txt file which is located in the root of the card:
max_usb_current=1
hdmi_group=2
hdmi_mode=87
hdmi_cvt 800 480 60 6 0 0 0
5) The LCD will display after booting up. Then open a terminal to install the touch driver which can be
found in the /boot/ directory. Note: Please make sure your Pi is connecting to the internet.
tar xzvf /boot/LCD-show-*.tar.gz
cd LCD-show/
# There are two LCD resolution modes, choose one of the two to execute.
./LCD35-HDMI-480x320-show
./LCD35-HDMI-800x480-show
Method 2. Using Ready-to-use image
The image file with pre-installed driver is located in the IMAGE directory of the CD, or you can
download it from #Image. Extract the .7z file and you will get an .img file. Write the image to your
micro SD card (How to write an image to a micro SD card for your Pi? See RPi Image Installation
Guides for more details). Then insert the card to your Pi, power up and enjoy it.
Содержание WSH-12824
Страница 7: ......


