TROUBLESHOOTING
Lights do not turn ON with motion (LED does flash)
1. Press and release each button to make sure that the correct lights
come ON for each relay.
-
If the lights do NOT turn ON
, check wire connections, especially the
Load connection.
-
If the lights turn ON
:
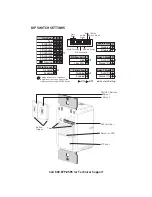
Verify the correct On Mode is selected in DIP switches 8 and 9.
Check to see if light level control is enabled: cover the sensor
lens with your hand. If the lights come ON, adjust the light level
setting.
2. If lights still do not turn ON, call 800.879.8585 for technical support.
Lights do not turn ON with motion (LED does not flash)
1. Press and release each button to make sure that the correct lights
come ON for each relay. If the lights turn ON, verify that Sensitivity is
on High.
2. Check the wire connections.
- Verify the ground connection.
- Make sure line and load are not reversed.
- Confirm that connections are tightly secured.
3. If lights still do not turn ON, call 800.879.8585 for technical support.
Lights do not turn OFF
1. There can be up to a 30 minute time delay after the last motion is
detected. To verify proper operation, set DIP switch 1 to ON, then reset
switches 1, 2, and 3 to OFF to start Test Mode. Move out of view of the
sensor. The lights should turn OFF in approximately 5 seconds.
2. Verify that the sensor is mounted at least six feet (2 meters) away from
any heating/ventilating/air conditioning device that may cause false
detection. Verify that there is no significant heat source (e.g., high
wattage light bulb) mounted near the sensor.
3. If the lights still do not turn OFF, call 800.879.8585 for technical support.
Sensing motion outside desired areas
1. Select PIR Sensitivity – Low (DIP switch 5 = ON) if necessary.
2. Mask the PIR sensor’s lens to eliminate unwanted coverage area.
Red LED is lit all the time and the sensor features don’t work.
1. Check DIP switches 1,2,3. If they are all ON the unit is in Service Mode.
Set the DIP switches to a valid Time Delay setting.
2. If re-setting the Time Delay switches does not clear the LED call
technical support.


