


To enable the leak sensor:
1.
Power-on the sample manager.
2.
In the console, select
System
from the system tree.
3.
Click
Control
>
Leak Sensors
.
4.
Enable the column-compartment leak sensor by selecting
Sample Manager (Upper)
.
2.5.3 Controlling the column compartment
To control the CH-A module, enter its compartment temperature settings using the sample
manager control panels or method editor in the chromatography data software. For details, refer
to the Waters online Help.
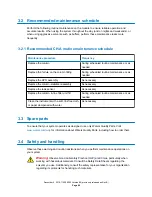
Recommendation:
When sample and column temperature are important to an application, in
addition to specifying explicit temperature set points in the method, specify appropriate
temperature limits. Together, these settings ensure that system operation occurs only within the
defined limits and that any occurrence of an unacceptable deviation from the set points is flagged
by an error message acknowledging the variance.
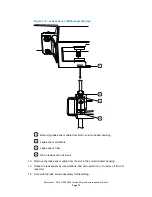
2.6 Responding to a leak-sensor alarm
After approximately 1.5 mL of liquid accumulates in the leak-sensor reservoir, an alarm sounds,
indicating that the leak sensor detected a leak.
Warning:
To prevent burn injuries, set the column temperature to Off, and then allow
the column compartment and its components to cool for 60 minutes before touching
them. Monitor the column compartment's internal temperature to ensure that all
components are cool.
Warning:
To avoid personal contamination with biologically hazardous, toxic, and corrosive
materials, wear chemical-resistant, powder-free gloves when performing this procedure.
Warning:
To avoid eye injury, use eye protection when performing this procedure.
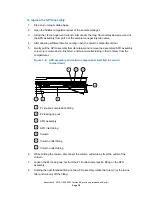
Notice:
To avoid scratching or otherwise damaging the leak sensor,
• do not allow buffered solvents to accumulate and dry on it;
• do not submerge it in a cleaning bath.
Note:
Small column leaks can be undetectable because the liquid leaked can evaporate before
reaching the leak sensor reservoir.
December 4, 2019, 715005052 Version 02 (previously released as Rev.B)
Page 65


