background image

 W06F3071W

Assembly Instructions

Содержание W06F3071W

Страница 1: ...W06F3071W Assembly Instructions ...

Страница 2: ......

Страница 3: ...1 1 6 11 2 9 5 10 8 7 4 13 3 14 14 13 12 ...

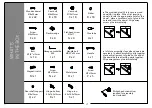
Страница 4: ... steps when dowels are necessary to attach assembly parts together place a small amount of glue on the end of the dowel before attaching parts together Wipe away excess glue immediately Philips head screwdriver required for assembly not included Wooden dowel Ø8x30mm Ø15x11mm Ø6x35mm Cam bolt Cam bolt Sticker Screw Ø4x50mm Flat head screw Ø3x17 Plastic wedge M 4 Hexagon socket key Ø1 4 x13mm Bolt G...

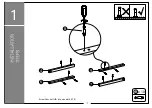
Страница 5: ...9 7 4 6 B Screw Cam bolts B into panels 4 6 7 9 B x 10 3 1 ...

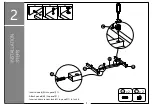
Страница 6: ...4 2 1 2 3 A x 2 C x 2 Insert dowels A into panel 11 Attach panels 6 9 to panel 11 Insert and secure cam locks C to panel 11 to lock it 11 6 9 A C ...

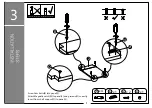
Страница 7: ...5 3 2 B x 4 M x 1 N x 2 Q x 1 Attach Magnetic catch M to panel 2 using screws N correctly Q B N M Screw Cam bolts B into panel 2 Insert Door shaft support Q to panel 2 ...

Страница 8: ...6 4 1 2 3 Insert dowels A into panels 5 8 Attach panel 2 to panels 5 8 Insert and secure cam locks C to panels 5 8 to lock it A x 4 C x 4 2 5 8 A C ...

Страница 9: ...7 5 A x 4 C x 4 1 2 3 Insert dowels A into panels 6 9 Attach panels 5 8 to panels 6 9 Insert and secure cam locks C to panels 5 8 to lock it 5 8 6 9 A C ...

Страница 10: ...8 6 A x 4 C x 4 1 2 3 Insert dowels A into panels 5 8 Attach panels 4 7 to panels 5 8 Insert and secure cam locks C to panels 5 8 to lock it 7 4 5 8 A C ...

Страница 11: ...9 7 10 3 5 8 Carefully slide panel 10 into place along the back of the assembly Q x 1 Insert Door shaft support Q to panel 3 Q ...

Страница 12: ...10 8 Insert dowels A into panels 4 5 6 7 8 9 Attach panel 3 to panels 5 8 using screws E A x 8 E x 4 3 5 4 6 9 8 7 A E ...

Страница 13: ...11 9 I x 8 Attach parts 13 to parts 14 using Bolts I J x 1 14 14 13 13 I J ...

Страница 14: ...12 10 Attach parts 13 14 to panel 3 using Bolts I I x 6 3 13 14 14 13 I ...

Страница 15: ...13 11 1 B x 4 B Screw Cam bolts B into panel 1 ...

Страница 16: ...14 12 1 2 3 C x 4 Attach panel 1 to panels 4 6 7 9 Insert and secure cam locks C to panels 4 6 7 9 to lock it 1 9 7 4 6 C ...

Страница 17: ...15 13 F x 4 G x 4 Secure parts F using screws G F G ...

Страница 18: ...16 14 K x 2 L x 1 O x 1 P x 3 S x 1 Attach Hinge top S to panel 12 using screws P Attach part O to panel 12 using screw P Attach Handle L to panel 12 using bolts K 12 O P P S L K ...

Страница 19: ...17 15 Insert Hinge bottom R to panel 3 R x 1 P x 2 Attach Hinge bottom R to panel 12 using screws P Insert panel 12 to panel 2 2 3 12 R P ...

Страница 20: ...6 1 2 Loosen screws P and adjust door then tighten screws P To adjust side ways Stick stickers D on cam lock C D x 18 To adjust depth Loosen screws N and adjust Magnetic catch M then tighten screws N P N M ...

Страница 21: ...19 17 Final Assembly ...

Страница 22: ......

Отзывы: