Rev Oct-2021
INSTALLATION INSTRUCTIONS
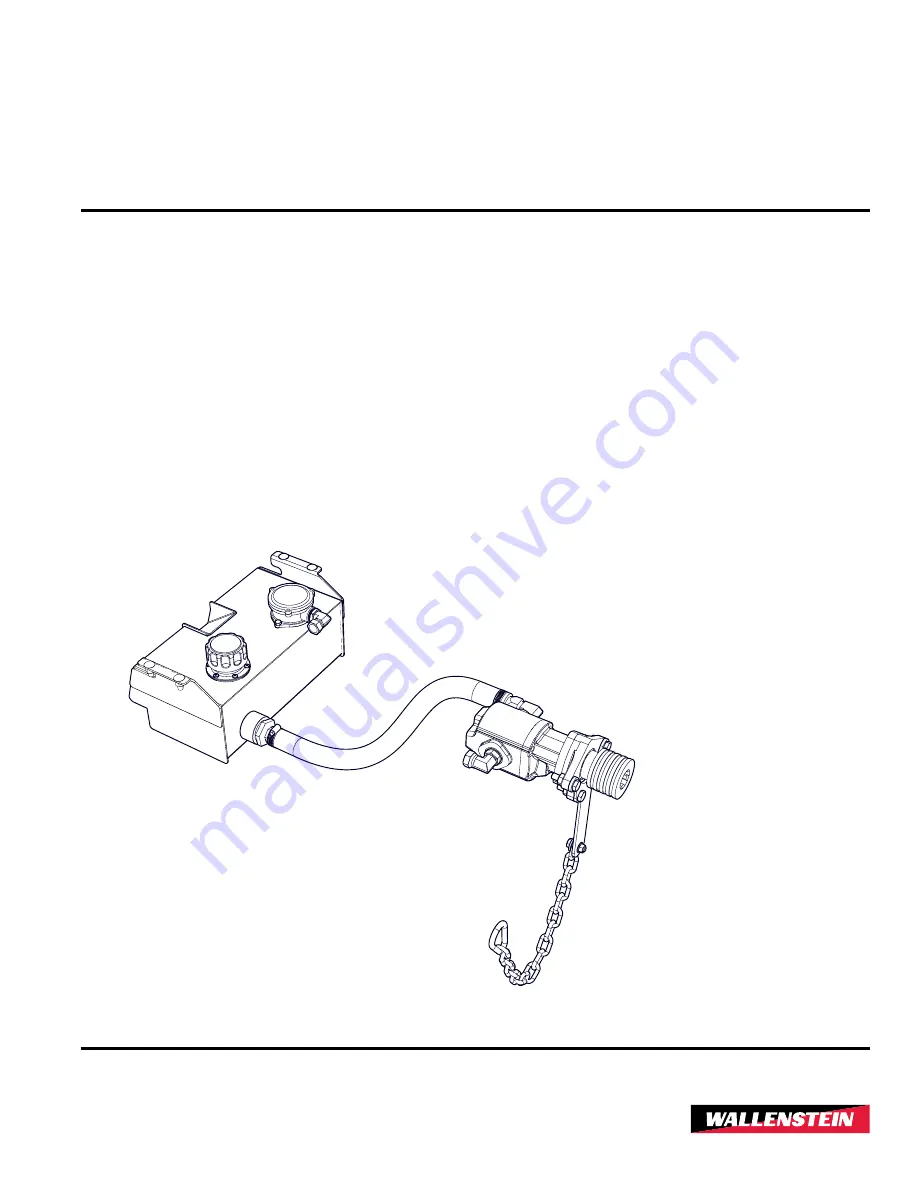
PTO Pump Kit for Backhoes
Wallenstein PTO Hydraulic Pump Kit is required when mounting a Wallenstein
backhoe on a tractor that does not have auxiliary hydraulic power.
PTO
62
& PTO
72
Z97824_En
Страница 1: ...INSTALLATION INSTRUCTIONS PTO Pump Kit for Backhoes Wallenstein PTO Hydraulic Pump Kit is required when mounting a Wallenstein backhoe on a tractor that does not have auxiliary hydraulic power PTO62 PTO72 Z97824_En ...
Страница 2: ...rded WARNING Indicates a potentially hazardous situation that if not avoided could result in death or serious injury and includes hazards that are exposed when guards are removed It may also be used to alert against unsafe practices CAUTION Indicates a potentially hazardous situation that if not avoided may result in minor or moderate injury It may also be used to alert against unsafe practices IM...
Страница 3: ...ORB 90 Elbow 1 10 Z52403 3 4 Plain Hose x 36 1 11 Z53102 Pump 2 38 CIR 1 12 Z55101 Tank Strainer Suction 1 13 Z55201 Tank Mounted Return Filter FP08 1 14 Z55401 Breather Filler Cap 1 15 Z71107 Hex Bolt 1 4NC x 3 4 2 16 Z71310 Hex Bolt 3 8NC x 1 1 17 Z72231 Hex Lock Nut 3 8NC 4 18 Z72531 Flange Nut 3 8NC 1 19 Z73230 Wide Flat Washer 3 8 1 20 Z76231 Carriage Bolt 3 8NC x 1 4 21 Z76711 Self tapping S...
Страница 4: ... Z52403 3 4 Plain Hose x 36 1 11 Z53102 Pump 2 38 CIR 1 12 Z55101 Tank Strainer Suction 1 13 Z55201 Tank Mounted Return Filter FP08 1 14 Z55401 Breather Filler Cap 1 15 Z71107 Hex Bolt 1 4NC x 3 4 2 16 Z71310 Hex Bolt 3 8NC x 1 1 17 Z72231 Hex Lock Nut 3 8NC 4 18 Z72531 Flange Nut 3 8NC 1 19 Z73230 Wide Flat Washer 3 8 1 20 Z76231 Carriage Bolt 3 8NC x 1 4 21 Z77161 Hex Bolt M10 x 40mm 4 22 Z77260...
Страница 5: ...e same way for all models Installation and setup instructions apply to both kits unless specified Please follow this instruction carefully The PTO Hydraulic Pump Kit comes partially assembled Illustrations show typical assembly This assembly procedure is one time only Once assembled only regular maintenance and minor adjustments are required Tighten all hardware using the Bolt Torque table on page...
Страница 6: ...o the tank mounting holes Adjust the tank position as required then tighten mounting bolts Fig 5 Installing Reservoir in Backhoe Frame Step 3 Connect the pressure line and return lines The pressure line is connected to the pump pressure port The return line is connected to the return connection on the reservoir Refer to the illustration on the next page Apply thread sealant to the hose threads to ...
Страница 7: ...eyes causing serious injury Tighten all connections before applying pressure Search for leaks with a piece of cardboard or wood not your hand Take care to protect hands and body from high pressure fluids Wear a face shield or goggles for eye protection If an accident occurs see a doctor familiar with this type of injury immediately W040 Fig 14 Pressure and Return Line Connections ...
Страница 8: ...r s foot slipping from the clutch can lead to injury or fatality to the person standing nearby W048 Stop close enough so hydraulic hose slack allows the pump to be mounted onto the tractor PTO shaft Set the park brake and remove the ignition key Fig 9 Positioning Tractor Retract the lock collar and slide the pump over the PTO shaft Make sure the collar seats in the groove and locks Tug on the pump...
Страница 9: ...hoe Carefully move one of the valve control levers to check system function WARNING Risk of personal injury from component failure Excessive PTO speeds above 540 rpm or incorrect rotation can result in machine damage W084 Maintenance Hydraulic Oil Changing Change the hydraulic oil at 100 hours of operation or annually IMPORTANT Change the return filter and clean the suction strainer when the reser...
Страница 10: ...the suction strainer should be removed and cleaned The strainer is made of stainless steel screen and is reused 1 Remove the suction hose then remove the strainer 2 Place the suction strainer in a solvent tank and use a small brush to clean it Examine the strainer screen and replace it if there are holes or damage 3 Dry the suction screen thoroughly then re install Hydraulic Oil Filter With the hy...
Страница 11: ...inal purchase receipt with any claim This warranty does not cover the following 1 Normal maintenance or adjustments 2 Normal replacement of wearable and service parts 3 Consequen al damage indirect damage or loss of profits 4 Damages resul ng from Misuse negligence accident the or fire Use of improper or insufficient fuel fluids or lubricants Use of parts or a ermarket accessories other than genuine Wa...
Страница 12: ...y 5 NOTE Bolt grades are identified by their head markings Imperial Bolt Torque Specifications Bolt Diameter Torque Value SAE Gr 2 SAE Gr 5 SAE Gr 8 lbf ft N m lbf ft N m lbf ft N m 1 4 6 8 9 12 12 17 5 16 10 13 19 25 27 36 3 8 20 27 33 45 45 63 7 16 30 41 53 72 75 100 1 2 45 61 80 110 115 155 9 16 60 95 115 155 165 220 5 8 95 128 160 215 220 305 3 4 165 225 290 390 400 540 7 8 170 230 420 570 650 ...
Страница 13: ...swivel nut with the second Torque to values shown If a torque wrench is not available use the FFFT Flats From Finger Tight method Hydraulic Fitting Torque Tube Size OD Hex Size Across Flats Torque value Flats From Finger Tight Inches Inches lbf ft N m Flats Turns 3 16 7 16 6 8 2 1 6 1 4 9 16 11 12 15 17 2 1 6 5 16 5 8 14 16 19 22 2 1 6 3 8 11 16 20 22 27 30 1 1 4 1 6 1 2 7 8 44 48 59 65 1 1 6 5 8 ...
Страница 14: ...WallensteinEquipment com ...