50
GM 4700AC
OPERATING MANUAL
VERSION 06/2014
ORDER NUMBER DOC2311730
10.4.4
ASSEMBLY
1.
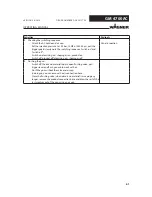
Attach the sealing collar (11) to the valve rod (34) together with the inserted
O-ring (12) and sealing screw (10).
2.
Push the completely assembled valve tappet (19) onto the valve rod (34).
3.
Screw the collet chuck (18) into the clamping sleeve (4) (do not tighten).
4.
Insert the preassembled valve rod into the preassembled clamping sleeve (4 and
18) up to the button stop.
5.
Hold the clamping sleeve (4) with size 6 mm; 0.24 inch wrench in position, screw
the preassembled valve rod to the clamping sleeve and tighten with a size 5mm;
0.20 inch open-end wrench, tightening torque 5 1 Nm; 3.69 lbft. Note reference
dimension.
6.
Carefully insert the complete valve rod (B) into the gun housing.
7.
Screw in the sealing screw (10) but do not tighten yet.
8.
Position the trigger guard (21) and fasten with screw (22) and nut (20).
9.
Insert the pressure springs (3) and (2) and screw on the spring cap (5), tightening
torque 12 1 Nm; 8.85 lbft.
10. Carefully tighten the sealing collar (11, 12) over the sealing screw (10).
Ensure that the trigger guard runs smoothly.
11. Commissioning in accordance with Chapter 6.8.
Note:
Only use silicone and resin-free grease.
Содержание GM 4700AC
Страница 2: ......
Страница 55: ...55 GM 4700AC 55 GM 4700AC OPERATING MANUAL VERSION 06 2014 ORDER NUMBER DOC2311730...
Страница 79: ......


