background image

DE


Wenn Sie das Klimaservicegerät entsorgen möchten, entleeren Sie das Gerät zunächst von allen Flüssigkeit-

en und entsorgen Sie diese gemäß den nationalen Vorschriften.

Lassen Sie das alte Klimaservicegerät durch sachkundiges Personal gemäß den nationalen Vorschriften

entsorgen oder wenden Sie sich an den Kundendienst.

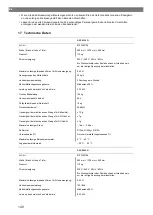
17 Technische Daten

ASC 6300 G

Art.-Nr.:

9103303105

Maße (Breite x Höhe x Tiefe):

560


mm × 1300


mm × 650


mm

Gewicht:

110


kg

Stromversorgung:

230


V / 240


V, 50


Hz / 60


Hz

Ein Wechselrichter oder Ähnliches kann erforderlich sein,

um die richtige Spannung bereitzustellen.

Maximal zulässige Impedanz Zmax für Stromversorgung:

0,43


Ω

Absaugmenge des Kältemittels:

30


kg/h

Vakuumpumpenleistung:

5 Fahrzeuge pro Stunde

Kältemittelrückgewinnungsquote:

Mindestens 95 %

Leistung des hermetischen Verdichters:

0,32 kW

Trockenfilterleistung:

150


kg

Vakuumpumpenöl-Laufzeit:

60


h

Füllzylinder-Speicher Nutzinhalt:

16


kg

Geräuschemission*:

62


dB(A)

Genauigkeit der elektronischen Waage für Kältemittel:

±


10


g

Genauigkeit der elektronischen Waage für Alt-/Frischöl:

±


1


g

Genauigkeit der elektronischen Waage für UV-Additiv:

±


1


g

Maximal zulässiger Druck:

– 1


bar … 20


bar

Kühlmittel:

R134a, R1234yf, R513A

Verwendbares Öl:

Nur vom Hersteller zugelassenes Öl

Maximal zulässige Betriebstemperatur:

5


°C … 40


°C

Lagertemperaturbereich:

– 25


°C … 50


°C

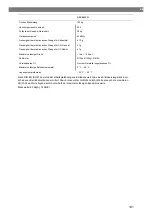
ASC 6400 G

Art.-Nr.:

9103303106

Maße (Breite x Höhe x Tiefe):

560


mm × 1300


mm × 650


mm

Gewicht:

110


kg

Stromversorgung:

230


V / 240


V, 50


Hz / 60


Hz

Ein Wechselrichter oder Ähnliches kann erforderlich sein,

um die richtige Spannung bereitzustellen.

Maximal zulässige Impedanz Zmax für Stromversorgung:

0,43


Ω

Vakuumpumpenleistung:

192 l/Std

Kältemittelrückgewinnungsquote:

Mindestens 95 %

Leistung des hermetischen Verdichters:

0,32 kW

140

Содержание ASC 6300 G

Страница 1: ...N A C service unit Operating manual 3 FR Poste de service climatisation Manuel d utilisation 51 DE Klimaserviceger t Bedienungsanleitung 102 RU 152 ES Estaci n de mantenimiento de aire acondicionado I...

Страница 2: ...this manual is protected by copyright and de sign law The underlying technical design and the products contained herein may be protected by design patent or be patent pending The trademarks mentioned...

Страница 3: ...as in accordance with all applicable laws and regulations A failure to read and follow the instructions and warnings set forth herein may result in an injury to yourself and others damage to your pro...

Страница 4: ...r its intended purpose CAUTION Failure to obey these cautions could result in minor or moderate injury Do not make modifications to the A C service unit Risk of injury from bursting components if the...

Страница 5: ...ke lever on the front wheels to secure the A C service unit from rolling away 6 2 Handling the refrigerant safely WARNING Failure to obey these warnings could result in death or serious injury Do not...

Страница 6: ...that they cannot be damaged when the A C service unit is used 7 Scope of Delivery The A C service unit was tested for leaks before shipping After delivery check that all the parts listed below are pr...

Страница 7: ...anual Dometic reserves the right to change product appearance and product specifications 10 Technical description 10 1 Warnings on the A C service unit Observe the operating manual Only connect the A...

Страница 8: ...re gauge 7 Display 8 Keypad 9 Front cover 10 Front wheels with wheel stops 11 Service hose for low pressure connection blue not included inth scope of delivery 12 Service hose for high pressure connec...

Страница 9: ...EN 16 USB port 9...

Страница 10: ...ing the length of the service hoses on page 11 4 Connect the A C service unit to the power supply 5 To switch the A C service unit on set the main switch to I The switch on delay runs for 35 s and the...

Страница 11: ...RNING The A C service unit runs a cleaning phase of the internal vessel pressure pressure mb Internal vessel Cleaning phase Afterwards the A C service unit runs a software test Don t connect to Softwa...

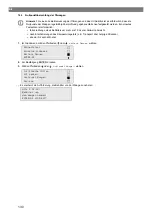
Страница 12: ...e selection Other selections ENTER OK 3 Press ENTER to confirm 4 Use the cursor key to select Service 5 Press ENTER to confirm 6 Enter the password 5264 7 Use the cursor keys or to select the preferre...

Страница 13: ...Entering the company data The company data is printed out with every service log 1 In the basic menu use the cursor keys or to select Other selections Short selection Free selection Other selections...

Страница 14: ...displayed 12 9 Editing default values The A C service unit has preset values for the most important service tasks The default values appear automatically when you select the respective menu You can al...

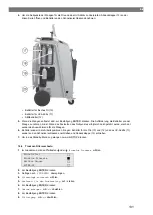
Страница 15: ...e left side and push the containers into the snap locks Container for fresh oil 17 Container for UV additive 18 Drained oil receptacle 19 2 Close the cover flap 20 3 Enter the container size for fresh...

Страница 16: ...g of refrigerant 1 Press STOP to confirm The current supply quantities are displayed in the standby menu 2 Connect the external refrigerant vessel to the A C service unit Note Observe the instructions...

Страница 17: ...he standby menu 12 Disconnect the external refrigerant vessel from the A C service unit The A C service unit is now ready for operation 13 Operation NOTICE Damage hazard When the air conditioning syst...

Страница 18: ...er the vehicle data 6 Press ENTER to confirm 7 Enter the refrigerant filling quantity Use the value shown on the filling quantities sticker in the vehicle and en ter it using the keypad and the cursor...

Страница 19: ...Enter the administrator code 0000 default setting and press ENTER to confirm Insert ADM Code Note For security reasons a new administrator code must be selected each time but not 0000 as this will de...

Страница 20: ...enable the A C service unit Enter the user code ENTER USER CODE If you enter an incorrect user code the following error message appears WRONG CODE Once the correct code is entered the A C service unit...

Страница 21: ...he vehicle data model type in the blank fields and press ENTER to confirm ____________ 0 ___________________ ____________ g ___ 0 9 Enter the refrigerant quantity and press ENTER to confirm AUDI 0 A4...

Страница 22: ...low the instructions on the display 13 5 2 Manual reports You can at any time manually transfer a monthly or annual report to a USB flash drive 1 Insert the USB flash drive in the USB port 2 In the ba...

Страница 23: ...y Press ENTER to print out the overview Press STOP to exit the overview 13 7 Testing the air conditioning system without refrigerant service Note The air conditioning system can only be tested on vehi...

Страница 24: ...from the Wait STOP EXIT Process completed 9 To end the air conditioning test press the STOP button 13 8 Free Selection The Free selection menu is used to perform air conditioning maintenance step by...

Страница 25: ...red waiting time for the pressure increase stan dard is 1 min in the following menu and press ENTER to confirm otherwise continue with chapter Vacuum process on page 25 Pressure increase Test time min...

Страница 26: ...cess must be performed in the same process se quence If no vacuum process has been selected only refrigerant can be selected in the filling menu 13 8 4 Selecting connections 1 Select the parameters in...

Страница 27: ...setting flashes and press ENTER to confirm 6 For the Pressure increase Test time enter 1 min and press ENTER to confirm 7 Deselect Vacuum phase using No the setting flashes and press ENTER to confirm...

Страница 28: ...ram step 27 Select Filling phase the setting flashes and press ENTER to confirm 28 Enter the refrigerant filling quantity note the oil filling quantity of the compressor 29 Then follow the instruction...

Страница 29: ...et see date Vacuum time 07 03 17 min 79 STOP EXIT Vacuum time indicates how long the vacuum pump has operated since the last reset see date Service completed 08 03 17 Number 4 STOP EXIT Service comple...

Страница 30: ...take the containers off the catches Container for fresh oil 10 Container for UV additive 11 Drained oil receptacle 12 5 When the scales are relieved press ENTER to confirm The prompt to remove the con...

Страница 31: ...Filling phase using No 10 Press ENTER to confirm 11 Select Process start 12 Press ENTER to confirm The service hoses will now be drained and the A C service unit s basic menu will be activated The co...

Страница 32: ...6 Calibrating the pressure transducer The pressure transducer has to be correctly calibrated in order to make accurate pressure measurements Cali bration is required Every four weeks If the A C servi...

Страница 33: ...e the service hoses perform a short vacuum phase see Free Selection on page 24 14 7 Changing the vacuum pump oil WARNING Electrocution hazard Touching uninsulated parts may result in serious injury Sw...

Страница 34: ...ce the A C ser vice unit was produced proceed as follows 1 Enter the Other selections Service menu 2 Enter the code 7783 3 Use the cursor keys or to select the required entry These meter readings cann...

Страница 35: ...tem When updating the software the following data is stored in the internal memory of the A C service unit The current software of the A C service unit The current database with all the common vehicl...

Страница 36: ...the air condi tioning system No action is required The process con tinues automatically The display shows Warning Pres sure inside the A C system Message during the vacuum process There is pressure i...

Страница 37: ...e unit Change the vacuum pump oil as soon as possible Changing the vacuum pump oil on page 33 To skip this press ENTER for 3 seconds The display shows Printer not in line Carry on Message indicates a...

Страница 38: ...trical sources of interference such as mobile phones or welding equipment away from the device The display shows Error 00003 Calibration with the ambient air failed Ensure the device is adequately ven...

Страница 39: ...er accumulator capacity 16 kg Noise emission 62 dB A Accuracy of the electronic scale for refrigerant 10 g Accuracy of the electronic scale for old new oil 1 g Accuracy of the electronic scale for UV...

Страница 40: ...e 1 bar 20 bar Refrigerant R134a R1234yf R513A Oil Only oil approved by manufacturer Maximum permissible operating temperature 5 C 40 C Storage temperature range 25 C 50 C In accordance with DIN EN IS...

Страница 41: ...EN 17 1 Flowchart ASC6300 G Legend 41...

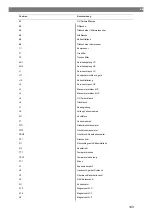
Страница 42: ...e hose HP L3 Manometer hose LP L4 Manometer hose HP L5 UV dye hose L6 Oil hose L7 Recovery line L9 Vacuum pump line M1 Valve manifold P1 Vacuum pump PIT1 LP manometer PIT2 HP manometer PSH2 High press...

Страница 43: ...EN Item Description X23 Solenoid valve DO X3 Solenoid valve UV X4 Solenoid valve oil X5 Solenoid valve Z2 X6 Solenoid valve Z2 X7 Solenoid valve HP X8 Solenoid valve HP X9 Solenoid valve RE 43...

Страница 44: ...EN 17 2 Flowchart ASC6400 G Legend 44...

Страница 45: ...e HP L3 Manometer hose LP L4 Manometer hose HP L5 UV dye hose L6 Oil hose L7 Recovery line L9 Vacuum pump line M1 Valve manifold P1 Vacuum pump P2 Liquid pump PIT1 LP manometer PIT2 HP manometer PSH1...

Страница 46: ...oid valve VC X16 Solenoid valve CY X2 Solenoid valve LP X23 Solenoid valve DO X3 Solenoid valve UV X4 Solenoid valve oil X5 Solenoid valve Z2 X6 Solenoid valve Z2 X7 Solenoid valve HP X8 Solenoid valv...

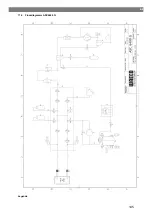
Страница 47: ...EN 17 3 Circuit diagram ASC6300 G 47...

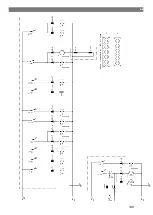
Страница 48: ...EN 48...

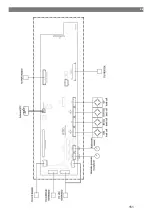
Страница 49: ...EN 17 4 Circuit diagram ASC6400 G 49...

Страница 50: ...EN 50...

Страница 51: ...anuel vous risquez de vous blesser ou de blesser d autres personnes d endommager votre produit ou d endommager d autres biens proximit Le pr sent manuel produit y compris les instructions directives e...

Страница 52: ...ra ner des blessures l g res ou de gravit mod r e N apportez aucune modification au poste d entretien pour climatisations Risques de blessures dues l clatement de composants en cas de d passement des...

Страница 53: ...niquement le fluide frigorig ne que vous avez d fini sur le poste d entretien pour climatisa tions Le m lange de diff rents fluides frigorig nes peut endommager le poste d entretien pour climati satio...

Страница 54: ...manipulation de gaz sous pression Mesures de sant publique concernant la manipulation de gaz sous pression Utilisation et op rations de maintenance sur le poste d entretien pour climatisations L expl...

Страница 55: ...tion une utilisation ou un entretien inappropri s entra nera des performances insatisfaisantes et une ventuelle d faillance Le fabricant d cline toute responsabilit en cas de blessure ou de dommage r...

Страница 56: ...si le moniteur de pression ne parvient pas stopper une surpression Surveillance du ventilateur Contr le le fonctionnement des ventilateurs au d marrage 10 3 Menu de mode veille Le menu de veille affi...

Страница 57: ...re haute pression 7 cran 8 Pav num rique 9 Capot avant 10 Roues avant avec freins 11 Flexible de service pour raccord basse pression bleu non inclus dans le contenu de la livraison 12 Flexible de serv...

Страница 58: ...FR 16 Port USB 58...

Страница 59: ...vice la page 60 4 Connectez le poste d entretien pour climatisations l alimentation 5 Pour allumer le poste d entretien pour climatisations mettez l interrupteur principal en position I La temporisati...

Страница 60: ...atisations ex cute une phase de purge de la pression interne du r servoir pressure mb Internal vessel Cleaning phase Le poste d entretien pour climatisations ex cute ensuite un test logiciel Don t con...

Страница 61: ...res menus ENTER OK 3 Appuyez sur ENTER pour confirmer 4 Utilisez la touche fl ch e pour s lectionner Utilisation 5 Appuyez sur ENTER pour confirmer 6 Saisissez le mot de passe 5264 7 Utilisez la touch...

Страница 62: ...s de l entreprise sont imprim es avec chaque journal de service 1 Dans le menu de base utilisez la touche fl ch e ou pour s lectionner Autres s lections Short selection Free selection Other selections...

Страница 63: ...ion des valeurs pr saisies Les valeurs des travaux d entretien les plus importants sont pr saisies sur le poste d entretien pour climatisations Ces valeurs par d faut apparaissent automatiquement lors...

Страница 64: ...uche et poussez le conteneur contre les attaches rapides Conteneur d huile neuve 17 Conteneur de traceur UV 18 Conteneur d huile usag e 19 2 Fermez le volet de protection 20 3 Saisissez la taille de b...

Страница 65: ...ch es les champs sombres sont activ s Bouteille d huile 150ml 250ml 500ml Bouteille de traceur 150ml 250ml 500ml 7 Appuyez sur ENTER pour confirmer 8 Appuyez sur STOP pour acc der au menu de veille 1...

Страница 66: ...fl ch e ou pour s lectionner Autres s lections Short selection Free selection Other selections ENTER OK 4 Appuyez sur ENTER pour confirmer 5 Utilisez la touche fl ch e ou pour s lectionner Charge de b...

Страница 67: ...quette du v hicule Dans le menu S lection courte les tapes suivantes sont ex cut es automatiquement les unes apr s les autres Extraction du fluide frigorig ne recyclage du r frig rant puret conforme l...

Страница 68: ...s tre d marr sans ce code Il est possible de cr er jusqu 10 utilisateurs diff rents avec des codes individuels Il est possible de cr er des comptes utilisa teurs l aide du code administrateur 13 3 1 C...

Страница 69: ...majuscules et les minuscules utilisez la touche Info jaune 11 Saisissez le nom d utilisateur et appuyez sur ENTER pour confirmer ADM AREA User number 1 User name Max Mustermann ADM AREA User number 1...

Страница 70: ...carte m moire flash Elles restent donc disponibles apr s une mise jour du logiciel Les entr es sont enregistr es par ordre chronologique et non par ordre alphanum rique 1 Dans le menu de base utilise...

Страница 71: ...que fois qu une proc dure d aspiration ou de remplissage proc dure seule ou enti rement automatis e est termin e le poste d entretien pour climatisations enregistre toutes les donn es correspondantes...

Страница 72: ...r ENTER pour confirmer 4910 rapport mensuel 4918 rapport annuel Si aucune cl USB n est ins r e ou reconnue le message Erreur 52 s affiche 6 l aide de la touche fl ch e ou s lectionnez l entr e souhait...

Страница 73: ...s d une entr e basse pression et d une entr e haute pression ou uniquement d une entr e basse pression Si vous testez uniquement le fonctionnement du syst me de climatisation d un v hicule sans aspir...

Страница 74: ...num rique les valeurs correspondantes pour chaque processus Ce menu permet galement de saisir les donn es du v hicule pour le rapport de service Les quatre processus suivants peuvent tre effectu s in...

Страница 75: ...peuvent s va porer puis tre extraits L vaporation des r sidus de fluide frigorig ne entra ne une augmentation de la pression 13 8 2 Phase de vide 1 Saisissez les r glages souhait s et appuyez sur ENTE...

Страница 76: ...ouve dans le menu de s lection 13 8 4 S lection des raccords 1 S lectionnez les param tres en fonction des raccords du syst me de climatisation Le climatiseur dispose de raccords haute pression et bas...

Страница 77: ...S lectionnez Phase de recyclage le r glage s lectionn clignote et appuyez sur ENTER pour valider 6 Pour Temps pour la diff de pression min saisissez 1 min et appuyez sur ENTER pour confirmer 7 D sact...

Страница 78: ...et appuyez sur ENTER pour valider 26 Si n cessaire utilisez le pav num rique pour saisir les donn es et appuyez sur ENTER pour confirmer S il n est pas n cessaire de saisir de donn es appuyez sur ENT...

Страница 79: ...syst me indique combien de grammes de fluide frigorig ne ont t ajout s aux syst mes de climatisation via l option de menu S lection courte ou S lection libre depuis la derni re remise z ro voir date...

Страница 80: ...z ro des balances pour les huiles et le traceur UV ouvrez le couvercle 13 du c t gauche et retirez les conteneurs des attaches Conteneur d huile neuve 10 Conteneur de traceur UV 11 Conteneur d huile u...

Страница 81: ...hase de remplissage avec Non 10 Appuyez sur ENTER pour confirmer 11 S lectionnez D marrer processus 12 Appuyez sur ENTER pour confirmer Les flexibles de service sont alors vidang s et le menu de base...

Страница 82: ...ne fois 14 6 Calibrage du capteur de pression Pour que les mesures de pression soient correctes le capteur de pression doit tre correctement calibr Le cali brage doit tre effectu toutes les quatre sem...

Страница 83: ...13 Appuyez deux fois sur STOP pour acc der au menu de veille 14 Pour la vidange des flexibles de service effectuez une br ve phase de vide voir le chapitre S lection libre la page 74 14 7 Changement...

Страница 84: ...s d aspiration R initialisation des compteurs la page 78 14 8 Remplacement du papier de l imprimante 1 Pour remplacer le rouleau de papier de l imprimante ouvrez le capot K 2 Ins rez un nouveau roulea...

Страница 85: ...oir date Temps de vide Total 07 03 17 min 79 STOP EXIT Temps d aspiration indique combien de temps la pompe vide a fonctionn depuis la derni re remise z ro voir date Service termin Total 07 03 17 Nomb...

Страница 86: ...n pour climatisations d finit les param tres par d faut Wait loading default parameters Le poste d entretien pour climatisations red marre et le menu de veille s affiche 5 Retirez la cl USB Le poste d...

Страница 87: ...ste d entretien pour climatisations L cran affiche Niveau de remplis sage trop important Remplir bouteille interne Message pendant la saisie du proces sus si la bouteille interne ne contient pas assez...

Страница 88: ...la pression interne de la bouteille V rifier que le compresseur et les lectrovannes correspondantes fonctionnent L cran affiche Erreur 12 Le r frig rant n a pas pu tre extrait du r servoir interne pe...

Страница 89: ...sonnel qualifi et en conformit avec les r glementations nationales limination des liquides r cup r s Les huiles usag es sont des d chets dangereux Ne m langez pas l huile usag e avec d autres liquides...

Страница 90: ...ensions largeur x hauteur x profondeur 560 mm 1300 mm 650 mm Poids 110 kg Alimentation 230 V 240 V 50 Hz 60 Hz Un onduleur ou un appareil similaire peut tre requis pour fournir la tension appropri e I...

Страница 91: ...ail d un poste d entretien pour climatisations a t d termin e dans diff rentes conditions de fonctionnement Les valeurs moyennes dB A et les valeurs maximales de cr te dB C sont nettement inf rieures...

Страница 92: ...FR 17 1 Organigramme ASC6300 G L gende 92...

Страница 93: ...ice HP L3 Flexible de manom tre BP L4 Flexible de manom tre HP L5 Flexible de traceur UV L6 Flexible d huile L7 Conduite de r cup ration L9 Conduite de la pompe vide M1 Collecteur de soupape P1 Pompe...

Страница 94: ...FR l ment Description X23 lectrovanne DO X3 lectrovanne UV X4 Huile d lectrovanne X5 lectrovanne Z2 X6 lectrovanne Z2 X7 lectrovanne HP X8 lectrovanne HP X9 lectrovanne RE 94...

Страница 95: ...FR 17 2 Organigramme ASC6400 G L gende 95...

Страница 96: ...anom tre BP L4 Flexible de manom tre HP L5 Flexible de traceur UV L6 Flexible d huile L7 Conduite de r cup ration L9 Conduite de la pompe vide M1 Collecteur de soupape P1 Pompe vide P2 Pompe liquide P...

Страница 97: ...iption X10 lectrovanne VC X16 lectrovanne CY X2 lectrovanne LP X23 lectrovanne DO X3 lectrovanne UV X4 Huile d lectrovanne X5 lectrovanne Z2 X6 lectrovanne Z2 X7 lectrovanne HP X8 lectrovanne HP X9 le...

Страница 98: ...FR 17 3 Sch ma lectrique ASC6300 G 98...

Страница 99: ...FR 99...

Страница 100: ...FR 17 4 Sch ma lectrique ASC6400 G 100...

Страница 101: ...FR 101...

Страница 102: ...n zu verwenden Eine Nichtbeachtung der hierin enthaltenen Anweisungen und Warnhinweise kann zu einer Verletzung Ihrer selbst und anderer Personen zu Sch den an Ihrem Produkt oder zu Sch den an anderem...

Страница 103: ...den das von Dometic au torisiert wurde Benutzen Sie dieses Ger t nur f r den angegebenen Verwendungszweck VORSICHT Nichtbeachtung dieser Hinweise kann zu leichten bis mittelschweren Verletzungen f hre...

Страница 104: ...Verwenden Sie nur das K ltemittel das Sie im Klimaserviceger t eingestellt haben Wird das K ltemit tel mit anderen K ltemitteln gemischt kann dies zu Sch den am Klimaserviceger t beziehungsweise an de...

Страница 105: ...icherheitsvorschriften beim Umgang mit Druckgasen Gesundheitsma nahmen beim Umgang mit Druckgasen Betrieb des Klimaserviceger ts und Durchf hrung von Wartungsarbeiten am Klimaserviceger t Der Betreibe...

Страница 106: ...nicht ordnungsgem er Betrieb oder eine nicht ordnungsgem e Wartung haben eine unzureichende Leistung und u U einen Ausfall des Ger ts zur Folge Der Hersteller bernimmt keine Haftung f r Verletzungen...

Страница 107: ...tern zu ver hindern falls der Druck trotz des Sicherheitsdruckw chters weiter steigt L fter berwachung Pr ft beim Start ob die L fter funktionieren 10 3 Stand by Men Das Standby Men zeigt die folgende...

Страница 108: ...e Absaugen gr n 6 Hochdruckmanometer 7 Display 8 Bedientastatur 9 Frontabdeckung 10 Feststellbare Vorderr der 11 Serviceschlauch f r Niederdruckanschluss blau nicht im Lieferumfang enthalten 12 Servic...

Страница 109: ...DE 16 USB Anschluss 109...

Страница 110: ...viceschl uche L nge der Serviceschl uche einstellen auf Seite 111 einstellen 4 Das Klimaserviceger t an die Stromversorgung anschlie en 5 Um das Klimaserviceger t einzuschalten den Hauptschalter auf I...

Страница 111: ...y with WARNING Das Klimaserviceger t f hrt eine Reinigungsphase des internen Flaschendrucks durch pressure mb Internal vessel Cleaning phase Anschlie end f hrt das Klimaserviceger t einen Softwaretest...

Страница 112: ...nues ENTER OK 3 Zur Best tigung ENTER dr cken 4 Mit der Pfeiltaste Bedienen w hlen 5 Zur Best tigung ENTER dr cken 6 Das Passwort 5264 eingeben 7 Mit den Pfeiltasten oder die gew nschte Sprache w hlen...

Страница 113: ...t 12 7 Firmendaten eingeben Die Firmendaten werden mit jedem Serviceprotokoll ausgedruckt 1 Im Grundmen mit den Pfeiltasten oder Weitere Menues w hlen Schnellstart Einzelne Prozesse Weitere Menues ENT...

Страница 114: ...Standby Men wird angezeigt 12 9 Vorgabewerte ndern Das Klimaserviceger t hat voreingestellte Werte f r die wichtigsten Servicearbeiten Diese Vorgabewerte erscheinen automatisch beim Aufrufen der entsp...

Страница 115: ...en Seite ffnen und Beh lter an den Schnellverschl ssen aufstecken Beh lter f r frisches l 17 Beh lter f r UV Additiv 18 Alt lbeh lter 19 2 Abdeckklappe 20 schlie en 3 Beh ltergr e f r Frisch l und UV...

Страница 116: ...tigung STOP dr cken Die aktuellen Bestandsmengen werden im Stand by Men angezeigt 2 Die externe K ltemittelflasche an das Klimaserviceger t anschlie en Hinweis Die Hinweise auf den K ltemittelflasche...

Страница 117: ...t 10 STOP dr cken um das Men zu verlassen 11 Um in das Standby Men zu gelangen noch einmal STOP dr cken 12 Die externe K ltemittelflasche vom Klimaserviceger t trennen Das Klimaserviceger t ist nun be...

Страница 118: ...ER dr cken 5 Mit der Bedientastatur und den Pfeiltasten die Fahrzeugdaten eingeben 6 Zur Best tigung ENTER dr cken 7 F llmenge f r K ltemittel eingeben Den entsprechenden Wert von dem F llmengenaufkle...

Страница 119: ...000 Standardeinstellung eingeben und zur Best tigung ENTER dr cken Insert ADM Code Hinweis Aus Sicherheitsgr nden muss jedes Mal ein neuer Administratorcode gew hlt werden der nicht 0000 sein darf da...

Страница 120: ...rcodes eingeben Wenn ein Benutzercode erstellt wurde muss derselbe Code verwendet werden um das Klimaserviceger t zu aktivieren Benutzercode eingeben ENTER USER CODE Bei Eingabe eines falschen Benutze...

Страница 121: ...K STOP EXIT 5 Personal DB w hlen und zur Best tigung ENTER dr cken Personal DB ALFA ROMEO ASTON MARTIN AUDI 6 In der leeren Datenbank mit den Pfeiltasten oder den jeweiligen Eintrag w hlen und zur Bes...

Страница 122: ...h dem Kalenderjahreswechsel zeigt das Klimaserviceger t an dass die im vorherigen Kalenderjahr gespeicherten Daten auf einen USB Stick bertragen werden sollen Nach der bertragung der Jahresdaten auf e...

Страница 123: ...emittel vom Klimaserviceger t abgesaugt Mit der Pfeiltaste wird als n chstes die Gesamtmenge des eingef llten K ltemittels des entsprechenden Jahres angezeigt Eingef llt in A C Total 2017 g 9000 PRINT...

Страница 124: ...und ffnen 2 Fahrzeugmotor starten und Klimaanlage einschalten 3 Im Grundmen mit den Pfeiltasten oder Weitere Menues w hlen Schnellstart Einzelne Prozesse Weitere Menues ENTER OK 4 Zur Best tigung ENT...

Страница 125: ...Additiv Einf llen von K ltemittel Anschl sse w hlen Die Klimaanlage weist einen Hoch und einen Niederdruckanschluss auf nur Hochdruck oder nur Niederdruckanschluss Im Anschluss an jeden durchgef hrten...

Страница 126: ...ste dr cken 5 Die Menge des Additivs eingeben 6 Pfeiltaste dr cken 7 Die Menge des K ltemittels eingeben 8 Alle Einstellungen mit ENTER best tigen Frisch l ml 0 UV Additive ml 7 K ltemittel g 500 ENTE...

Страница 127: ...den Anschl sse des Klimaserviceger ts mit der Fahrzeugklimaanlage verbinden und ffnen 2 Im Grundmen mit den Pfeiltasten oder Einzelne Prozesse w hlen Schnellstart Einzelne Prozesse Weitere Menues ENTE...

Страница 128: ...K 22 Zur Best tigung ENTER dr cken 23 Gegebenenfalls mit der Bedientastatur die gew nschten Daten eingeben und zur Best tigung ENTER dr ck en Sollen keine Daten eingegeben werden ENTER dr cken um zum...

Страница 129: ...n System gibt an wie viel Gramm K ltemittel seit der letzten R ckstellung siehe Datum ber den Men punkt Schnellstart oder Einzelne Prozesse aus Klimaanlagen abgesaugt wurde von ext Flaschen 07 03 17 g...

Страница 130: ...m Sollwert abweicht nach Ersch tterungen des Klimaserviceger ts z B Transport ber holprige Strecken alle vier bis sechs Wochen 1 Im Grundmen mit den Pfeiltasten oder Weitere Menues w hlen Schnellstart...

Страница 131: ...agen 6 Beh lter wieder in die Arbeitspositionen bringen Beh lter f r die le 10 und 12 und das UV Additiv 11 wieder an den Schnellverschl ssen anschlie en und Abdeckklappe 13 schlie en 7 Um in das Stan...

Страница 132: ...und Trocknerfilter gerade herausziehen 16 O Ringe E ersetzen Neue O Ringe vor dem Einbau mit K ltemittel l benetzen 17 Neuen Trockner einsetzen und Schraube mit max 15 Nm anziehen 18 Netzstecker einst...

Страница 133: ...pplungen wieder auf die Serviceschl uche 7 und 8 handfest aufschrauben Dabei die blauen und roten Kennzeichnungen an den Servicekupplungen und Serviceschl uchen beachten 11 Mit der Bedientastatur den...

Страница 134: ...e flie t beim Ablassen durch die ffnung I im Boden des Klimaserviceger ts 4 leinf llschraube G herausdrehen 5 Zum lablassen lablassschraube J herausdrehen 6 Wenn das l vollst ndig aus dem Pumpengeh us...

Страница 135: ...chseln auf Seite 131 von Klimaanlagen Total 07 03 17 g 1455 STOP EXIT R1234yf von System gibt an wie viel Gramm K ltemittel seit der letzten R ckstellung siehe Datum ber den Men punkt Schnellstart ode...

Страница 136: ...ktuelle Datenbank mit allen g ngigen Fahrzeugtypen und den entsprechenden Klimaanlagen F llmengen Sie k nnen Software und Datenbank unabh ngig voneinander aktualisieren 1 Die aktuelle Software auf den...

Страница 137: ...ystem Absaugung gestartet Normale Meldung zu Beginn des Vaku umprozesses Es ist noch Druck in der Klimaanlage vorhanden Es sind keine Ma nahmen erforderlich Der Prozess l uft automatisch weiter Im Dis...

Страница 138: ...n des Kli maserviceger ts M glichst bald Vakuumpumpen l wechseln Vakuumpumpen l wechseln auf Seite 133 Zum berspringen 3 Sekunden ENTER dr cken Im Display erscheint Funktion sst rung des Druckers Fort...

Страница 139: ...h M gliche elektrische St rquellen wie z B Mobiltelefone oder Sch wei ger te vom Ger t fernhalten Im Display erscheint Error 00003 Die Kalibrierung mit der Umgebungsluft ist fehlgeschlagen F r ausreic...

Страница 140: ...eistung des hermetischen Verdichters 0 32 kW Trockenfilterleistung 150 kg Vakuumpumpen l Laufzeit 60 h F llzylinder Speicher Nutzinhalt 16 kg Ger uschemission 62 dB A Genauigkeit der elektronischen Wa...

Страница 141: ...imal zul ssiger Druck 1 bar 20 bar K hlmittel R134a R1234yf R513A Verwendbares l Nur vom Hersteller zugelassenes l Maximal zul ssige Betriebstemperatur 5 C 40 C Lagertemperaturbereich 25 C 50 C Nach D...

Страница 142: ...DE 17 1 Flussdiagramm ASC6300 G Legende 142...

Страница 143: ...L3 Manometerschlauch LP L4 Manometerschlauch HP L5 UV Farbschlauch L6 lschlauch L7 Absaugleitung L9 Leitung Vakuumpumpe M1 Ventilblock P1 Vakuumpumpe PIT1 Niederdruckmanometer PIT2 Hochdruckmanometer...

Страница 144: ...DE Position Beschreibung X23 Magnetventil DO X3 Magnetventil UV X4 Magnetventil l X5 Magnetventil Z2 X6 Magnetventil Z2 X7 Magnetventil HP X8 Magnetventil HP X9 Magnetventil RE 144...

Страница 145: ...DE 17 2 Flussdiagramm ASC6400 G Legende 145...

Страница 146: ...uch LP L4 Manometerschlauch HP L5 UV Farbschlauch L6 lschlauch L7 Absaugleitung L9 Leitung Vakuumpumpe M1 Ventilblock P1 Vakuumpumpe P2 Fl ssigkeitspumpe PIT1 Niederdruckmanometer PIT2 Hochdruckmanome...

Страница 147: ...bung X10 Magnetventil VC X16 Magnetventil CY X2 Magnetventil LP X23 Magnetventil DO X3 Magnetventil UV X4 Magnetventil l X5 Magnetventil Z2 X6 Magnetventil Z2 X7 Magnetventil HP X8 Magnetventil HP X9...

Страница 148: ...DE 17 3 Schaltplan ASC6300 G 148...

Страница 149: ...DE 149...

Страница 150: ...DE 17 4 Schaltplan ASC6400 G 150...

Страница 151: ...DE 151...

Страница 152: ...152 3 152 4 153 5 153 6 153 7 156 8 156 9 156 10 157 11 158 12 160 13 167 14 179 15 187 16 190 17 190 1 Important notes documents dometic com 2 dometic com sds Find this manual in other languages onli...

Страница 153: ...RU 4 Tel 49 0 2572 879 0 5 6 Domestic 153...

Страница 154: ...RU 6 1 154...

Страница 155: ...RU 6 2 R1234yf 405 C R134a 743 C R153A 6 3 155...

Страница 156: ...RU 7 4445900107 4445900081 4445103554 R1234yf R134a R513A 8 R134a R153A 4440400009 R1234yf 4445900221 4 4445900088 1000 l 8887200018 9 R1234yf R134a R513A 156...

Страница 157: ...RU Dometic 10 10 1 230 240 50 60 190 10 2 10 3 10 4 157...

Страница 158: ...RU 11 1 2 3 4 ECO 5 6 7 8 9 10 11 12 13 14 15 158...

Страница 159: ...RU 16 USB 159...

Страница 160: ...RU 17 18 500 19 20 21 22 12 12 1 187 ENTER 1 2 3 162 4 5 I 35 mgas0081 mgas2107 LE640004 LF DB SW SN000000 LE ASC6400G Dometic Germany GmbH SW DB SN LF 6 160 12 2 160...

Страница 161: ...NTER OK Once done press OK connection hose Please install HP LP 4 5 ENTER Wait 6 7 ENTER ENTER OK R 513A Usage only with WARNING pressure mb Internal vessel Cleaning phase Don t connect to Software te...

Страница 162: ...selections ENTER OK 2 ENTER 3 Service 4 ENTER 5 7732 6 7 ENTER 12 4 1 2 Short selection Free selection Other selections ENTER OK 3 ENTER 4 5 ENTER 6 5264 7 8 ENTER 9 12 5 1 2 Short selection Free sel...

Страница 163: ...K 7 Unifont Mingliu 8 ENTER 9 12 6 1 2 Short selection Free selection Other selections ENTER OK 3 ENTER 4 5 ENTER 6 2899 PAR Buzzer Loud Quiet ENTER OK 7 8 ENTER 9 12 7 1 Short selection Free selectio...

Страница 164: ...RU 5 3282 20 01 05 6 C C 7 ENTER 8 9 12 8 1 Short selection Free selection Other selections ENTER OK 2 ENTER 3 4 ENTER 5 8463 6 7 ENTER 8 12 9 1 1 4 0 0 500 164...

Страница 165: ...RU 1 Short selection Free selection Other selections ENTER OK 2 ENTER 3 4 ENTER 5 7388 6 7 ENTER 8 12 10 1 20 17 18 19 2 20 165...

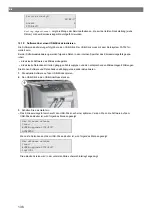
Страница 166: ...1 Short selection Free selection Other selections ENTER OK 2 ENTER 3 Refrigerant Test Hybrid service Service ENTER OK STOP EXIT 4 ENTER 5 2688 6 Oil bottle 150ml 250ml 500ml UV bottle 150ml 250ml 500...

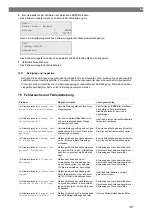
Страница 167: ...elections ENTER OK 4 ENTER 5 Int vessel filling Flushing Reset scales Service 6 ENTER Connect the HP hose to the external tank then open the valve ENTER OK STOP EXIT 7 ENTER Set the quantity then conf...

Страница 168: ...RU 230 240 190 13 1 1 2 13 2 5 SAEJ2099 1 2 3 Short selection Free selection Other selections ENTER OK 4 ENTER 5 6 ENTER 7 ENTER 8 HP LP PORT HP PORT LP PORT ENTER OK STOP EXIT 168...

Страница 169: ...Short selection Free selection Other selections ENTER OK 2 ENTER 3 ENTER Flushing Reset scales Service ENTER OK STOP EXIT 4 9786 ENTER ADM Service 5 0000 ENTER Insert ADM Code 0000 6 ADM AREA Insert n...

Страница 170: ...REA User number 1 9 ADM AREA User number 1 Insert new code 10 10 ADM AREA User number 1 Confirm new code 11 ENTER ADM AREA User number 1 User name John Citizen ADM AREA User number 1 John Citizen 12 1...

Страница 171: ...ohn Citizen 13 4 100 1 Short selection Free selection Other selections ENTER OK 2 ENTER 3 ENTER CAR DATA PLATE NR 4 ENTER Filling Qt g 500 Database ENTER OK STOP EXIT 5 ENTER Personal DB ALFA ROMEO AS...

Страница 172: ...TER ____________ 0 ___________________ ____________ g ___ 0 9 ENTER AUDI 0 A4 8E 2000 2004 g 500 AUDI 0 A4 8E 1 10 13 5 USB USB USB FAT32 HTML XLS Microsoft Excel USB JPEG logo jpg 370 x 50 163 13 5 1...

Страница 173: ...OK 3 ENTER 4 ENTER 5 ENTER 4910 4918 USB 52 6 ENTER 7 8 13 6 1 Short selection Free selection Other selections ENTER OK 2 ENTER 3 ENTER Flushing Reset scales Service ENTER OK STOP EXIT 4 9051 ENTER S...

Страница 174: ...9000 PRINT STOP EXIT R1234yf from system 01 2017 g 2400 PRINT STOP EXIT 2017 2400 ENTER STOP 13 7 1 2 3 Short selection Free selection Other selections ENTER OK 4 ENTER 5 A C system test Service ENTE...

Страница 175: ...A C system service hose from Disconnect the HP 8 service hoses Recovery from the Wait STOP EXIT Process completed 9 13 8 Schnellstart 5 1 2 Short selection Free selection Other selections ENTER OK 3...

Страница 176: ...TER 176 Pressure increase Test time min 1 ENTER OK STOP EXIT 13 8 2 1 ENTER Vacuum phase Yes No ENTER OK STOP EXIT 2 20 176 3 4 ENTER Vacuum time min 20 Vacuum test time min 4 ENTER OK STOP EXIT 13 8...

Страница 177: ...efrigerant g 500 ENTER OK STOP EXIT 0 13 8 4 1 LP HP HP LP 2 ENTER HP LP PORT HP PORT LP PORT ENTER OK STOP EXIT 3 ENTER Process start ENTER OK STOP EXIT 13 8 5 1 ENTER 2 13 9 1 2 Short selection Free...

Страница 178: ...ER 7 ENTER 8 ENTER 9 ENTER 10 11 12 13 Short selection Free selection Other selections ENTER OK 14 ENTER 15 Flushing Reset scales Service ENTER OK STOP EXIT 16 ENTER ENTER 17 Full flushing Fast flushi...

Страница 179: ...ection Other selections ENTER OK 22 ENTER 23 ENTER ENTER 24 ENTER 25 ENTER 26 ENTER ENTER 27 ENTER 28 29 ENTER 30 ENTER 31 ENTER 32 14 14 1 14 2 1 2 7782 3 ENTER 4 ENTER 3 5 R1234 from system 07 03 17...

Страница 180: ...EXIT R1234yf Vacuum time 07 03 17 min 79 STOP EXIT Service completed 08 03 17 Number 4 STOP EXIT 14 3 10 l 1 Short selection Free selection Other selections ENTER OK 2 ENTER 3 Int vessel filling Flus...

Страница 181: ...RU 4 13 10 11 12 5 ENTER 6 10 12 11 13 7 14 4 1 Short selection Free selection Other selections ENTER OK 2 ENTER 3 4 5 1 6 ENTER 7 8 ENTER 9 10 ENTER 181...

Страница 182: ...RU 11 12 ENTER 13 14 15 D 16 E 17 15 18 19 20 R1234yf 179 21 179 14 5 12 182...

Страница 183: ...hort selection Free selection Other selections ENTER OK 2 181 3 ENTER 4 Service 5 ENTER 6 2224 7 ENTER 8 7 8 9 ENTER 10 7 8 11 ENTER www weatherpro com air pressure 12 ENTER 13 STOP 14 175 14 7 Domest...

Страница 184: ...RU 2 D E 3 I 4 G 5 J 6 J 7 H G 8 9 10 179 184...

Страница 185: ...4 7782 183 181 R1234 from system Total 07 03 17 g 1455 STOP EXIT R1234yf R1234 from tank Total 07 03 17 g 3395 STOP EXIT R1234yf R1234 to system Total 07 03 17 g 1200 STOP EXIT R1234yf Vacuum time Tot...

Страница 186: ...mpleted 07 03 17 Number 4 STOP EXIT 14 10 USB USB USB FAT32 1 USB 2 USB USB 3 USB USB New firmware release found ENTER upgrade STOP EXIT AS5k0058 USB New database release found ENTER upgrade STOP EXIT...

Страница 187: ...RU 4 ENTER Wait Erase flash Erased Writing 1 63488 7 762751 Wait loading default parameters 5 USB 14 11 15 ENTER 8 50 120 150 l 187...

Страница 188: ...RU 181 ENTER 3 183 ENTER 3 01 02 03 04 188...

Страница 189: ...RU 09 10 12 52 USB USB USB FAT32 60 61 G1 00001 00002 00003 00004 10 C 45 C 00001 189...

Страница 190: ...RU 16 17 ASC 6300 G 9103303105 x x 560 1300 650 110 230 240 50 60 Zmax 0 43 30 5 95 0 32 150 60 16 62 A 10 1 190...

Страница 191: ...r R134a R1234yf R513A 5 C 40 C 25 C 50 C ASC 6400 G 9103303106 x x 560 1300 650 110 230 240 50 60 Zmax 0 43 192 95 0 32 150 60 28 62 A 10 1 1 1 bar 20 bar R134a R1234yf R513A 5 C 40 C 25 C 50 C DIN EN...

Страница 192: ...RU 17 1 ASC6300 G 192...

Страница 193: ...RU B1 UV dye B2 B3 B4 B5 B6 C1 F1 F2 KU1 KU2 L1 L11 L12 L2 L3 L4 L5 UV dye L6 L7 L9 M1 P1 PIT1 PIT2 PSH2 PT1 R1 R2 TT1 TZH1 TC1 V1 V2 V3 V4 NCG W1 X10 VC X16 CY X2 LP 193...

Страница 194: ...RU X23 DO X3 UV X4 X5 Z2 X6 Z2 X7 HP X8 HP X9 RE 194...

Страница 195: ...RU 17 2 ASC6400 G 195...

Страница 196: ...RU B1 UV dye B2 B3 B4 B5 B6 C1 F1 F2 KU1 KU2 L1 L11 L12 L2 L3 L4 L5 UV dye L6 L7 L9 M1 P1 P2 PIT1 PIT2 PSH1 PSH2 PT1 R1 R2 R3 TT1 TZH1 TC1 V1 V2 V3 V4 NCG W1 196...

Страница 197: ...RU X10 VC X16 CY X2 LP X23 DO X3 UV X4 X5 Z2 X6 Z2 X7 HP X8 HP X9 RE 197...

Страница 198: ...RU 17 3 ASC6300 G 198...

Страница 199: ...RU 199...

Страница 200: ...RU 17 4 ASC6400 G 200...

Страница 201: ...RU 201...

Страница 202: ...y observaci n de las instrucciones y advertencias aqu expuestas puede causarle lesiones a usted o a terceros da os en el produc to o da os en otras propiedades cercanas Este manual del producto incluy...

Страница 203: ...adas o leves No realice modificaciones en la unidad de servicio de aire acondicionado Peligro de sufrir lesiones por revent n de componentes si se superan los l mites de temperatura per mitidos Transp...

Страница 204: ...haya ajustado en la unidad de servicio de aire acondicionado Si se mezclan otros refrigerantes se pueden producir da os en la unidad de servicio de aire acondi cionado y en el sistema de aire acondici...

Страница 205: ...idas de higiene para la salud al manipular gases a presi n Funcionamiento de la unidad de servicio de aire acondicionado y realizaci n de trabajos de servicio en la unidad de servicio de aire acondici...

Страница 206: ...instalaci n y o funcionamiento del producto Una instalaci n deficiente y o un uso y mantenimiento inadecuados conllevan un rendimiento insatisfactorio y posibles fallos El fabricante no se hace respo...

Страница 207: ...iga aumentando a pesar del presostato de seguridad Control del ventilador comprueba en el arranque si los ventiladores funcionan correctamente 10 3 Men Stand by El men Stand by muestra la siguiente in...

Страница 208: ...presi n 7 Pantalla 8 Panel de teclas 9 Cubierta frontal 10 Ruedas delanteras con inmovilizador 11 Manguera de servicio para conexi n de baja presi n azul no incluida en el volumen de entrega 12 Mangue...

Страница 209: ...ES 16 Conexi n USB 209...

Страница 210: ...a longitud de las mangueras de servicio en la p gi na 211 4 Conecte la unidad de servicio de aire acondicionado a la fuente de alimentaci n 5 Para encender la unidad de servicio de aire acondicionado...

Страница 211: ...fase de limpieza de la presi n interna del dep sito pressure mb Internal vessel Cleaning phase A continuaci n la unidad de servicio de aire acondicionado ejecuta una prueba de software Don t connect t...

Страница 212: ...para confirmar 12 4 Selecci n del idioma 1 Pulse las teclas de direcci n o 2 En el men b sico utilice las teclas de direcci n o para seleccionar Otras selecciones Selec autom tica Selecci n libre Otr...

Страница 213: ...cionada est activa y se visualiza el men Stand by 12 6 Ajuste del volumen del zumbador 1 Pulse las teclas de direcci n o para acceder al men b sico 2 En el men b sico utilice las teclas de direcci n o...

Страница 214: ...configurados est n activos 9 Vuelva a pulsar STOP Aparece el men Stand by 12 8 Introducir la fecha y la hora Para protocolar los pasos de servicio se necesitan la fecha y la hora La fecha y la hora se...

Страница 215: ...de direcci n para seleccionar Manejo 4 Pulse INTRO para confirmar 5 Introduzca la contrase a 7388 6 Introduzca la informaci n con el teclado y las teclas de direcci n 7 Pulse INTRO para confirmar 8 P...

Страница 216: ...batible 20 3 Introduzca el tama o de los recipientes para aceite nuevo y medio de contraste UV Introducci n del tama o de los recipientes en la p gina 216 12 11 Introducci n del tama o de los recipien...

Страница 217: ...rno de refrigerante a la unidad de servicio de aire acondicionado Nota Siga las instrucciones de los dep sitos de refrigerante Los dep sitos de refrigerante R1234yf tienen una rosca a izquierdas Hay t...

Страница 218: ...staci n de mantenimiento de aire acondicionado solo es apta para 230 V 240 V v ase Datos t cni cos en la p gina 242 13 1 Desconexi n en caso de reparaciones emergencias y aver as 1 Para asegurarse de...

Страница 219: ...ndicionado tiene dos conexiones pre si n alta y presi n baja o solo una presi n alta o presi n baja AP BP conector AP conector BP conector ENTER OK STOP EXIT 9 Pulse INTRO para confirmar Se inicia el...

Страница 220: ...duzca el c digo de administrador 0000 ajuste por defecto y pulse INTRO para confirmar Insert ADM Code Nota Por motivos de seguridad debe seleccionarse cada vez un nuevo c digo de administrador y no 00...

Страница 221: ...do el usuario y el men vuelve a cambiar a la selecci n de usuario 12 Siga los siguientes pasos Cree otro usuario utilizando las teclas de direcci n para seleccionar Base de datos y proceda de la forma...

Страница 222: ...TRO para confirmar 3 Introduzca el n mero de matr cula del veh culo tambi n puede dejarse en blanco y pulse INTRO para con firmar DATOS DEL COCHE Matr cula 4 Utilice las teclas de direcci n o para sel...

Страница 223: ...se copia una gr fica que cumpla las siguientes condiciones Formato de archivo formato JPEG Nombre de archivo logo jpg todas las letras en min scula Tama o de imagen 370 x 50 p xeles La direcci n de l...

Страница 224: ...tras selecciones Selec autom tica Selecci n libre Otras selecciones ENTER OK 2 Pulse INTRO para confirmar 3 Con la tecla de direcci n seleccione Manejo y pulse INTRO para confirmar Flushing Calibrado...

Страница 225: ...ci n autom tica y Selecci n libre ya hay una funci n de compensaci n para las mangueras de servicio de forma que la prueba final de funcionamiento del equipo de aire acondicionado puede llevarse a cab...

Страница 226: ...s de realizar cualquier trabajo en el equipo de aire acondicionado de un veh culo se ha de comprobar la estanqueidad Para ello se ha de llenar dicho equipo con una muestra de refrigerante La presi n e...

Страница 227: ...n para introducir el tiempo de la fase de vac o 4 Confirme los dos ajustes con INTRO Vac o min 20 Verificaci n fuga min 4 ENTER OK STOP EXIT La bomba de vac o vac a totalmente el sistema de aire acond...

Страница 228: ...condicionado Cuando finaliza el mantenimiento del equipo de aire acondicionado aparece un mensaje exhort ndole a desconectar las mangueras de la unidad de servicio de aire acondicionado del sistema de...

Страница 229: ...ntes de recogida Unidades de secado de filtros V lvula de expansi n 12 Conecte conforme a las especificaciones del fabricantes los componentes en los que se va a realizar un barrido a los puertos de s...

Страница 230: ...Cuando se termina el proceso de llenado aparece un mensaje exhort ndole a desconectar las mangueras de la unidad de servicio de aire acondicionado del sistema de aire acondicionado del veh culo 31 De...

Страница 231: ...l 4 STOP EXIT Servicio finalizado indica la cantidad de trabajos de mantenimiento realizados con la unidad de ser vicio de aire acondicionado desde la ltima puesta a cero ver fecha 14 3 Comprobar la c...

Страница 232: ...s de los recipientes Recipiente para aceite nuevo 10 Recipiente para aditivo UV 11 Recept culo para aceite usado 12 5 Una vez liberadas las b sculas pulse INTRO para confirmar El mensaje exhort ndole...

Страница 233: ...para confirmar 11 Seleccione Inicio del proceso 12 Pulse INTRO para confirmar Se vac an entonces las mangueras de servicio y se activa el men b sico de la unidad de servicio de aire acondicionado El...

Страница 234: ...n se visualiza un Introducci n de c digo Si no se introduce ning n c digo la unidad de servicio de aire acondicionado se pone fuera de funcionamiento Cada c digo tiene un solo uso 14 6 Calibraci n del...

Страница 235: ...ta Puede consultar en Internet la presi n atmosf rica actual en su regi n en por ejemplo www weatherpro com bajo Presi n de aire 12 Una vez finalizada la calibraci n pulse INTRO para salir del men 13...

Страница 236: ...de aire acondicionado 4 Desenrosque el tornillo de llenado de aceite G 5 Para dejar salir el aceite desenrosque el tornillo de vaciado de aceite J 6 Una vez que el aceite ha salido totalmente de la ca...

Страница 237: ...a el c digo 7782 en Manejo ver tambi n Cambiar el aceite de la bomba de vac o en la p gina 235 o Cambiar el filtro del secador en la p gina 233 1234yf desde sistema Total 07 03 17 g 1455 STOP EXIT R12...

Страница 238: ...unidad de servicio de aire acondicionado El software actual de la unidad de servicio de aire acondicionado La base de datos actual con todos los tipos de veh culo convencionales y las correspondientes...

Страница 239: ...pantalla se visualiza Adver tencia Presi n dentro del sis tema A C Inicio de la recu peraci n Mensaje normal que aparece al comienzo del proceso de vac o To dav a hay presi n en el sistema de aire aco...

Страница 240: ...dicionado Cambie el filtro interno lo antes posi ble Cambiar el filtro del secador en la p gina 233 Para omitir este paso pulse INTRO durante 3 segundos En la pantalla se visualiza Cambiar el aceite d...

Страница 241: ...h brido Est n abiertos los acoplamientos de servicio En la pantalla se visualiza Error G1 No se ha podido establecer ninguna conexi n con el m dulo de an lisis Compruebe las conexiones Est n activados...

Страница 242: ...ntacto con el servicio de atenci n al cliente 17 Datos t cnicos ASC 6300 G N de art 9103303105 Dimensiones anchura x altura x profundidad 560 mm 1300 mm 650 mm Peso 110 kg Fuente de alimentaci n 230 V...

Страница 243: ...dB A Precisi n de la b scula electr nica para el refrigerante 10 g Precisi n de la b scula electr nica para el aceite usado nue vo 1 g Precisi n de la b scula electr nica para el aditivo UV 1 g Presi...

Страница 244: ...ES 17 1 Diagrama de flujo ASC6300 G Leyenda 244...

Страница 245: ...3 Manguera del man metro LP L4 Manguera del man metro HP L5 Manguera del colorante UV L6 Manguera de aceite L7 Tuber a de recuperaci n L9 Tuber a de la bomba de vac o M1 Bater a de v lvulas P1 Bomba d...

Страница 246: ...scripci n X23 V lvula solenoide DO X3 V lvula solenoide UV X4 V lvula solenoide de aceite X5 V lvula solenoide Z2 X6 V lvula solenoide Z2 X7 V lvula solenoide HP X8 V lvula solenoide HP X9 V lvula sol...

Страница 247: ...ES 17 2 Diagrama de flujo ASC6400 G Leyenda 247...

Страница 248: ...etro LP L4 Manguera del man metro HP L5 Manguera del colorante UV L6 Manguera de aceite L7 Tuber a de recuperaci n L9 Tuber a de la bomba de vac o M1 Bater a de v lvulas P1 Bomba de vac o P2 Bomba par...

Страница 249: ...6 V lvula solenoide CY X2 V lvula solenoide LP X23 V lvula solenoide DO X3 V lvula solenoide UV X4 V lvula solenoide de aceite X5 V lvula solenoide Z2 X6 V lvula solenoide Z2 X7 V lvula solenoide HP X...

Страница 250: ...ES 17 3 Esquema de conexiones ASC6300 G 250...

Страница 251: ...ES 251...

Страница 252: ...ES 17 4 Esquema de conexiones ASC6400 G 252...

Страница 253: ...ES 253...

Страница 254: ...4445103554 2022 11 30...

Отзывы: