background image

HAVING TROUBLE?

     Page  118

Contents

Index

WINDOWS-SPECIFIC PROBLEMS

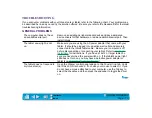
Double-clicking is difficult.

Be sure you are quickly tapping the tablet twice in the same place on 
the tablet’s active area.  Wacom recommends using the side switch to 
double-click (review the techniques in 

Clicking

).

Try increasing the D

OUBLE

-C

LICK

 D

ISTANCE

 or reducing the double-

click speed (see 

Adjusting Double-Click

). 

Try using a lighter T

IP

 P

RESSURE

 F

EEL

 (see 

Adjusting Tip Feel

).

After switching to left-handed 
mouse in the Mouse control 
panel, the pen tip no longer 
works as a left click.

Restart Windows for the new mouse settings to recognized by the 
Wacom driver.

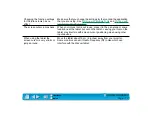
Cannot move the cursor.

Verify that the Display Area is set to E

NTIRE

 D

ISPLAY

 on the M

APPING


tab for the selected tool and application.

When the pen tip contacts the 
tablet surface, the cursor 
jumps to the top left corner of 
the screen, or the message, 
“Unable to implement 
function”, appears in the 
Wacom control panel.

If you have had another manufacturer’s tablet, and the drivers are still 
loaded on your system, uninstall these drivers according to their 
manufacturer’s instructions and reinstall the Intuos driver.

ACECAT: Edit your SYSTEM.INI.  Go to the drivers=line in the [boot] 
section and remove awintab.  Then go to the [drivers] section and 
remove the awintab=awintab.drv line.  Look also for any reference to 
Virtual Tablet and remove it.  Save the changes and restart Windows.

KURTA: Edit your SYSTEM.INI by looking for any references to 
wtkurta and removing them.  Save the changes and restart Windows.

Содержание Intuos GD-0405-R

Страница 1: ...Navigation Contents Index USER S MANUAL FOR WINDOWS USER S MANUAL FOR WINDOWS...

Страница 2: ...DualTrack are trademarks of Wacom Company Limited in the United States and or other countries Acrobat Reader Copyright 1987 1996 Adobe Systems Incorporated All rights reserved Adobe and Acrobat are tr...

Страница 3: ...erference stops it was probably caused by the tablet If your tablet does cause interference to radio or television reception try to correct the interference by using one or more of the following measu...

Страница 4: ...Norms EN 50082 1 or EN 55104 electromagnetic immunity EN 50081 1 or EN 55014 electromagnetic emissions EN 60742 safety of low voltage devices Based on the results of these tests Wacom declares that t...

Страница 5: ...OMIZING 47 Opening the Control Panel 48 Control Panel Features 49 Tabs 50 Control Panel Lists 52 Control Panel Buttons 54 Trademarks 2 Radio and Television Interference 3 FCC Notice 3 CE Declaration 4...

Страница 6: ...ystrokes and Mapping Options 81 Customizing Tablet Buttons 82 Working with Multiple Tools 84 Adding a New Tool 85 Using More Than One Tool 86 Working with Application Specific Settings 87 Creating an...

Страница 7: ...eneral Specifications for All Intuos Tablets 131 Intuos 4x5Tablet Model GD 0405 R 132 Intuos 6x8Tablet Model GD 0608 R 132 Intuos 9x12Tablet Model GD 0912 R 132 Intuos 12x12 Tablet Model GD 1212 R 133...

Страница 8: ...ribes how you can change the control panel settings to optimize Intuos tablets and tools for your personal work style Advanced Features allow further customization of your Intuos Graphics Tablet Syste...

Страница 9: ...l Information about your specific computer hardware Information about your operating system Information about other Wacom tablets Information about application software Many graphics applications have...

Страница 10: ...o Table of Contents Go to Index Go back to previous view Page back or page forward Go to beginning of section Go to topic Topic continued The Acrobat Reader provides you with additional tools for usin...

Страница 11: ...r later and with all applications that support a mouse Before you install the Intuos Graphics Tablet System be sure to turn off your computer Connect the hardware then install the software THINGS TO K...

Страница 12: ...ers have a built in modem and the external serial port may be disabled or configured with the same serial port address as the modem If your tablet does not communicate properly after installing the ha...

Страница 13: ...light Note If you have a 12x12 or larger tablet turn on the power switch located on the right side of the tablet 5 If you have any trouble with the installation go to Having Trouble Otherwise move on...

Страница 14: ...follow the screen prompts 3 If the PLUG AND PLAY dialog does not appear click on the START button and then click RUN Important If you replaced your mouse with the tablet press CTRL ESC to open the ST...

Страница 15: ...DD REMOVE PROGRAMS icon 3 In the dialog box that appears choose the Wacom tablet option 4 Click on the ADD REMOVE button and follow the prompts to remove the Intuos software driver REGISTRATION To reg...

Страница 16: ...ns currently support your Intuos tablet and tools visit the Wacom web site for your region USA Canada Central and South America http www wacom com productinfo Europe Middle East and Africa http www wa...

Страница 17: ...using a graphics tablet and tablet input tools read the following sections They describe your Intuos tools and explain how to use them with the tablet APPEARANCE AND FEATURES SETTING UP YOUR WORK AREA...

Страница 18: ...ments a graphics tablet that serves as your work area and the Intuos Tools you use with the tablet For a complete listing of Intuos tablets refer to Parts and Accessories INTUOS 4X5 TABLET Note To lea...

Страница 19: ...ETS Note The Intuos 9x12 tablet is shown To learn more about your tablet see Working with the Tablet Menu Strip removable Active Area Incline Bar shown attached QuickPoint Area Markings not available...

Страница 20: ...UOS 12X12 AND 12X18 TABLETS Note The Intuos 12x12 tablet is shown To learn more about your tablet see Working with the Tablet Menu Strip removable Active Area Pen Stand QuickPoint Area Markings Power...

Страница 21: ...each tool differently Note The tool s included with your tablet will vary depending on which tablet model and configuration you purchased The Intuos Pen and Airbrush are pressure sensitive freehand to...

Страница 22: ...es four degrees of control x and y position thumbwheel position and positional rotation The thumbwheel can be set to emulate the Microsoft IntelliMouse and used for scrolling zooming and other tasks i...

Страница 23: ...e coordinate position information Use the Lens Cursor with graphics and CAD applications for very accurate tracing or digitizing images For information on these and other available Intuos tools refer...

Страница 24: ...rtably with a minimum of eyestrain For some tablet models you can adjust the tablet incline and attach the pen stand to better fit your work style Refer to Adjusting Tablet Incline and Adjusting the P...

Страница 25: ...stand attaches to the tablet for others it is free standing 4x5 tablets The stand is free standing Place it within easy reach of your tablet 6x8 tablets The stand can be free standing or attached in...

Страница 26: ...apply the incline bar For desktop use you may find an inclined tablet position more comfortable To attach the incline bar 1 First turn the tablet upside down and locate the incline bar recess 2 Remove...

Страница 27: ...n a button with your Intuos tool the function assigned to that button will occur To remove the menu strip carefully lift the overlay sheet from the left side and gently slide the menu strip out You ca...

Страница 28: ...Button name Keyboard shortcut Function new Ctrl N Open a new document open Ctrl O Open an existing document close Alt F C Close a document save Ctrl S Save work print Ctrl P Print document exit Alt F...

Страница 29: ...uld a normal pen Make sure the DuoSwitch is in a convenient location where you can toggle it with your thumb or forefinger but not accidently press the switch while drawing You can tilt the pen in any...

Страница 30: ...l jump to the corresponding point on the screen This is the default setting and makes tracing possible something you cannot do with a mouse In Mouse Mode you move the cursor with a pick up and roll ac...

Страница 31: ...n cursor over the icon and pressing down on the pen tip The icon should highlight when you press Double Clicking To double click quickly tap the tablet twice in the same place with the pen tip This is...

Страница 32: ...f the tablet You do not have to touch the pen tip to the tablet in order to use the switch To assign new switch functions refer to Customizing Tool Buttons Double Click Hint Press the upper side switc...

Страница 33: ...the tablet and slide it across the tablet The selected object will move across the screen To select text move the screen cursor to the beginning of a text line then drag the Intuos Pen across the tabl...

Страница 34: ...tive area This allows you to position the screen cursor or use the side switch without touching the pen tip to the tablet You can also trace a drawing or photograph as long as the pen tip remains with...

Страница 35: ...an be controlled much better by the Intuos Pen s pressure sensitivity You can vary line width blend colors and change opacity with the pressure you exert upon the pen To draw with pressure sensitivity...

Страница 36: ...a curve in a graphics application such as Painter that supports tilt Be sure that the tilt function in your application is active then change the tilt of the pen as you draw to vary the shape and thic...

Страница 37: ...plications The eraser will not be pressure sensitive but you can use it to select and delete text or spreadsheet cells Try your eraser by opening Windows Notepad and typing a few words Use the eraser...

Страница 38: ...oordination for using the Intuos Pen 1 Open any graphics application Use the line tool to draw a rectangular grid with line spacings of about 20 25 mm 3 4 to 1 inch You can use your traditional mouse...

Страница 39: ...can adjust the spray intensity and pressure on the tip can control the brush size Pointing Clicking Erasing and Proximity are similar to the pen For additional information refer to Holding the Airbrus...

Страница 40: ...lows you to paint and draw with pressure sensitivity To customize the fingerwheel see Airbrush Settings Visit Wacom s web site to learn which applications currently support the airbrush fingerwheel Se...

Страница 41: ...rotation parameter The front button nearest the thumbwheel is set to left click by default The front button opposite the thumbwheel is set to right click by default The middle button is set to perform...

Страница 42: ...dedness configuration 1 2 3 4 Grasp the upper portion of the 4D Mouse in one hand and face the bottom portion toward you Viewed from the bottom a thumbwheel is visible at both sides of the body A pair...

Страница 43: ...soft IntelliMouse moving the thumbwheel scrolls through documents in applications that support the IntelliMouse When you release the thumbwheel it springs back to the neutral position leaving the scro...

Страница 44: ...useful for tracing and digitizing drawings into graphics and CAD applications Refer to Customizing the 4D Mouse and Lens Cursor for information on programming the Lens Cursor buttons Left Click Butto...

Страница 45: ...ile liquids such as paint thinner or benzene because they may damage the plastic case Keep your tablet and tools in a clean dry place and avoid extremes in temperature Room temperature is best Also yo...

Страница 46: ...u can replace it with the extra nib that came with your tool 1 Clasp the old nib with a tweezer needle nosed plier or similar instrument and pull it straight out of the pen or airbrush 2 Slide the end...

Страница 47: ...om control panel to adjust your Intuos tool and tablet settings Advanced users can learn how to further optimize Intuos by creating application specific settings OPENING THE CONTROL PANEL CONTROL PANE...

Страница 48: ...ntrol panel with the Intuos tool you wish to customize 1 Using your Intuos tool click on the Windows START button Then select SETTINGS and CONTROL PANEL 2 Double click on the tablet icon To open the W...

Страница 49: ...ol Control Panel Buttons apply to the entire control panel The Help button displays online Help The information is the same as in the Customizing and Advanced Features chapters in this manual Tab butt...

Страница 50: ...L LIST has more than one tool you can select a different tool to customize and the appropriate tabs will display for that tool Note The APPLICATION LIST is for advanced users it is not necessary to se...

Страница 51: ...the OK or APPLY buttons click To copy settings from one tool or application to another click This will display the Copy Settings To dialog box As you explore the control panel tabs experiment with di...

Страница 52: ...an installed application to the APPLICATION LIST You can customize tool settings for the selected application Click to add an Intuos tool to the TOOL LIST You can customize the tool for the above sel...

Страница 53: ...IST displays an icon for each Intuos tool that has been used on the tablet Each Intuos tool that is used on the tablet will automatically appear in the TOOL LIST However the Wacom control panel settin...

Страница 54: ...apply your changes and remain in the control panel click The changes you apply are saved To display online Help for the control panel click Or you can choose HELP from the HELP pull down menu Balloon...

Страница 55: ...or a different tool select it from the TOOL LIST by clicking on its icon PEN AND AIRBRUSH TABS If the selected tool is an Intuos Pen or Airbrush the following tabs are displayed 4D MOUSE AND LENS CURS...

Страница 56: ...um control while drawing thin lines use a firm tip setting Drag the slider to a softer or firmer setting Make several pen strokes to test the current pressure sensitivity setting Click here with your...

Страница 57: ...ing the upper side switch to double click Use custom double click settings when checked Note DOUBLE CLICK ASSIST can be enabled for some applications and disabled for others See Working with Applicati...

Страница 58: ...ngerwheel sensitivity For each tool button a pull down menu enables you to choose the function that will be performed Select the function to perform when using the eraser Select the function to perfor...

Страница 59: ...e and click LEFT DOUBLE CLICK Default setting for the upper position of the side switch When this option is selected pressing the switch simulates a left mouse button double click For easier double cl...

Страница 60: ...an enter a keystroke or keystroke sequence to play back Keystroke combinations can include letters numbers function keys such as F3 and modifier keys such as SHIFT ALT or CTRL After defining a keystro...

Страница 61: ...plications use modifier keys to constrain the size or placement of objects If you select this option the DEFINE MODIFIER dialog box appears There you select the modifier key s to simulate You can sele...

Страница 62: ...E Toggles between Pen Mode and Mouse Mode POP UP MENU Displays a Pop up Menu on your screen See Customizing the Pop up Menu for more information ERASE Default setting for the eraser Refer to Erasing f...

Страница 63: ...h size opacity or other variables Reducing the fingerwheel range allows you to achieve the same effect with less finger movement Move the wheel forward for less effect and move it back for more effect...

Страница 64: ...use a soft tip setting For maximum control while erasing use a firm eraser setting Drag the slider to a softer or firmer setting Using your eraser test the current eraser pressure sensitivity setting...

Страница 65: ...eristics Your tilt setting applies to both the tip and eraser of your pen or airbrush Visit Wacom s web site for a list of applications that currently support tilt See Product Information Drag the sli...

Страница 66: ...Positioning Mode In Pen Mode the screen cursor moves with absolute positioning Select the Tablet Area for drawing QuickPoint Mode Splits tablet into two independent areas a large area for drawing and...

Страница 67: ...h MOUSE MODE selected the MAPPING tab looks like this Positioning Mode In Mouse Mode the screen cursor moves with relative positioning Select the Orientation of your tablet Select a slower or faster s...

Страница 68: ...ode the screen cursor is positioned like a mouse requiring a pick up and roll action to move the cursor on the screen If you are working with multiple tools you may want to set your pen or airbrush to...

Страница 69: ...entation will be vertical with the tablet buttons on the right side LANDSCAPE FLIPPED Rotate the tablet 180 degrees from landscape orientation The tablet will be upside down with the tablet buttons ne...

Страница 70: ...size as the original image on your display screen PROPORTIONAL Maintains correct vertical and horizontal proportions between the tablet and display A traced image appears proportionally correct on you...

Страница 71: ...a smaller PORTION OF TABLET for fast pointing and navigation with the 4D Mouse Sets the QuickPoint area to the lower left corner of the tablet Sets the QuickPoint area to the lower right corner of th...

Страница 72: ...the displayed values A count equals one line of tablet resolution Enter values for the TOP LEFT BOTTOM and RIGHT boundary of the tablet area Values are measured from the top left corner of the tablet...

Страница 73: ...tion The QuickPoint area is always mapped to the entire display area to all monitors on multiple monitor systems The drawing area is set to Pen Mode and mapped according to the DISPLAY AREA and ASPECT...

Страница 74: ...box Drag corners of the foreground graphic to select the screen area The background graphic represents the entire screen area Values in the ENTER COORDINATES text boxes will change accordingly Enter c...

Страница 75: ...to Setting Right or Left Handed Operation Lens Cursor button configuration is based on settings you choose in the PREFERENCES dialog box accessed from the Edit pull down menu When checked the 4D Mous...

Страница 76: ...ch button can be customized to perform three different functions depending on the thumbwheel position To program the additional button settings 1 Choose the THUMBWHEEL tab and select 15 BUTTON 4D MOUS...

Страница 77: ...assigning these functions Depending on the thumbwheel position the following button numbers are reported to the application when a button is set to APPLICATION DEFINED For information on other uses fo...

Страница 78: ...if you use your 4D Mouse or Lens Cursor as a Button Box it must remain on the tablet s active area to function To configure your 4D Mouse or Lens Cursor as a Button Box open the TOOL BUTTONS tab and s...

Страница 79: ...ate the function of an IntelliMouse Sets the thumbwheel to switch each button between three settings See Using Your 4D Mouse as a 15 Button Mouse Provides thumbwheel information to a supporting applic...

Страница 80: ...ver you push that button the Pop up Menu is displayed Select items in the Pop up Menu by clicking on them Displays a list of functions that will appear in the Pop up Menu To change the order of an ite...

Страница 81: ...MAPPING OPTIONS When you click on the ADD MAPPING OPTIONS button the following mapping options can be added to the Pop up Menu list Pen Mode Mouse Mode and if you are working with a Intuos 9x12 or lar...

Страница 82: ...ected in their pull down menu The settings of other tablet buttons are set to IGNORED See Using The Tablet Menu Strip for the default tablet button settings To customize tablet button functions 1 Sele...

Страница 83: ...et into a QuickPoint area and a drawing area This option is only available for Intuos 9x12 or larger tablets IGNORED Leaves the tablet button undefined DEFAULT Returns a button to its default settings...

Страница 84: ...for that tool are displayed Tab settings apply only to the selected tool and application If application specific settings have not been added the ALL APPLICATIONS icon is displayed and the tool setti...

Страница 85: ...Intuos tool on the tablet a new tool discovered message box appears This reminds you to open the Wacom control panel and click OK to permanently add the new tool to the TOOL LIST This message only app...

Страница 86: ...xample you might name one Drawing Pen and the other Paint Brush To change the tool names select RENAME TOOL from the EDIT pull down menu Note If you have two or more Intuos pens use the colored decals...

Страница 87: ...and tool settings for individual applications Tab settings apply only to the selected tool and application The APPLICATION LIST displays icons for applications with customized settings Your current se...

Страница 88: ...your changes will apply to all applications except the specific one s you have added to the list If you select the icon for a specific application and make changes to the tab settings your changes wi...

Страница 89: ...ST Only applications that are currently running and that have not previously been added to the APPLICATION LIST are displayed Displays the name of the selected application If you have more than one ta...

Страница 90: ...onfirm your selection After you have added an application its icon appears in the APPLICATION LIST When you select the application icon the TOOL LIST displays only the tool s that have application spe...

Страница 91: ...to create settings for Click OK to confirm your selection The dialog box will close and the tool will appear in the TOOL LIST for the chosen application First select ADD EXISTING TOOL TO APPLICATION I...

Страница 92: ...S To remove application specific settings 1 Open the REMOVE menu and select CUSTOM SETTINGS FOR APPLICATION 2 In the REMOVE CUSTOM SETTINGS FOR APPLICATION dialog box select the application s for whic...

Страница 93: ...devices are dimmed Allows the use of two tools simultaneously Not supported on the 4x5 tablet Single tool mode at maximum data rate Required by some handwriting recognition software Displays messages...

Страница 94: ...ry of your current settings EXIT Exits the control panel EDIT The EDIT menu contains the following options COPY SETTINGS TO Opens a dialog box where you can copy your customized settings to another to...

Страница 95: ...Opens a dialog box where you can add a tool to the control panel TOOL LIST This is also accessed by clicking on the ADD TOOL TO LIST button Refer to Adding a New Tool for more information REMOVE The R...

Страница 96: ...ges can be specified during a custom install Please refer to the Readme file for more information HELP The HELP menu contains the following options HELP Displays online Help USER S MANUAL Displays the...

Страница 97: ...ANCED FEATURES You can use advanced features to further customize your Intuos Graphics Tablet System for the way you like to work ADVANCED TIP PRESSURE SETTINGS ADVANCED ERASER PRESSURE SETTINGS COPYI...

Страница 98: ...RE FEEL slider overrides the advanced pressure settings If you customize advanced settings then drag the TIP PRESSURE FEEL slider your advanced settings will be removed Toggles to the basic options di...

Страница 99: ...ed to generate a button click Enter a value from 0 1 to 50 or drag the CLICK FORCE bar to set the force at which a click occurs The CLICK FORCE bar graphically displays the force level at which a clic...

Страница 100: ...ond to If you have a soft touch and want to achieve full pressure without having to apply full force to your pen decrease the maximum force level You can apply less force to your pen and still have th...

Страница 101: ...MAXIMUM TIP FORCE control moves and the value in the edit box changes to reflect the peak pressure registered by your hand movements To start over click the START button and begin a new drawing While...

Страница 102: ...tab and click on the MORE OPTIONS button You work with the advanced eraser settings in the same manner as with the Advanced Tip Pressure Settings Important The ERASER PRESSURE FEEL slider overrides t...

Страница 103: ...another within the same application or between different applications You can also copy settings between different types of Intuos tools Note For dissimilar tools such as a pen and a 4D Mouse only tho...

Страница 104: ...e screen cursor and the second tool will function as a Button Box If you are using a graphics program for example you can set one of the 4D Mouse buttons to simulate the SHIFT key to constrain lines w...

Страница 105: ...ING dialog box Here you can define multiple different tablet to screen mappings Changes units origin and range or size displayed in the status bar Creates a new mapping Removes the active map Be sure...

Страница 106: ...rom each pull down menu Click OK to confirm your selections 2 Select the tablet mapping to define The mapping numbers are displayed in the top left corner of each tablet area graphic If multiple table...

Страница 107: ...select an option These options work similarly to normal mapping If you choose PROPORTIONAL or TO FIT you can set an exact scale factor One to One A 1 1 scale is maintained between the selected tablet...

Страница 108: ...display area by dragging the handles of the selected display area Then click and drag the display area to the desired position For more precise control in selecting the display area click the SET DISP...

Страница 109: ...the DELETE MAPPING button To quickly remove all advanced mappings from a tool in the MAPPING tab click RESET TAB TO DEFAULTS for that particular application and tool This also resets all MAPPING tab s...

Страница 110: ...hardware or software product it may be helpful to download a new Wacom tablet software driver Wacom periodically updates the software driver to maintain compatibility with new products See Who to Call...

Страница 111: ...is plugged into an active outlet Make sure the tablet is turned on 12x12 and larger tablets Important Use only the AC adaptor that came with Intuos Other adaptors may cause damage to your tablet If t...

Страница 112: ...tus LED should change color from orange to green each time you click with the tool tip press the side switch or press the tool s eraser to the tablet Click on the tablet surface with the tool tip the...

Страница 113: ...TILT value should change from approximately 0 to 60 0 to 50 for Intuos 4x5 tablets Now move the tool to the left of vertical the X TILT value should change from approximately 0 to 60 0 to 50 for Intuo...

Страница 114: ...eel to the front center and rear positions The WHEEL status should change from approximately 1000 to 1000 with a center value of zero 3 If your tool supports rotation rotate it on the tablet The ROTAT...

Страница 115: ...ptor that came with your tablet It should be plugged into an active wall outlet and securely connected to the Intuos tablet cable Be sure your computer is off before disconnecting or connecting your t...

Страница 116: ...FEEL slider toward FIRM or select the MORE OPTIONS button and increase the CLICK FORCE setting The Intuos Pen or Airbrush tip does not function Make sure the status LED changes from orange to green wh...

Страница 117: ...The screen cursor jumps back When your Intuos tool is not in use place it in the pen stand or some location near the tablet but not on the tablet Leaving your tool on the tablet may interfere with scr...

Страница 118: ...hat the Display Area is set to ENTIRE DISPLAY on the MAPPING tab for the selected tool and application When the pen tip contacts the tablet surface the cursor jumps to the top left corner of the scree...

Страница 119: ...egion LINKING TO THE WEB PAGE Answers to frequently asked questions and troubleshooting tips can be found on the appropriate web site for your area in Who to Call PRE CONTACT CHECKLIST You might want...

Страница 120: ...ng properly contact the Wacom support staff for the area where your product was purchased If you have a modem you can download the latest software drivers from the Internet or the Wacom bulletin board...

Страница 121: ...rbook online support database FAQs Frequently Asked Questions and answers Software updates Anonymous FTP Site Type ftp wacom com and go to the pub drivers subdirectory Software updates Phone 1 360 896...

Страница 122: ...lgium 32 0 2 713 38 10 Technical Support Phone France 33 0 1 69 32 49 31 Technical Support Phone Germany 49 0 69 66 568 517 Technical Support Phone Great Britain 44 0 181 358 5851 Technical Support Ph...

Страница 123: ...0 3 5322 3905 Technical Support Japanese FAX 81 0 3 5322 3916 Technical Support Japanese Internet Email tablet wacom co jp Technical Support and sales Japanese Worldwide Web http www wacom co jp asia...

Страница 124: ...with multiple tablets and working with AutoCAD You will also find product specifications a listing of available parts and accessories and license and warranty information INSTALLING MULTIPLE TABLETS W...

Страница 125: ...add a new serial tablet connect it to your computer From the ADD menu choose TABLET and follow the prompts When the ADD TABLET dialog box appears click the ADD SERIAL button You will be prompted thro...

Страница 126: ...ITIZER For AutoCAD Release 14 1 Start AutoCAD From the DRAWING EDITOR open the TOOLS menu and select PREFERENCES 2 From the PREFERENCES window select the POINTER tab 3 From the list of available digit...

Страница 127: ...e the number of the Wintab Compatible Digitizer Type 0 zero to exit the drawing editor Then type Y to keep the configuration changes 4 Decide from which device AutoCAD will accept input From the DRAWI...

Страница 128: ...utoCAD also recommends that you select the default tablet menus columns and rows they provide After you configure the tablet menus AutoCAD prompts you for the fixed and floating screen pointing areas...

Страница 129: ...lumns and press ENTER Now enter the number of rows and press ENTER Repeat for each menu area 4 Define the fixed screen pointing area By default the entire tablet is a fixed screen pointing area If you...

Страница 130: ...the TABLET and CALIBRATE options then Digitize point 1 on the paper drawing Then enter the xy coordinate from the paper drawing at the digitized point Digitize point 2 on the paper drawing Then enter...

Страница 131: ...pen 10 mm 0 4 in Maximum report rate 200 points per second Communication interface RS 232C Serial Connector 9 pin D sub female Power supply DC 12V 200mA Power Adaptor s AEC 3512B W 120V USA AD 3923FM...

Страница 132: ...gth 2 5 m 8 2 ft Weight 540 g 1 19 lb Power consumption 1 2 watts Active area W x D 203 2 x 162 4 mm 8 13 x 6 45 in Physical size W x D x H 334 0 x 258 0 x 14 0 mm 13 36 x 10 32 x 0 56 in Cable length...

Страница 133: ...ght 2 1 kg 4 62 lb Power consumption 1 2 watts Active area W x D 457 2 x 316 8 mm 18 28 x 12 67 in Physical size W x D x H 616 0 x 445 5 x 37 0 24 64 x 17 82 x 1 48 in Cable length 2 5 m 8 2 ft Weight...

Страница 134: ...1024 levels Eraser tip travel 1 3 mm 0 05 in approximately Physical size L x D 162 5 x 32 6 mm 6 38 x 1 28 in Weight 24 g 0 85 oz approximately Tip refill type Polyacetal Part No PSI A007 Pen tip tra...

Страница 135: ...0 49 in Weight 12 g 0 42 oz approximately Tip refill type Polyacetal Part No PSI A011 Physical size L x D x H 113 5 x 72 6 x 38 5 mm 4 47 x 2 86 x 1 52 in Weight 75 g 2 65 oz approximately Button str...

Страница 136: ...da please contact your local dealer or distributor PENS Intuos Pen model GP 300E This pressure sensitive pen is an all purpose tool for use in drawing erasing and typical mouse operations The easy to...

Страница 137: ...e the thumbwheel to smoothly pan and zoom at the same time Orient a 3D object with pitch yaw and roll control Smoothly shuttle through video or film with a nudge from your thumb or just use it as a su...

Страница 138: ...blet PSH A144 6x8 tablet PSH A145 9x12 tablet PSH A146 12x12 tablet PSH A147 12x18 tablet PSH A148 Pen Stand 4x5 6x8 and 9x12 tablets PST A017 12x12 and 12x18 tablets PST A018 Replacement Tips Tips fo...

Страница 139: ...ledge that the Software is Wacom s property and contains valuable confidential unpublished information developed or acquired by Wacom at great expense including data processing algorithms innovations...

Страница 140: ...ation accompanied by the return authorization number your name address and telephone number proof of purchase date and a description of the defect Wacom will pay for return shipping by United Parcel S...

Страница 141: ...WHO HAS BEEN INVOLVED IN THE CREATION PRODUCTION OR DELIVERY OF THIS PRODUCT SHALL BE LIABLE FOR ANY DIRECT CONSEQUENTIAL OR INCIDENTAL DAMAGES INCLUDING DAMAGES FOR LOSS OF BUSINESS PROFITS BUSINESS...

Страница 142: ...you should notify your local dealer or distributor In all other respects the terms of the warranty as set forth above apply to such sales Should you have any questions about this Agreement or if you...

Страница 143: ...pped to the display area This setting determines if the aspect of the tablet and display are the same It also determines if a 1 1 scale will be maintained between the tablet and display Click force Th...

Страница 144: ...ENTATION setting In landscape orientation the tablet buttons are at the top Rectangular tablets will be in a horizontal position See also portrait Lens Cursor An input device with programmable buttons...

Страница 145: ...your tool buttons 4D Mouse buttons or Tablet buttons to display this menu Portrait A tablet ORIENTATION setting In portrait orientation the tablet buttons are on the side Rectangular tablets will be i...

Страница 146: ...t senses the amount of tilt between the tool and tablet This is used to create natural looking pen brush and eraser strokes in applications that are tilt sensitive Tool ID A feature that makes each In...

Страница 147: ...pressure customizing 102 mapping 105 tip pressure customizing 98 Airbrush holding 40 settings customizing 63 testing 112 using 39 Application specific settings creating 89 working with 87 Aspect 70 Au...

Страница 148: ...31 Drawing with pressure 35 with tilt 36 DualTrack using 104 Edit menu 94 Environmental conditions 45 Eraser feel customizing 64 Erasing with pen 37 Eye hand coordination exercise 38 Features 18 12x12...

Страница 149: ...136 Orientation 69 Parts and accessories 136 4D Mouse 137 airbrush 137 Lens Cursor 137 ordering 136 other 138 pens 136 Pen clicking 31 clicking with 31 double clicking with 31 drawing with pressure 3...

Страница 150: ...2 6x8 tablet 132 9x12 tablet 132 airbrush 134 general 131 inking pen 134 Lens Cursor 135 pen 133 stroke pen 135 Tablet buttons customizing 82 connection checking 93 storing 45 testing 111 working with...

Страница 151: ...s customizing 58 Tool List adding tools to 91 Tools adding to Tool List 91 customizing 55 testing 112 using more than one 86 Troubleshooting general problems 115 Windows specific problems 118 Uninstal...

Страница 152: ...the manual under aggressive deadlines and contributing to a successful new product introduction Richard Stumpf Technical Direction Daniel Fryda Design and Writing Rhonda Kitzberger Writing Rich Harri...

Отзывы: