background image

User Manual

User Manual DP1601-281H_Eng_2021.05

FROG M1-X

FROG M2-X

FROG M3-X

FROG M4-X

FROG L1-X

FROG L2-X

FROG L3-X

FROG L4-X

Содержание FROG L1-X

Страница 1: ...User Manual User Manual DP1601 281H_Eng_2021 05 FROG M1 X FROG M2 X FROG M3 X FROG M4 X FROG L1 X FROG L2 X FROG L3 X FROG L4 X...

Страница 2: ...Intentionally left empty User Manual DP1601 281H_Eng_2021 10...

Страница 3: ...purchasing the Voyar FROG Please read the user manual prior to first use of the equipment and follow its instructions Could you take care that the user manual remains with the product Technical Detail...

Страница 4: ...Intentionally left empty User Manual DP1601 281H_Eng_2021 10...

Страница 5: ...ports 16 17 2 5 Wheel lock Anti reverse 18 3 Lift seat 3 1 Seat Lifting force Adjustment 19 22 4 Size adjustments 4 1 Seat Height Adjustment 23 25 4 2 Forearm Support Adjustment 26 28 4 3 Front Wheel...

Страница 6: ...of medium size and large frame versions with or without the armrest and seat features 6 Frame size With seat and armrests With seat only With armrests only No seat and armrests Medium FROG M1 X FROG...

Страница 7: ...support in patients with walking difficulties and can be used in the rehabilitation of gait It has weight bearing handles and arm rests and a foldable seat as resting position It can be used indoors...

Страница 8: ...an accompanying person Accompanying persons must be adequately instructed The users should remain within the frame during use Adjustments for handle and the frame width need to remain within the marke...

Страница 9: ...t adjustable seat Length height angle adjustable armrests Adjustable force lift seat On Off Antireverse and wheel lock Adjustable wheel swivel limiter Folding frame Height width length adjustable fram...

Страница 10: ...ight M 62 to 86 cm L 74 to 95 cm Adjustable frame width M 38 to 46 cm L 49 to 57 cm Adjustable Seat height M 32 to 53 cm L 49 to 64 cm Adjustable frame height M 52 to 67 cm L 67 to 76 cm 10 Dimensions...

Страница 11: ...s Getting in and out of the walker must be done with the support of the supervisor The child should grip the handles tightly and place their forearms in the armrests If there is insufficient control o...

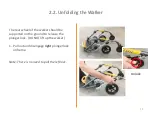
Страница 12: ...The rear wheel of the walker should be supported on the ground to release the plunger lock DO NOT lift up the walker 1 Pull out and disengage right plunger lock on frame Note There is no need to pull...

Страница 13: ...ck the rear frame against front wheels on the ground 2 Once walker is upright ensure plunger locks on both sides are engaged and in locked positions Caution Please ensure locks are fully engaged befor...

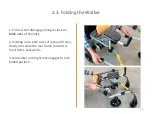
Страница 14: ...and disengage plungers lock on both sides of the links 2 Holding on to both sides of lock and frame slowly articulate the rear frame forward or front frame backwards 3 Fold walker until right lock en...

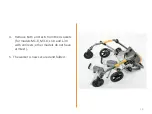
Страница 15: ...4 Remove both armrests from their sockets for models M1 X M3 X L1 X and L 3X with armrests other models do not have armrest 5 The walker is now secured and folded 15...

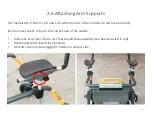
Страница 16: ...ts other models do not have armrest Each armrest needs to be on the correct side of the walker Take note of section of arm rest that should face outwards see below circled in red Handle and knob shoul...

Страница 17: ...3 Holding the aluminium shaft engage the arm support into the hole 4 At desired position release lock ensuring pin has engaged with hole in the shaft If not engaged gently slide the shaft up or down u...

Страница 18: ...sengaged Anti reverse ratchet engaged To release flip tag towards the rear Anti reverse ratchet released To engage flip tag towards the front Wheel lock released To engage rotate and release Anti reve...

Страница 19: ...adjustable components for each side A and B 3 1 Seat Lifting Force Adjustment Important Scales A and B should be adjusted equally on BOTH sides Adjustments should also only be done with seat in flipp...

Страница 20: ...her the lifting force the easier it is to get up B controls the transition force when the seat is in half elevated position Decreasing B means it will be easier to push the seat down in transition Lin...

Страница 21: ...eat is mostly lowered down either to low 1 medium 2 or high 3 Repeat the same adjustments on the other side Spring force should be adjusted equally on BOTH drum sides before use Adjustments should als...

Страница 22: ...alf elevated either to low 1 medium 2 or High 3 Repeat the same to the drum on the right Spring force should be adjusted equally on both sides and typically equally between A B before use Adjustments...

Страница 23: ...t 2 Slide the whole seat assembly up or down holding on both sides 3 Release the locks back in the holes on both sides check both sides are positively locked 4 1 Seat Height Adjustment for models M1 X...

Страница 24: ...Lock is not fully engaged into the hole Lock is fully engaged into the hole Caution Please ensure pins are fully engaged before use Pull the locks out on both sides left and right 24...

Страница 25: ...Sliding the seat assembly up or down after unlocking by grabbing at the black plastic slider part Intermediate Seat Height low Seat Height 25...

Страница 26: ...sts Knob 1 controls the angle and length extension of the handle Lock 2 controls the height of the whole forearm support 1 2 4 2 Forearm Support Adjustment for models M1 X M3 X L1 X and L 3X with armr...

Страница 27: ...To adjust length and angle 1 Loosen knob 1 2 Slide handhold forward or backward and rotate to desired position Handle Adjustment 27 1 Do not extend handles beyond limit mark...

Страница 28: ...t in position 2 Slide post up or down to desired height 3 Release lock back in ensuring pin inside has engaged with the hole on the shaft If not gently slide the shaft up or down until pin engages 2 F...

Страница 29: ...ed for each individual wheel and each side of the wheel lock 1 2 Position 1 0 Swivel Position 2 30 Swivel Position 3 60 Swivel L R L R L R 1 1 2 1 3 1 2 2 2 2 3 2 1 3 2 3 3 3 Lock 1 Lock 2 1 2 3 1 2 3...

Страница 30: ...To adjust limits 1 Push down lock 1 2 Rotate pin and engage in desired position 1 2 3 3 Release lock 1 Note Ensure lock is fully engaged 4 Repeat with pin 2 5 Repeat with other wheel 1 2 30...

Страница 31: ...Example Swivel Configurations Left 1 Right 1 Left 2 Right 2 Left 3 Right 3 Left 2 Right 3 Left 3 Right 1 31...

Страница 32: ...ove limits 1 Unscrew the centering pin 2 Repeat on the other side Note Please keep centering pins in case the limit locks should be reinstated at a later time The front casters can now swivel 360 degr...

Страница 33: ...Note Please ensure walker is unfolded locked upright and placed on even ground surface before adjusting width height 4 4 Frame Size Adjustment 33...

Страница 34: ...he frames orange arrows there is no need to remove them entirely 2 Slide the left and right half segments in or out relative to the clamp bar orange double arrows referring to the markers indicating n...

Страница 35: ...an Allen key un tighten it 2 Remove the screw completely 3 Slide the wheel attachment inside the frame to the desired incremental position Check the screw holes line up 4 Re insert the screw and tight...

Страница 36: ...t 2 Remove the screw completely 3 Slide the wheel attachment inside the frame to the desired incremental position Check the screw holes line up Re insert the screw 4 Tighten the screw with Allen key 5...

Страница 37: ...4 Check the correct function of the seat kinematics with special attention to the condition of the suspension points of the seat 5 Check the firm and torsion free condition of the frame width adjustme...

Страница 38: ...frames with a damp sponge or cloth using soapy water If alcohol is required these painted surfaces should be avoided Seat height fixtures Armrest fixtures Folding locks Remove coarse dirt from the whe...

Страница 39: ...d soft moulded parts 1 Before re use the instructions for use which should remain with the product should be studied in detail 2 All maintenance points under 5 1 and a thorough cleaning should be carr...

Страница 40: ...40 cm User Manual DP1601 281H_Eng_2021 10 Materials Frame and seat mechanism Aluminium and stainless steel Seat backrest armrests grips PU foam with armature in stainless steel and aluminium Fittings...

Страница 41: ...mum weight of the user For models without a seat it is attached to the rear frame on the opposite side of the backrest The serial number is stamped on the rear frame close to the right rear wheel Plea...

Страница 42: ...Intentionally left empty User Manual DP1601 281H_Eng_2021 10...

Страница 43: ...Intentionally left empty User Manual DP1601 281H_Eng_2021 10...

Страница 44: ...www voyarmobility com XentiQ Partners Pte Ltd 35 Joo Koon Circle 6th Floor Vicplas Bldg Singapore 629110 MT Promedt Consulting GmbH Altenhofstrasse 80 66386 St Ingbert Germany...

Отзывы: