background image

17

S

TORING


YOUR


PROGRAM

When you’ve come up with a sound you like, you should store (write) the program.

1. Press the WRITE button. The CH1 or CH2 LED will blink.

2. Press the CH button to select the channel in which you want to store your 

program. The program will be stored in the channel whose indicator is blink-
ing.

HINT:

 If, during this process, you decide that you really don’t want to store the pro-

gram, you can press the TAP button to cancel at this point. The LED will stop blinking, 
and you’ll return to the mode in which you were.

3. Press the WRITE button once again. Your program will be saved in the spec-

ified channel, and the LED of the destination channel will stop blinking and 
remain lit.

NOTE:

 The program that was previously stored in that channel will be overwritten; in 

other words, the settings that used to be stored in the channel you selected in step 2 
will be erased.

NOTE:

 The effect bypass setting isn’t stored as part of the program.

NOTE:

 If you’re creating your sound in Preset or Channel Select mode, your changes 

will disappear if you switch to a different program or to Manual mode before storing.

C

HECKING


THE


SETTINGS


OF


A


PROGRAM

 (

ORIGINAL


VALUES

)

If you want to find out exactly what settings are saved in a preset or user program, you 
can use the Original Value function.

When you’re turning a knob to adjust the value of a parameter, and the value at that 
moment matches the value that is saved in the program (i.e., the “original value”), the 
PRESET LED will blink if you’re in Preset mode, or the channel LED will blink if you’re in 
Channel Select mode.

HINT:

 When you’ve found a program you like, and want to know just what settings it 

contains, simply use this Original Value function!

NOTE:

 Since the top panel MASTER volume, the rear panel POWER LEVEL control 

are not programmed, the original value display will not occur for these settings. Also, 
the Original Value function doesn’t operate in manual mode.

Содержание AD100VT-XL

Страница 1: ...E 1 AD50VT XL AD15VT XL AD30VT XL AD100VT XL ...

Страница 2: ...h the cart stand tripod bracket or table specified by the manufacturer or sold with the apparatus When a cart is used use caution when moving the cart apparatus combination to avoid injury from tip over The lightning flash with arrowhead symbol within an equilateral triangle is intended to alert the user to the presence of uninsulated dangerous voltage within the product s enclosure that may be of...

Страница 3: ...out the three operating modes 13 Preset mode selecting a preset program 13 Channel Select mode selecting a channel program 13 Manual mode 14 Creating and storing your own program 15 Creating your own program 15 Adjusting the noise reduction 16 Storing your program 17 Checking the settings of a program original values 17 Restoring the factory settings 18 Using the VFS2 dual foot switch 19 Amp model...

Страница 4: ...neously plus Noise Reduction You can store your favorite amp and effect settings as a program which contain two dif ferent settings CH1 and CH2 You can switch between these settings from the top panel or by using the optional VFS2 foot switch connected to the rear panel Channel Select mode In addition there s one preset program for each amp type Preset mode In Manual mode the sound you hear will r...

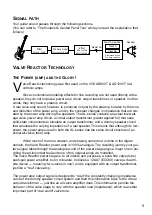
Страница 5: ... used in both the XL series has the same circuit structure of an actual all valve tube amp While much of the tone creation and shaping carried out is done in the digital domain the Valve Reactor power amp is 100 analogue The resulting journey your gui tar s signal takes through the analogue world of the power stage plays a major role in pro viding the all important feel and tone of the original am...

Страница 6: ... killer bells n whistles that warrant your interest In short it ll be worth your while we promise This said here s the Quick Start enjoy I look forward to taking you through the amp in more detail once you re done HINT If you re not sure of the location of a control or switch referred to in this Quick Start section you can refer to the illustrations in the section entitled The Guitarist s Guided P...

Страница 7: ...op panel MANUAL button The MANUAL LED will light you re in Manual mode HINT You can also create your own sounds in Preset mode or Channel Select mode However the process is a bit easier to understand in Manual mode since the positions of all knobs except the EDIT 1 knob are exactly what you re hearing In other words what you see is what you get 2 Use the AMP selector to select an amp and adjust th...

Страница 8: ...ch model repli cates the preamp with its gain and tonal response the power amp operation class A or AB negative feedback circuitry or lack thereof and the response of the tone controls and their placement within the circuit For details turn to Amp models and effects page 20 Preset mode when the PRESET LED is lit lets you select preset programs that contain typical sound and effect settings for eac...

Страница 9: ...d by Valve Reactor NOTE The MASTER volume control is NOT programmable NOTE The GAIN control also affects the amount of distortion For some settings there may be virtually no distortion 3 EFFECT SECTION Here you can make settings for effects and noise reduction For details on each effect refer to Amp models and effects page 20 EFFECTS Selects the type of effect You can use the TAP button EDIT 1 kno...

Страница 10: ...he bypass setting is remembered even when you switch modes switch pro grams or turn off the power HINT The Bypass button can be used to modify effect parameters EDIT 3 Press and hold Bypass and simultaneously turn the EDIT 1 knob See the chart on page 25 for what parameters can be controlled 4 PRESET MANUAL CHANNEL SECTION PRESET and LED This button puts your Valvetronix amp into Preset mode and y...

Страница 11: ...an connect the optional VFS2 dual foot switch sold separately here and use it to switch programs or bypass the effect while you perform POWER LEVEL This adjusts the output wattage of the power amp AD30VT XL less than 0 1 W 30 W AD50VT XL less than 0 15 W 50 W AD100VT XL less than 0 2 W 100 W NOTE The AD15VT XL doesn t have this control NOTE The power level setting isn t saved as part of the progra...

Страница 12: ...XTERNAL SPEAKER OUT jack NOTE The AD15VT XL and AD30VT XL don t have this jack Important To ensure that your system works correctly you must observe the follow ing points a Don t use an external speaker whose impedance is other than 8 ohms b Don t connect a speaker whose rated input capacity is less than 50 watts 100 watts for the AD100VT XL The speaker may be destroyed if you ignore this cau tion...

Страница 13: ... PROGRAM With the PRESET LED lit turn the AMP selector and the preset program for each amp type will be selected The physical settings of the top panel control knobs and EFFECTS selector are ignored at this time HINT If you want to bypass the effect press the BYPASS button If the BYPASS LED is lit the effect is bypassed Press the BYPASS button once again to cancel bypass and enable the effect once...

Страница 14: ... 1 knob indicate exactly what you re hearing GETTING TO MANUAL MODE If the MANUAL LED is dark you re not in Manual mode Press the MANUAL button the MANUAL LED will light and you ll be in Manual mode NOTE If the CH1 or CH2 LED is blinking i e when you re in the middle of selecting a writing destination for the program the MANUAL LED won t light when you press the MANUAL button the first time In thi...

Страница 15: ...d down the TAP button and turn the EDIT 1 knob to adjust the noise reduction This setting is also saved as part of your program For details refer to Adjusting the noise reduction page 16 HINT Adjust the noise reduction so that you don t hear noise when you re not playing your guitar 6 If you want to use an effect press the BYPASS switch once again to turn bypass off the BYPASS LED goes dark 7 Sele...

Страница 16: ... modes your setting will be lost if you switch to a different program or to Man ual mode or turn off the power without storing your edited program first 1 Press the BYPASS button to make the BYPASS LED light 2 Hold down the TAP button and turn the EDIT 1 knob to adjust the noise reduction sensitivity Turning the knob toward the right will produce greater noise reduction less noise If you turn the ...

Страница 17: ...step 2 will be erased NOTE The effect bypass setting isn t stored as part of the program NOTE If you re creating your sound in Preset or Channel Select mode your changes will disappear if you switch to a different program or to Manual mode before storing CHECKING THE SETTINGS OF A PROGRAM ORIGINAL VALUES If you want to find out exactly what settings are saved in a preset or user program you can us...

Страница 18: ...e erased 1 Turn the power off 2 While holding down both the CH and WRITE buttons turn the power on When the CH1 and CH2 LEDs begin blinking release these two buttons HINT If you decide to abort this operation press the TAP switch at this point 3 When you press the WRITE switch the CH1 and CH2 LEDs will change from blinking to lit Initialization will be completed in a few seconds and the amp will s...

Страница 19: ...FF SWITCH 2 Hold down the top panel BYPASS switch and press the VFS2 s right switch switch 2 This assigns the function of switch 2 as bypass on off Now when you press switch 2 effect bypass will alternately be turned on off HINT The amp will remember the switch 2 assignment This setting is remembered even if you switch modes or programs or turn off the power SWITCHING TO MANUAL MODE SWITCH 2 Hold ...

Страница 20: ... do nothing we ve made full use of all five Val vetronix amp controls without compromising the accuracy of any of our models This means you ll be able to mimic the full tonal spectrum of each and every one of the origi nals we ve modeled and then some thanks to the extra flexibility and additional control the five Valvetronix amp controls give you For example if an original doesn t have a Gain Con...

Страница 21: ... stage and no negative feedback that s exactly what your Valve Reactor power amp reconfigures itself to emulate And as an added bonus thanks to our rear panel POWER LEVEL control you can adjust the output power Wattage to best suit the size of the room you re playing in The AD15VT XL doesn t have this feature TURN IT UP Truly great all valve amps have one thing in common they invariably sound at t...

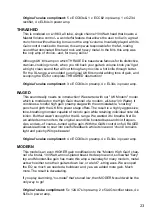
Страница 22: ...ZZSAW This sound was inspired by the pioneering sounds of 70s hard rock and metal Based on a British made 50 watt head this sound churns out a dark grinding tone perfect for any aspiring prince of darkness To create this sound we started with the High Treble channel of a 1971 50 Watt four input all valve head then we cranked the gain and boosted all bands of the original s EQ As this amp has no ma...

Страница 23: ...igh Gain channel of a modern all tube 100 Watter It combines a toneful high gain preamp stage with the unmistakable snarling punch and girth the UK 80s power stage offers The result is a highly aggressive tone breathing monster capable of mondo gain while retaining individual note def inition But that wasn t enough for the XL range We wanted it to breathe fire So we added some mods to the original...

Страница 24: ...st extreme gain settings Plug in and take cover NOTE The Molten preset features our Octave effect When the Octave effect is on we do not recommend playing chords unless you are going for an unusual effect Original s tube compliment 4 x 12AX7s in preamp 4 x 6L6s in power amp BLACK This sound was created when we were having some fun mutating our UK Modern model We wondered what this famous UK made 1...

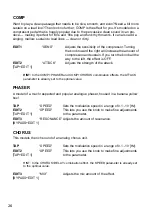
Страница 25: ...LAY LEVEL or REVERB LEVEL to the minimum setting OCTAVE This effect generates a note one octaves lower than the one you re playing adding thick ness and weight to single note lines HINT Like all pedals of this type OCTAVE only works with single notes chords confuse the heck out of it NOT a fault that s just the way these pedals operate TYPE TAP EDIT 1 EDIT 2 TAP EDIT 1 EDIT 3 BYPASS EDIT 1 OCTAVE ...

Страница 26: ... the rich sound of an analog chorus unit HINT In the CHORUS DELAY combination effect the SPEED parameter is already set to the optimal value EDIT1 SENS Adjusts the sensitivity of the compressor Turning the knob toward the right will increase the amount of compression and sustain If you turn the knob all the way to the left the effect is OFF EDIT2 TAP EDIT 1 ATTACK Adjusts the strength of the attac...

Страница 27: ...s to the parameter EDIT3 BYPASS EDIT 1 RESONANCE Adjusts the amount of resonance TAP SPEED Sets the tremolo speed in a range of 2 5 10 Hz EDIT2 TAP EDIT 1 SPEED This lets you use the knob to make fine adjustments to the parameter EDIT3 BYPASS EDIT 1 DEPTH Adjusts the tremolo depth TAP SPEED Sets the rotational speed of the speaker in a range of 0 8 10 Hz EDIT2 TAP EDIT 1 SPEED This lets you use th...

Страница 28: ...our common sense when setting this REVERB A model of the most popular spring reverb system used in guitar amps HINT In combination effects the TIME and HI DAMP parameters are already set to opti mal values TAP TIME Sets the delay time in a range of 1 1486 ms EDIT1 MIX Adjust the mix amount of the delayed sound EDIT2 TAP EDIT 1 TIME This lets you use the knob to make fine adjustments to the paramet...

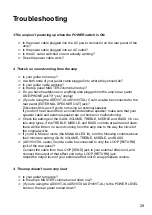
Страница 29: ...ed external speaker make sure that your speaker cable and external speaker are not broken or malfunctioning Check the settings of the GAIN VOLUME TREBLE MIDDLE and BASS On cer tain amp types if the TREBLE MIDDLE and BASS controls are all turned down there will be little or no sound coming from the amp due to the way the circuit of the original works If you re in Manual mode the MANUAL LED lit turn...

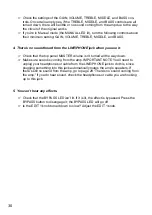
Страница 30: ... top panel MASTER volume isn t turned all the way down Make sure sound is coming from the amp IMPORTANT NOTE You ll need to unplug your headphones or cable from the LINE PHONE jack to do this since plugging something into this jack automatically mutes the amp s speakers If there s still no sound from the amp go to page 29 There s no sound coming from the amp If you do hear sound check the headphon...

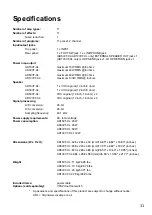
Страница 31: ... VOX original 10 inch 8 ohm AD30VT XL 1 x VOX original 12 inch 8 ohm AD50VT XL VOX original 12 inch 16 ohm x 2 AD100VT XL VOX original 12 inch 16 ohm x 2 Signal processing A D conversion 24 bit D A conversion 24 bit Sampling frequency 44 1 kHz Power supply requirements AC local voltage Power consumption AD15VT XL 23W AD30VT XL 45W AD50VT XL 52W AD100VT XL 100W Dimensions W x D x H AD15VT XL 428 x ...

Страница 32: ... by colouring in the relevant LED 3 Don t forget to make notes on NR TAP TEMPO and POWER LEVEL in the areas indicated WORD TO THE WISE There s only four panels you can fill out here so do yourself a favor by photocopying it and then keep a blank master so you can make more copies whenever you like PROGRAM NAME NOTE NR NOISE REDUCTION POWER LEVEL EDIT2 TAP EDIT 1 TAP EDIT3 BYPASS EDIT 1 PROGRAM NAM...

Страница 33: ...TION POWER LEVEL EDIT2 TAP EDIT 1 TAP EDIT3 BYPASS EDIT 1 PROGRAM NAME NOTE NR NOISE REDUCTION POWER LEVEL EDIT2 TAP EDIT 1 TAP EDIT3 BYPASS EDIT 1 PROGRAM NAME NOTE NR NOISE REDUCTION POWER LEVEL EDIT2 TAP EDIT 1 TAP EDIT3 BYPASS EDIT 1 ...

Страница 34: ...TION POWER LEVEL EDIT2 TAP EDIT 1 TAP EDIT3 BYPASS EDIT 1 PROGRAM NAME NOTE NR NOISE REDUCTION POWER LEVEL EDIT2 TAP EDIT 1 TAP EDIT3 BYPASS EDIT 1 PROGRAM NAME NOTE NR NOISE REDUCTION POWER LEVEL EDIT2 TAP EDIT 1 TAP EDIT3 BYPASS EDIT 1 ...

Страница 35: ...ail order and or via a telephone sale you must verify that this product is intended to be used in the country in which you reside WARNING Use of this product in any country other than that for which it is intended could be dangerous and could invalidate the manufacturer s or distributor s warranty Please also retain your receipt as proof of purchase otherwise your product may be disqualified from ...

Отзывы: