XR3D-6 Maintenance & Troubleshooting
EM-XR3D-6-001-EN.D
3-7
©2011 VOTI Inc.
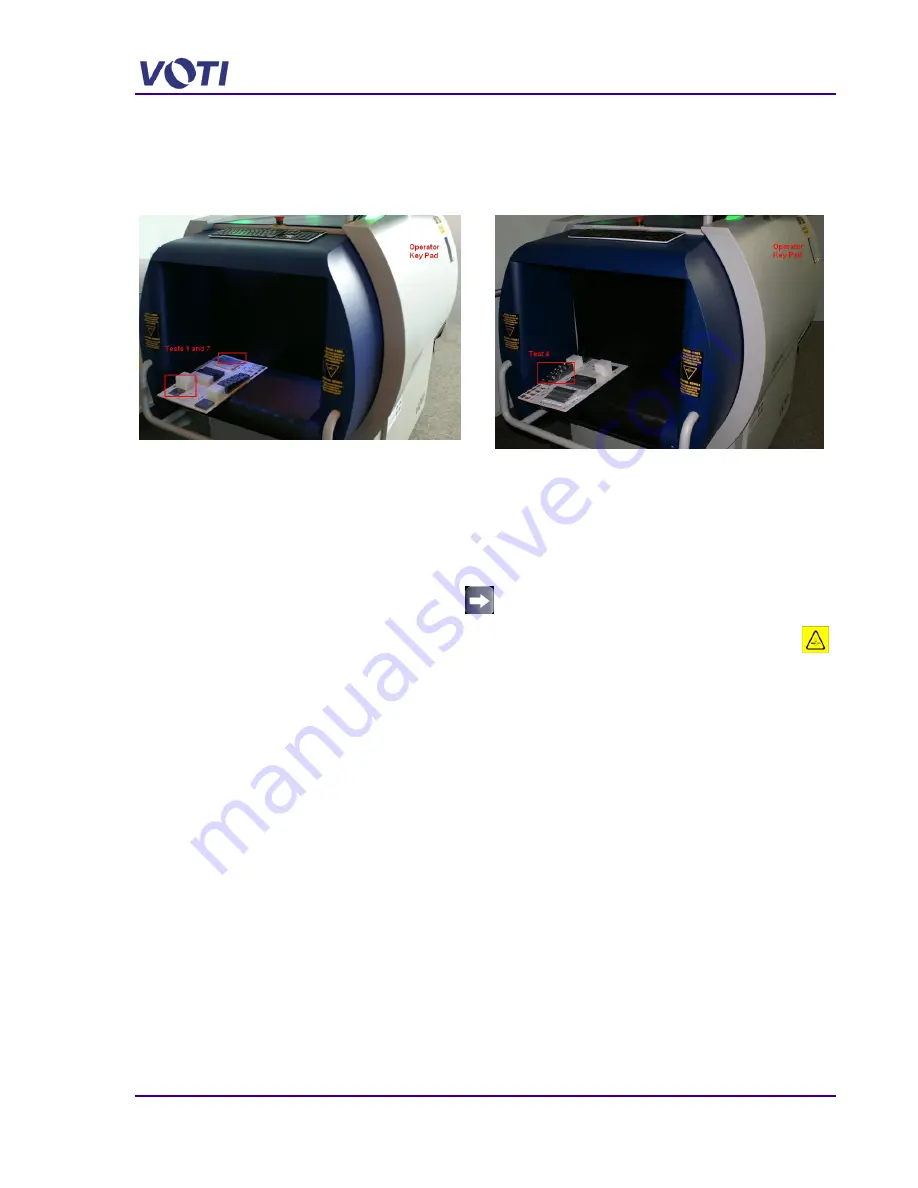
For example, the recommended orientation of Test Tool is as follows:
Tests 1 & 7
Test 4
Scan the edge with Test 1 and 7 farthest from the Operator.
Scan the edge with Test 4 farthest from the Operator.
3.4.3 Run a Test Scan
Run a scan to test the XR3D functionality.
1. Start BIOSansLoginMenu and log in with Operator permission.
2. Set the ASTM test tool on the conveyor belt at the tunnel entrance.
3. Click and release the forward arrow (
) on the screen to start the conveyor.
Indicator lights on the scanner turn red during X-ray generation. A warning icon (
)
appears on the monitor.
The resulting scan displays in the Main Viewing Screen and alternate views appear in the
Alternate Scan View area.
4. Check the quality of the image.
3.4.4 Test 1
– Wire Display
After scanning the ASTM test object, record the gauge of all the wires that can be seen on the
monitor (any image mode can be used) on the Log Sheet (by checking with a
in the box).
Содержание XR3D-6
Страница 2: ...XR3D 6 Maintenance Troubleshooting ii EM XR3D 6 001 EN D 2011 VOTI Inc...
Страница 5: ...XR3D 6 Maintenance Troubleshooting EM XR3D 6 001 EN D v 2011 VOTI Inc 7 XR3D 6 Safety Features 7 1...
Страница 6: ......
Страница 20: ...XR3D 6 Maintenance Troubleshooting 2 8 EM XR3D 6 001 EN D 2011 VOTI Inc...
Страница 32: ...XR3D 6 Maintenance Troubleshooting 3 12 EM XR3D 6 001 EN D 2011 VOTI Inc...
Страница 48: ...XR3D 6 Maintenance Troubleshooting 3 28 EM XR3D 6 001 EN D 2011 VOTI Inc...
Страница 52: ...XR3D 6 Maintenance Troubleshooting 4 4 EM XR3D 6 001 EN D 2011 VOTI Inc...


