Vortex V-V700 Скачать руководство пользователя страница 1

-

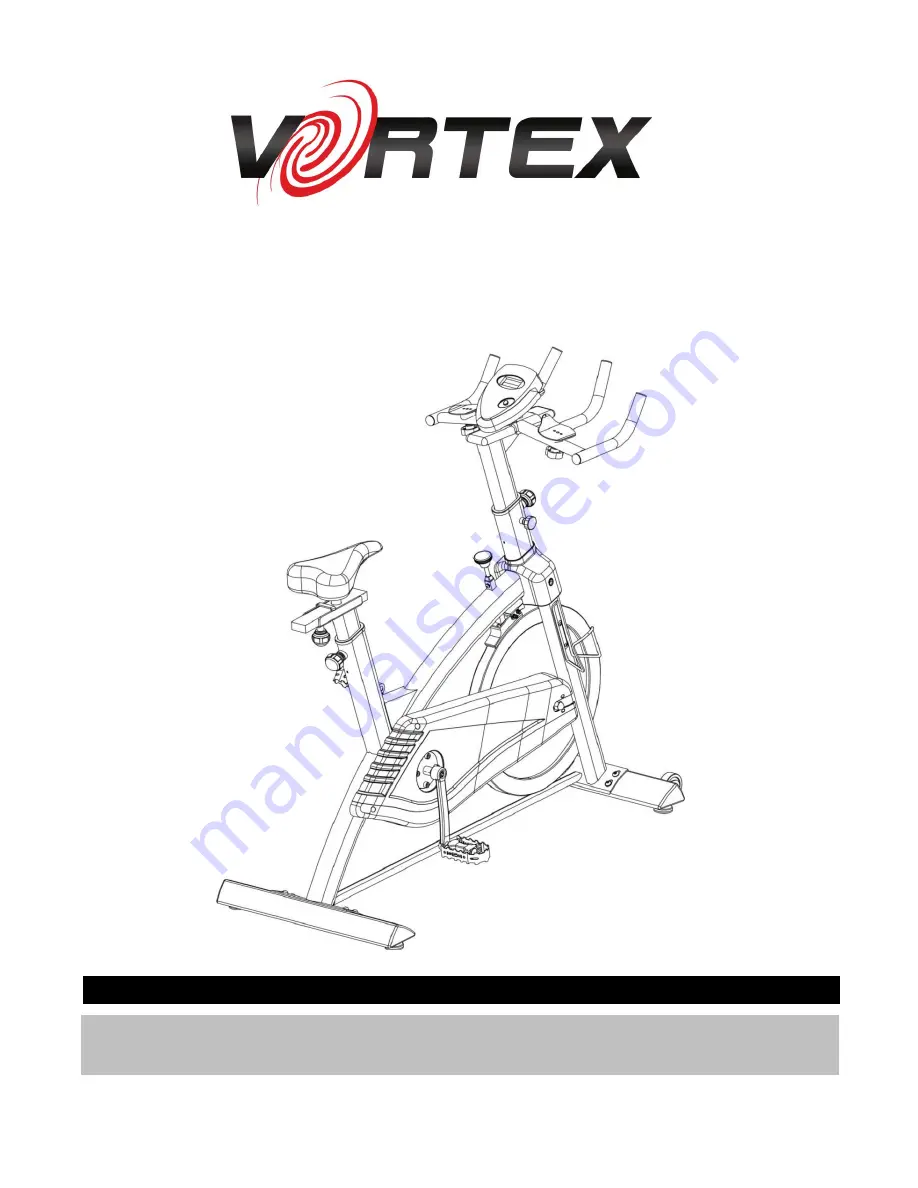
OWNERS MANUAL V-V700

Spin Bike

These Instructions contain important information which will help you get best from your equipment

-ensure safe and correct assembly, use and maintenance.

Important –

Please read these instructions fully before assembly or use

Содержание V-V700

Страница 1: ...Bike These Instructions contain important information which will help you get best from your equipment ensure safe and correct assembly use and maintenance Important Please read these instructions fu...

Страница 2: ...c shoes to protect your feet while exercising Do not place any sharp objects around the equipment Disabled persons should not use the equipment without a qualified person or doctor in attendance Injur...

Страница 3: ...al Left Right 1Set 29 Computer 1 9 Front Stabilizer 1 8 Rear Stabilizer 1 1 Main Body 1 2 Handle Frame 1 3 Handle Support Frame 1 4 5 Saddle Post Assembly 1 12 Computer Holder Bracket 1 32 Water Bottl...

Страница 4: ...e contacting Argos regarding any missing fixings Components Fixings 3 8mm Washer 8 5 Allen Wrench 1 74 75 71 28 89 6mm Flat Head Philips Bolt 2 20mm Allen Bolt 8 15mm Flat Head Philips Bolt 2 Multi Wr...

Страница 5: ...ers 75 b Repeat step a to install Rear stabilizer 8 to Main Body 1 c Lever the machine The user can tighten or loose 2 x Level Feet 21 to level the machine if needed Tighten 2 x Level foot lock nuts 5...

Страница 6: ...nsert Saddle Post Assembly 4 5 into the rear opening tube of the Main body 1 b Adjust the Saddle Post Assembly 4 5 to your desired height then tighten the Lock knob 25 c Loosing Knob 26 to select your...

Страница 7: ...Assembly Instructions Step 3 6 Place Saddle 27 onto the post of the Saddle Support 5 secure the Saddle 27 by tightening the saddle locking nuts Pre fitting on the Saddle...

Страница 8: ...Assembly Instructions Step 4 7 Loose the side Knob 31 and Lock Knob 25 and pull it out Insert Handle Support Frame 3 into the front opening tube of the Main Body 1 Tighten Lock knob 25 and Knob 31...

Страница 9: ...ion and fix using 1 x 20mm L Shaped Lock Knob 28 and 1 x U Shaped handle locking bracket 10 Which was pre fitted inside of the Handle support frame 3 To Tighten Turn 20mm L Shaped Lock Knob 28 handle...

Страница 10: ...Assembly Instructions Step 6 Attach Water Bottle Rack 32 to the Main Body 1 fix using 2 x 15mm Flat Head Philips Bolts 71 9...

Страница 11: ...L and right one marked R Fasten the left pedal by turning in an anti clockwise direction and fasten the right pedal by turning in a clockwise direction The pedals include a system which maintains the...

Страница 12: ...sing 2 x 6mm Flat Head Philips Bolts 89 b Attach the Computer 29 to the Computer Holder Bracket 12 fix using 2 x 12mm Philips Bolts 88 Please note these two bolts were pre fitted to the bottom of the...

Страница 13: ...m greater than the training area This is a space where you can safely dismount without obstruction in case of an emergency Where two pieces of equipment are positioned adjacent to each other the free...

Страница 14: ...s by using adjustable wrench user self prepared Step 2 Tighten M6 Hex Nut b and M6 Aircraft Nut c 1 4 turn Step 3 Repeat step 1 and 2 to tighten the tension bolt on the other side Step 4 Ride the bike...

Страница 15: ...The Computer will display the current speed DISTANCE Press Mode key until the pointer advances to DIST The Computer will display each trip distance you have traveled TIME Press Mode key until the poi...

Страница 16: ...ove the battery cover on the back of the computer 2 Replace 1 5V AA battery 3 Make sure the battery is installed correctly and the polarities are correct 4 If the display is not clear or only partial...

Страница 17: ...to work to start in your Target Zone Warming up A successful exercise program consists of three parts Warm up Aerobic exercise and cool down Never start a training session without warning up and never...

Страница 18: ...arget Zone B Beat per minute 20 24 145 165 155 175 25 29 140 160 150 170 30 34 135 155 145 165 35 39 130 150 140 160 40 44 125 145 135 155 45 49 120 140 130 150 50 54 115 135 125 145 55 59 110 135 120...

Страница 19: ...e the benefits of exercising it is important to exercise with the proper intensity The proper intensity level can be found by using your heart rate as a guide For effective aerobic exercise your heart...

Страница 20: ...s get rid of and keep off the excess fat that our bodies can store weight training is an essential part of the exercise routine process Weight training helps tone build and strengthen muscle If you ar...

Страница 21: ...an three workouts each week with at least one day of rest between workouts After a few months of regular exercise you may complete up to five workouts each week if desired Remember the key to success...

Страница 22: ...lles tendons and ankles Quadriceps stretch With one hand against the wall for balance reach back and grasp one foot with your other hand Keeping your bent knee pointing directly downward towards the f...

Страница 23: ...and mild non abrasive detergent Do not use solvents 5 Do not attempt to repair this equipment yourself Should you have any difficulty with assembly operation or use of your exercise product or if you...

Страница 24: ...Exploded Parts Diagram 23...

Страница 25: ...41 Front Fork Right Cover 1 14 Brake 1 42 Brake Holder 1 15 Transport Wheel Inner Sleeve 2 43 8mm Spring Washer 4 16 Fly Wheel 1 44 40 80mm Elliptical Sleeve 2 17 Belt Pulley 1 45 60 20 2mm Flat Elli...

Страница 26: ...k 2 82 6mm Washer Zinc 2 65 M12 Cap Nut Chromed 2 83 ST4 2 20mm Dome Head Philips Screw Black 2 66 12mm Spring Washer Chromed 2 84 ST4 2 15mm Dome Head Philips Screw Black 6 67 20 12 5 5mm Washer Zinc...

Отзывы: