76
Straightening the crankshaft
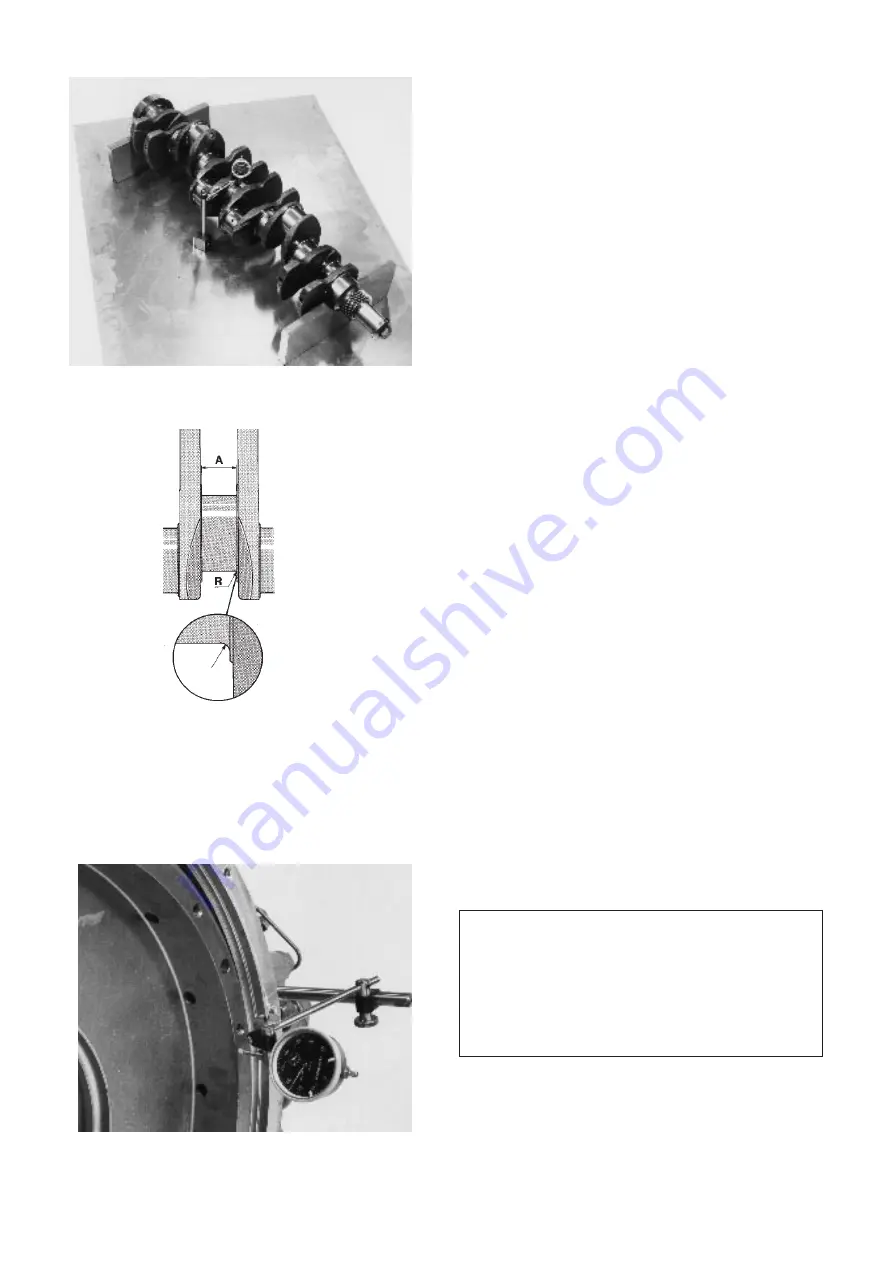
To assess straightness, the crankshaft must be support-
ed under main bearings 1 and 7 and main bearing 4
checked for out-of-round.
Below 0.2 mm
No straightening.
Between 0.2
Careful straightening, not more
and 0.7 mm
than necessary.
Above 0.7 mm
Replace crankshaft.
Straightening reduces fatigue resistance and should
therefore be avoided. The nitro-carburized bearing sur-
face has a tendency to crack at the fillets between the
bearing races and the webs.
Flywheel
Checking
Crank the flyhweel to get max. throw. It must not
exceed 0.15 mm.
If the throw is greater than this, remove the fly-
wheel and check the contact surfaces for dirt or un-
evenness.
Machining
Damaged bearing surfaces should be lapped. If this is
not enough, replace the crankshaft or machine it. A ni-
tro-carburized crankshaft must be be ground more than
to second undersize, unless the nitro-craburizing treat-
ment is repeated. After treatment, bearing surfaces and
fillets should be lapped to a surface finish of 0.002 mm.
Grinding nicks or sharp edges are not permitted, as
they may cause fracture. The width measurement “A”
for the pilot bearing is particularly important. Refer to
“Specifications”.
After machining, thoroughly clean the crankshaft. Re-
check for cracks, using the magnetic power test method
and de-magnetize. Clean and flush all oil drillings.
NOTE!
It is most important that the fillets are ground to the
right shape and size. They should be between 3.75–
4.00 mm. Use a radial template for the measuring.
Measuring radius 150 mm
Содержание DH10A 245
Страница 1: ...Service Manual Buses Section 2 20 27 Engine DH10A 245 285 345 350 360 TP 16031 1 ...
Страница 31: ...30 Adjust in the supports on the lift unit as shown in the pictures below ...
Страница 59: ...58 Cylinder block crank mechanism ...
Страница 162: ...Volvo Bus Corporation TP 16031 1 English 2500 06 97 Printed in Sweden by Novum Grafiska AB 97 24296 Göteborg Sweden ...


