


33
94.
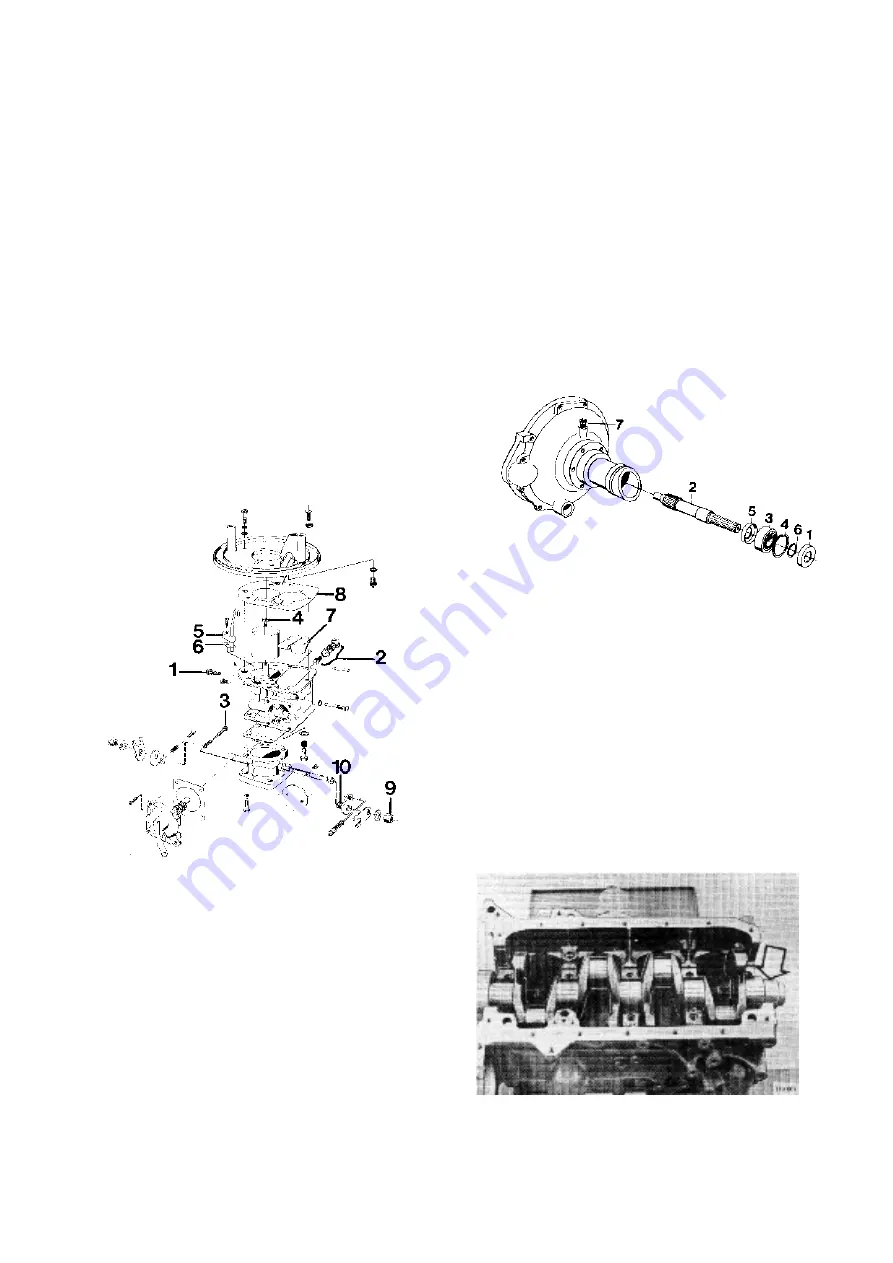
Fit the idling jet (1), main jet (2)and mixing screw
(3). NOTE! Copper washer on the main jet. Then
fit the emulsifying jet (4), acceleration jet (5) and
gasket (6). Place the float in the float housing and
put on a new gasket (8) and screw on the upper
part of the carburetor housing. Loosen the nut (9)
and remove the levers. The spring can then be re-
placed.
Adjusting the idling screws:
AQ145A. Screw in the screw until it comes into
contact with the carburetor. Then screw it in a
further 3/4 turn.
AQ125A. 1 1/4 turn.
Adjusting the venting screws:
AQ145A. Screw the venting screw right in. Then
screw it out 1 turn.
AQ125A. 1 turn.
Assembling
Overhauling the flywheel cover
95.
Remove the sealing ring (1) in the flywheel cover.
Check the primary shaft (2) and the bearing (3). If
either one is damaged the lock rings (4) are to be
undone and the shaft with bearings is to be
pressed out. Remove the sealing ring (5) and re-
move the lock ring (6). Replace the damaged
parts and then fit the lock ring (6) on the primary
shaft and the sealing ring (5). Then press the
bearing brackets (3) on the primary shaft (2).
Press the shaft with bearing in the flywheel cover.
Fit the lock rings (4) and the sealing ring (1).
NOTE! Carefully lubricate the sealing rings before
they are fitted. Press grease into the lubricating
channel (7).
Assembling
96.
Put the main bearing shells in position in the
block and the caps. If a spacer tube which has
been removed is to be refitted, it is to be reversed.
Содержание AQ125A
Страница 1: ...Workshop Manual Engine Unit AQ125A B AQ145A B C 2 0 ...
Страница 2: ......
Страница 74: ...7739856 8 English 11 1998 ...


