


VMAC
– Vehicle Mounted Air Compressors
Toll Free:
1-888-241-2289
Fax: 1-250-740-3201
57
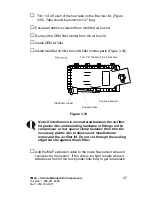
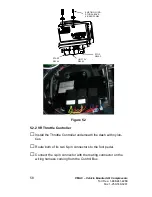
•
The inlet valve solenoid, clutch, and compressor
temperature connectors rest near the compressor.
•
The remaining pressure sensor cable can go down along
with the pressure line until it reaches the chassis. Then run
along the chassis towards the rear of the truck to the location
of the Discharge Check Valve.
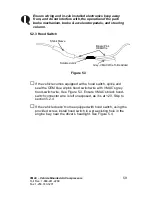
□
Solder and seal the pigtail provided in the AUS Electrical Pack to
the end of the Beacon wires placed through firewall.
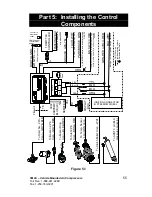
5.2 Installing the components
5.2.1 Control Box Mount
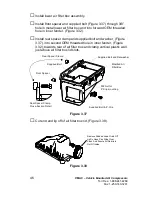
□
Fasten the control box to the control mount bracket using screws
provided in its fastener pack.
□
Fasten the relay sockets onto the mount bracket using remaining
screws in the fastener pack.
□
Install relays into the relay-sockets.
Verify the terminals in the relay-sockets did not get pushed
loose from the relay-sockets during relay installation.
□
Install the control box
wiring harness’ three rectangular
connectors into their respective mates on the control box.
□
Fasten the heat-shrunk diode with a nylon-tie to either the fuse
holder or the back side of the narrow column on the control
mount. The diode assembly can be identified by its short orange
and long red wires coming out of heat-shrunk tubing.
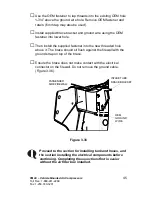
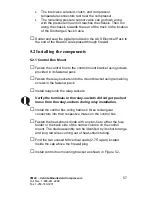
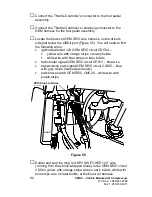
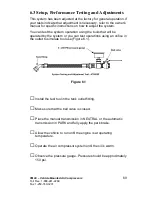
□
Find the two unused M8 vertical studs (
2.75” apart) located
inside the cab above the firewall plug.
□
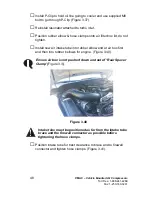
Install control box mounting bracket as shown in
Figure 5.2
.
Содержание VR70
Страница 1: ...YMAC VEHICLE MOUNTED AIR COMPRESSORS System V90G120 2016 2011 Ford F250 F550 6 7L Diesel www com...
Страница 2: ......
Страница 74: ...This page intentionally left blank...
Страница 75: ...This page intentionally left blank...
Страница 76: ...This page intentionally left blank...
Страница 77: ...This page intentionally left blank...
Страница 79: ......