VMAC
– Vehicle Mounted Air Compressors
VMAC Technical Support:
1-888-241-2289
VMAC Knowledge Base: www.kb.vmacair.com
52
Ensure the threaded nipple did not unscrew with the oil filter. If the nipple
came out with the oil filter, remove it from the filter carefully to avoid
damaging the threads.
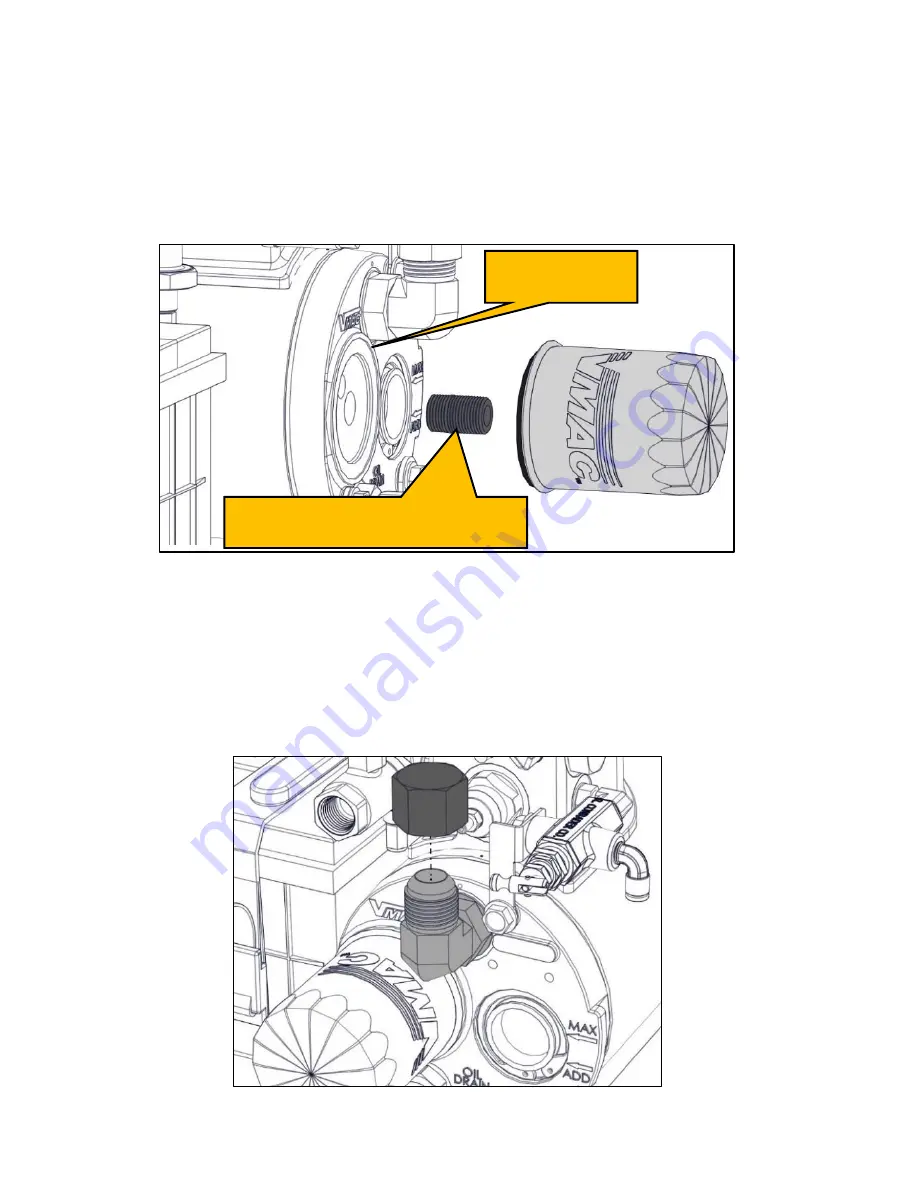
To reinstall the nipple, thoroughly clean the threads and apply
Loctite 242 (blue) to the end with the short threads and replace it in
the tank (Figure 39).
Clean the gasket sealing surface on the front of the tank and inspect it for
damage. The surface must be free of old gasket material and smooth to
ensure a good seal. (Figure 39).
Figure 39
– Compressor oil filter
Apply a thin coat of compressor oil to the rubber gasket on the oil filter.
Spin the filter onto the threaded nipple until the gasket contacts the
sealing surface on the tank, then tighten the filter an additional 3/4 to 1
turn to seat the gasket.
Remove the filler cap on the WHASP Tank. Fill the WHASP Tank with
VMAC compressor oil until is reaches the
“MAX” mark. The air
compressor system holds approximately 4 L (1 USG) of oil (Figure 40).
Figure 40
– Compressor oil fill
Inspect sealing
surface
Oil filter nipple (Insert shorter
threaded end into WHASP Tank)
Содержание G300003
Страница 1: ...Gas Engine Driven 30 CFM Air Compressor Installation Owner s and Service Manual G300003...
Страница 2: ......
Страница 97: ...This page intentionally left blank...
Страница 98: ...This page intentionally left blank...
Страница 99: ......
Страница 100: ......


