DLP Projector—User’s Manual
—
10
—
I
TEM
L
ABEL
D
ESCRIPTION
S
EE PAGE
32.
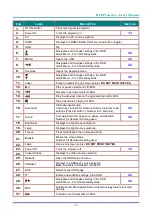
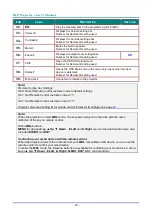
Play the following item on the programming list for MHL.
33.
Volume/1
Displays the Volume setting bar.
Number for Remote ID setting used.
34.
Contrast/2
Displays the Contrast settings bar.
Number for Remote ID setting used.
35.
Mute/3
Mutes the built-in speaker.
Number for Remote ID setting used.
36.
Zoom/4
Displays the digital zoom settings bar.
Number for Remote ID setting used.
37.
3D/5
Open the OSD 3D Setting menu.
Number for Remote ID setting used.
38.
Status/7
Opens the OSD Status menu (the menu only opens when an input
device is detected).
Number for Remote ID setting used.
39.
Wired Jack
Connect wire remote to the projector.
Note:
Remote Combo Key Settings:
ID+0: Reset Remote Control customer code to default settings.
ID+1: Set Remote Control customer code to "1".
~
ID+7: Set Remote Control customer code to "7".
Projector also need setting ID for unique control. Projector ID settings see page
Note:
When the projector is under MHL mode, The keypad on projector should be with the same
definition of the key on remote control.
When MHL function:
MENU for App settings,
▲ Up, ▼ Down, ◄ Left and ► Right are used as directional arrows, also
included ENTER and EXIT.
Controlling your smart device with the remote control:
When the projector projects the contents from your MHL compatible smart device, you can use the
remote control to control your smart device.
To enter the MHL mode, the following buttons are available for controlling your smart device, Arrow
keys (
▲ Up, ▼ Down, ◄ Left, ► Right), MENU, EXIT, MHL control buttons.

