background image

56 


Installing the Software 

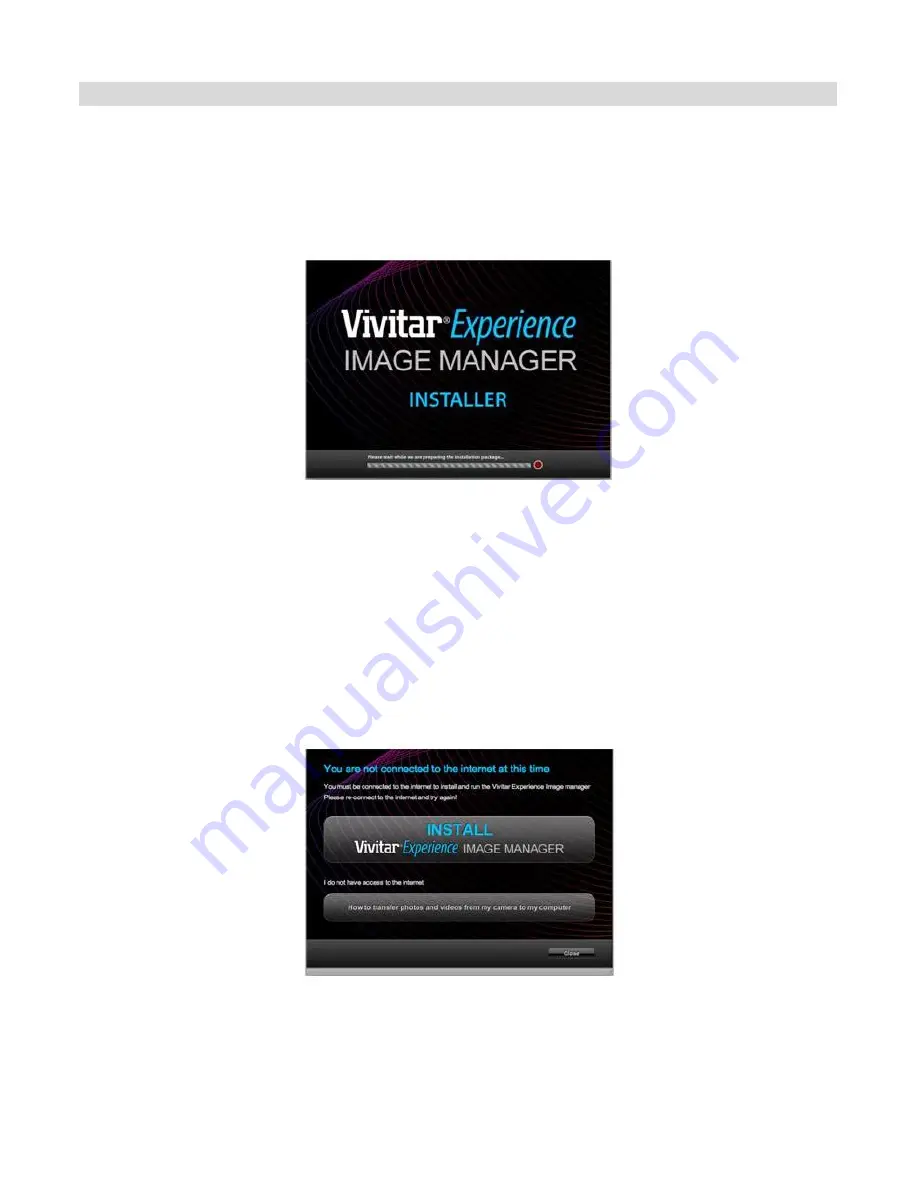
You must be connected to the internet to install and run the Vivitar Experience Image 

Manager software. 

1.  Insert the installation CD into your CD-ROM drive. The installation screen should automatically 

open.   


2.  On PC: The Vivitar Experience Image Manager Installer window appears. If the window does 

not appear, open the application’s CD/DVD drive and click on “Setup.exe” to launch the 

installer. 

3.  On Macintosh: Click the icon that appears on the desktop to install the Vivitar Experience Image 

Manager. 

4.  If you do not have internet access at the time of inserting the CD-ROM, connect to the internet 

and then click the “Install Vivitar Experience Image Manager” button to begin the installation. 


Содержание DVR 942HD-V1

Страница 1: ...amcorder User Manual 2009 2011 Sakar International Inc All rights reserved Windows and the Windows logo are registered trademarks of Microsoft Corporation All other trademarks are the property of thei...

Страница 2: ...11 Navigating the Menus 12 Video Capture Mode 13 Video Playback Mode 27 Photo Capture Mode 31 Photo Playback Mode 48 Connecting the Digital Camcorder to a TV or HDTV 54 Installing the Software 56 Con...

Страница 3: ...symbol with a C and a number within Make sure the number inside is a 4 or higher Your digital camcorder supports a Class 4 SD Memory Card up to 32GB In order to use your digital camcorder normally it...

Страница 4: ...6 MODE Button 20 HDMI Port 7 Up EV Button Slideshow 21 SD Memory Card Slot Inside the Battery Compartment 8 Video Shutter Button 22 Battery Compartment 9 Right Button Delete Button 23 Tripod Socket 1...

Страница 5: ...onnect the camcorder using the supplied USB cable to the computer s USB port or to the AC Charger which is then inserted into a standard wall socket 4 Allow the battery to charge for at least 3 hours...

Страница 6: ...red on an SD icon will appear on the LCD display If you do not see the SD icon on the display please check if the card was inserted properly Important You must use a Class 4 SD card or higher SD card...

Страница 7: ...the Language has been set you will be asked to Confirm ViviLink Photo and Video Social Network site to set the default ViviLink destination for photos and videos taken with your camcorder The ViviLink...

Страница 8: ...ENU button while in the Video Capture mode Photo Capture Mode Use this mode to capture pictures with your camcorder After turning on your camcorder press the MODE button once to open the Photo Capture...

Страница 9: ...5mm 66mm F 1 8 3 1 5 Zoom 12X Optical Zoom Exposure 3 0EV 3 0EV White Balance Auto Daylight Cloudy Fluorescent Incandescent Scene Auto Scenery Portrait Night Scenery Night Portrait High Sensitivity S...

Страница 10: ...250 MB available hard disk space 16 bit Color monitor 1024 X 768 recommended screen resolution CD ROM Drive QuickTime 6 or higher Microsoft Internet Explorer 7 or higher Windows Media Player 10 or hig...

Страница 11: ...Goodbye splash screen and then the camcorder will power off completely Note Your digital camcorder also has an Auto Power Off feature that will automatically turn off your camcorder after a specific...

Страница 12: ...ttings and options specific to that mode 1 Press the MENU button located on the LCD panel to open the menus for the current mode 2 Press the joystick button LEFT or RIGHT to scroll between the various...

Страница 13: ...on at the top of the LCD indicating that the record is in progress The elapsed video record time is shown as you record at the top right corner on the LCD screen 5 To STOP the video record press the V...

Страница 14: ...the current video you are capturing Remember The ViviLink feature is deactivated by default therefore select the ViviLink destination before capturing a video A ViviLink destination will only be assi...

Страница 15: ...15 Video Capture Mode Menus The following are the menus that appear in your digital video camcorder s Video Capture Mode...

Страница 16: ...or restore the camcorder s default factory settings Image Size Menu The Image Size menu allows you to choose the desired size of the images taken by your digital video camcorder Keep in mind that ima...

Страница 17: ...o camcorder until you manually change the setting or restore the camcorder s default factory settings Anti Shake Menu The Anti Shake feature reduces image corruption that can be caused by movement of...

Страница 18: ...enu and return to your previous mode 8 An icon reflecting your selection will display on the LCD screen 9 Remember that this setting will be saved by your digital video camcorder until you manually ch...

Страница 19: ...tings Light Exposure Menu The Light Exposure setting helps you control the amount of light that enters your camcorder s lens This setting should be adjusted when the environment is lighter or darker t...

Страница 20: ...IGHT to scroll and select the ISO menu 3 Press the joystick button UP or DOWN to highlight the desired menu option 4 Press the OK button on the joystick to select and confirm the highlighted menu opti...

Страница 21: ...o your previous mode 8 An icon reflecting your selection will display on the LCD screen 9 Remember that this setting will be saved by your digital video camcorder until you manually change the setting...

Страница 22: ...ion icon will appear on the selected item 6 Press the joystick button LEFT or RIGHT to select the next menu item 7 Press the MODE button to exit the menu and return to your previous mode 8 Remember th...

Страница 23: ...previous mode 8 Remember that this setting will be saved by your digital video camcorder until you manually change the setting or restore the camcorder s default factory settings Frequency Menu The op...

Страница 24: ...ess the OK button on the joystick to select and confirm the highlighted menu option 5 A selected option icon will appear on the selected item 6 Press the joystick button LEFT or RIGHT to select the ne...

Страница 25: ...exit the menu and return to your previous mode Firmware Settings Restore Factory Settings Menu Use this menu to view the Firmware version on your digital video camcorder or to reset your camcorder set...

Страница 26: ...order the language will be set to the default English To change the system Language Press the MENU button to open the menus Press the joystick button LEFT or RIGHT to scroll and select the Language Me...

Страница 27: ...e top left of the LCD screen 2 Play your selected video Press the Video Shutter button to start playing the video Press the Video Shutter button again to pause the video and to continue playing and pa...

Страница 28: ...PREVIOUS image Navigates in Thumbnail View Up Navigates in Thumbnail View Down Navigates in Thumbnail View OK STOPS Video Playback Enlarges selected photo from Thumbnail size to regular size Other Vid...

Страница 29: ...on site 9 Remember that the ViviLink feature is deactivated by default A ViviLink destination will only be assigned to a photo or video if you manually set it from this menu Changing the ViviLink dest...

Страница 30: ...button on the joystick to confirm The video will be deleted and you will exit the menu and return to the Playback mode If you do not want to delete the current image select No and press the OK button...

Страница 31: ...buttons may vary per camcorder model 3 Press the Photo Shutter button to take the picture 4 The picture will automatically be saved to the SD Memory card Photo Capture Mode Quick Function Buttons You...

Страница 32: ...the current picture you are capturing Remember The ViviLink feature is deactivated by default therefore select the ViviLink destination before capturing a photo A ViviLink destination will only be ass...

Страница 33: ...33 Photo Capture Mode Menus The following are the menus that appear in your digital video camcorder s Photo Capture Mode...

Страница 34: ...re the camcorder s default factory settings Image Resolution Menu The Image Resolution menu allows you to choose the desired size of the images taken by your digital video camcorder Keep in mind that...

Страница 35: ...ing will be saved by your digital video camcorder until you manually change the setting or restore the camcorder s default factory settings Self Timer Menu The Self Timer menu allows you to set a dela...

Страница 36: ...GHT to scroll and select the Anti Shake menu 3 Press the joystick button UP or DOWN to highlight the desired menu option 4 Press the OK button on the joystick to select and confirm the highlighted men...

Страница 37: ...the Face Detect menu 3 Press the joystick button UP or DOWN to highlight the desired menu option 4 Press the OK button on the joystick to select and confirm the highlighted menu option 5 A selected op...

Страница 38: ...to open the menus for the current mode 2 Press the joystick button LEFT or RIGHT to scroll and select the Color Effect menu 3 Press the joystick button UP or DOWN to highlight the desired menu option...

Страница 39: ...U button to open the menus for the current mode 2 Press the joystick button LEFT or RIGHT to scroll and select the Image Sharpness menu 3 Press the joystick button UP or DOWN to highlight the desired...

Страница 40: ...ry settings ISO Menu The ISO menu allows you to set the level of sensitivity that your camcorder has to light in the surrounding environment When the ISO level is increased the image sensor in your ca...

Страница 41: ...brightness background direct light and scenes Spot Meters the area within the spot point frame at the center of the LCD to set the exposure on the subject in the center of the monitor 1 Press the MENU...

Страница 42: ...r s default factory settings Date Time Menu When you capture an image with your camcorder the image will include a time stamp with the date and time that the image was taken The Date Time menu allows...

Страница 43: ...ivating the digital video camcorder s Silent mode to disable all of the sound effects that the digital video camcorder emits when performing functions NOTE The Silent Mode is not active when using the...

Страница 44: ...previous mode 8 Remember that this setting will be saved by your digital video camcorder until you manually change the setting or restore the camcorder s default factory settings Frequency Menu The op...

Страница 45: ...option 4 Press the OK button on the joystick to select and confirm the highlighted menu option 5 A selected option icon will appear on the selected item 6 Press the joystick button LEFT or RIGHT to s...

Страница 46: ...this menu to view the Firmware version on your digital video camcorder or to reset your camcorder settings to the Factory Default Settings 1 Press the MENU button to open the menus for the current mod...

Страница 47: ...ss the MENU button to open the menus Press the joystick button LEFT or RIGHT to scroll and select the Language Menu Press the joystick button UP or DOWN to select the language you would like Press the...

Страница 48: ...s memory card Photos appear with a JPG icon on the top left of the LCD screen Thumbnail View Use the W Zoom Out button to display your captured images in Thumbnail View The images videos and photos o...

Страница 49: ...l View Left Displays the PREVIOUS image Navigates in Thumbnail View Up Begins Slide Show Navigates in Thumbnail View Down Navigates in Thumbnail View OK Enlarges selected photo from Thumbnail size to...

Страница 50: ...Remember that the ViviLink feature is deactivated by default A ViviLink destination will only be assigned to a photo or video if you manually set it from this menu or by pressing the ViviLink button b...

Страница 51: ...e saved as a new picture to your memory card Protect Lock Menu Pictures and Videos taken with your camcorder can be protected or locked to prevent any deletion or alteration being made to the files 1...

Страница 52: ...will not be deleted and you will exit the menu and return to the Playback mode 5 To delete all the videos and photos you have saved on your SD Memory card select Delete All Images and press the OK bu...

Страница 53: ...you to set the interval length of time that each picture will display during the slide show Note While in Playback mode press the UP Quick Function button to initiate the slide show Press any button...

Страница 54: ...to the TV Audio port 2 Turn On the TV and the digital video camcorder and then set the TV to AV mode 3 Set the TV format on the digital video camcorder to suit the TV format of your TV set NTSC or PAL...

Страница 55: ...use the TV Mode Menu to select the TV format 4 When the digital video camcorder is set to Video or Photo Capture mode you can preview what you would like to record on the HDTV screen and view the rec...

Страница 56: ...erience Image Manager Installer window appears If the window does not appear open the application s CD DVD drive and click on Setup exe to launch the installer 3 On Macintosh Click the icon that appea...

Страница 57: ...te the folder to where the program will be installed and then click Install 11 Please wait while the application continues the installation process on your computer On Macintosh If needed please follo...

Страница 58: ...ice connected then it will be selected automatically 5 Select a location on the computer where to place the new photo and video files 6 Add the new photo and video files to albums if desired 7 Select...

Страница 59: ...een Transferring Images Manually Transferring Images from my Camcorder to my Computer Manually WINDOWS 1 Use the USB cable that came with your camcorder to connect your camcorder to your computer 2 MS...

Страница 60: ...Please check your device packaging for compatibility with the iPad Apple iPad Camcorder Connection For models that are compatible with the iPad photos and videos can be imported from your digital camc...

Страница 61: ...ns not resulting from defects in material or workmanship and damages or malfunctions from other than normal use including but limited to repair by unauthorized parties tampering modification or accide...

Страница 62: ...ple photos and then try downloading them again With test photos if the camcorder powers off before you upload them to the computer the photos are not stored in the camcorder s memory These photos shou...

Отзывы: